

Keyword List Manager Guide
The Keyword List Manager is the SEO Tester Online tool that allows you to collect, manage and share keywords quickly and easily.
To enter our keyword list management tool you can click here or click the respective tool icon in the left side menu.
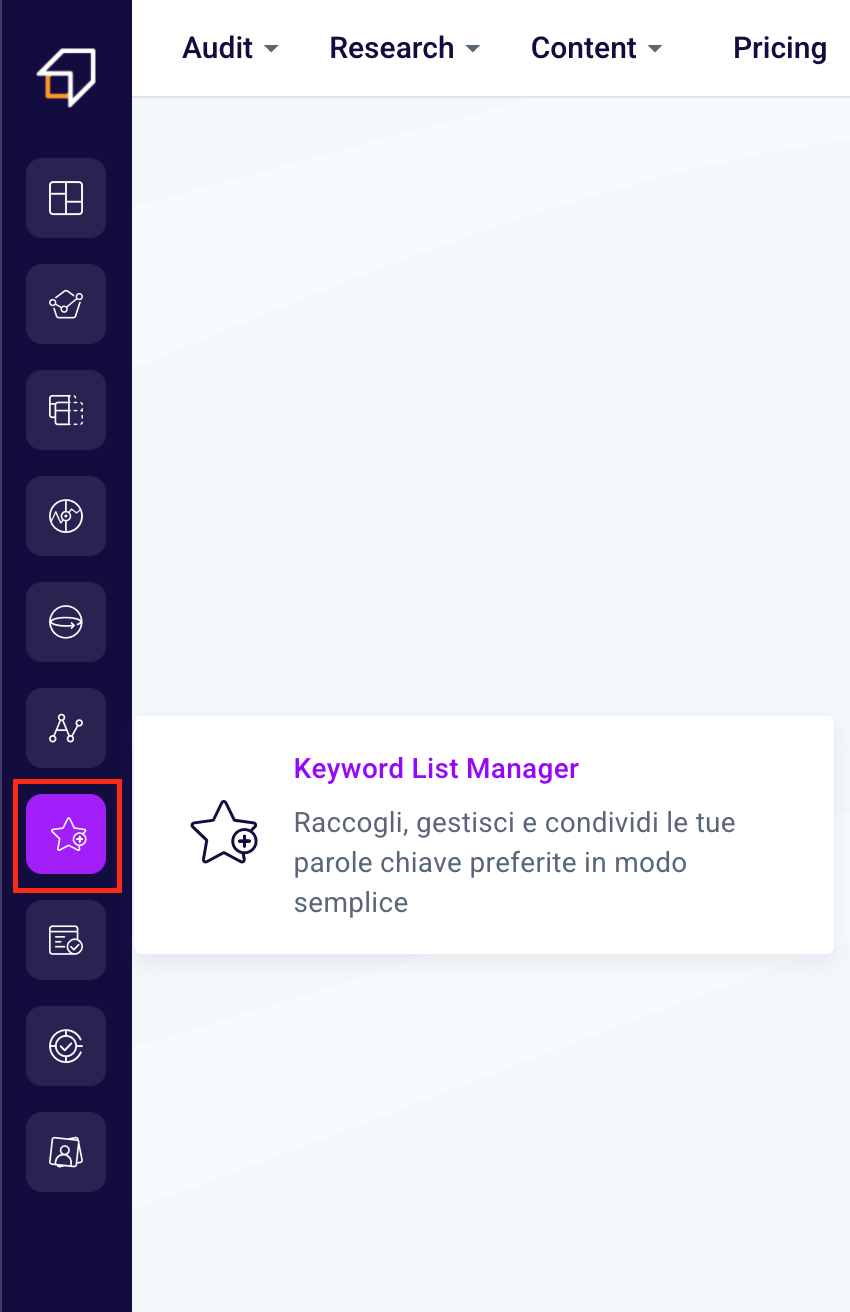
You will land on this page.
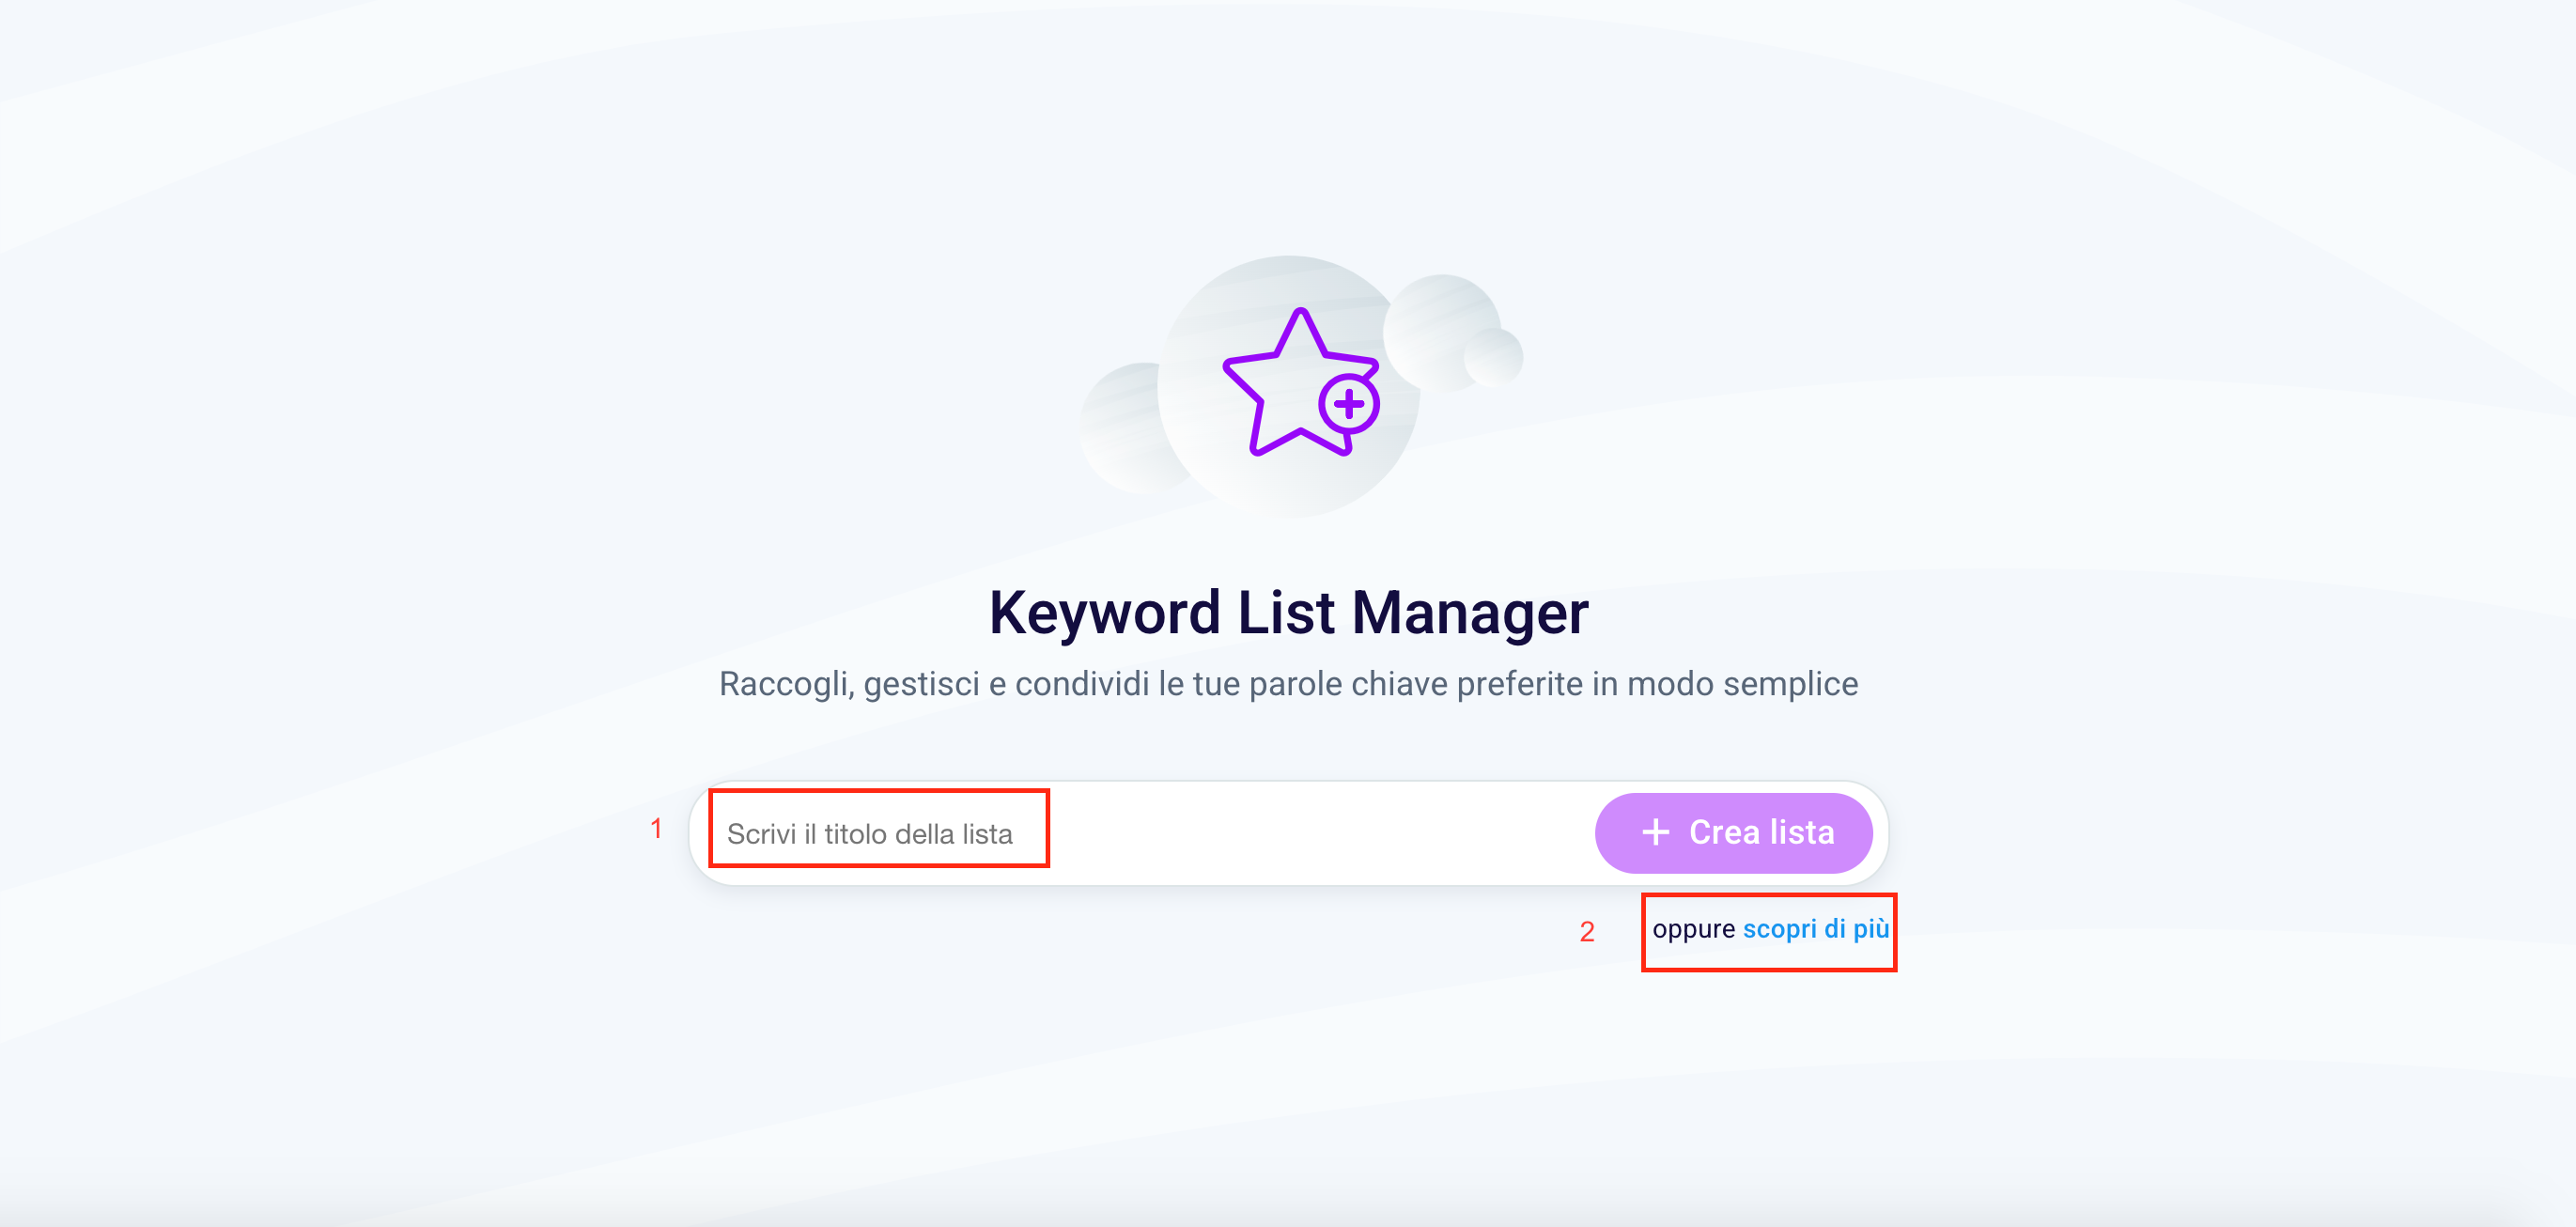
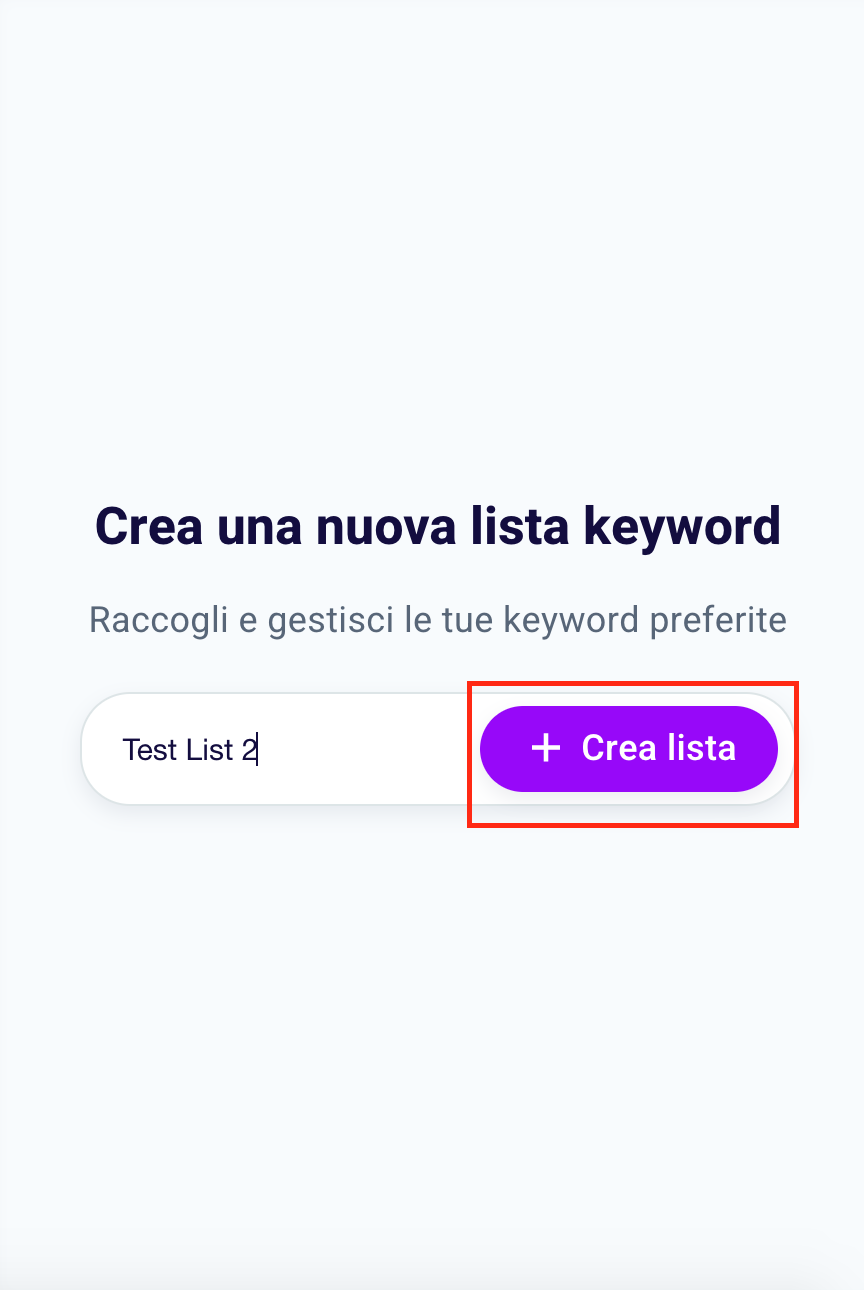
Here you can create a new list. Start by writing the name you want to give your list of keywords by clicking in conjunction with the words “Write the title of the list” (1) or click “find out more” (2) to view a short slideshow explaining how to use the instrument.
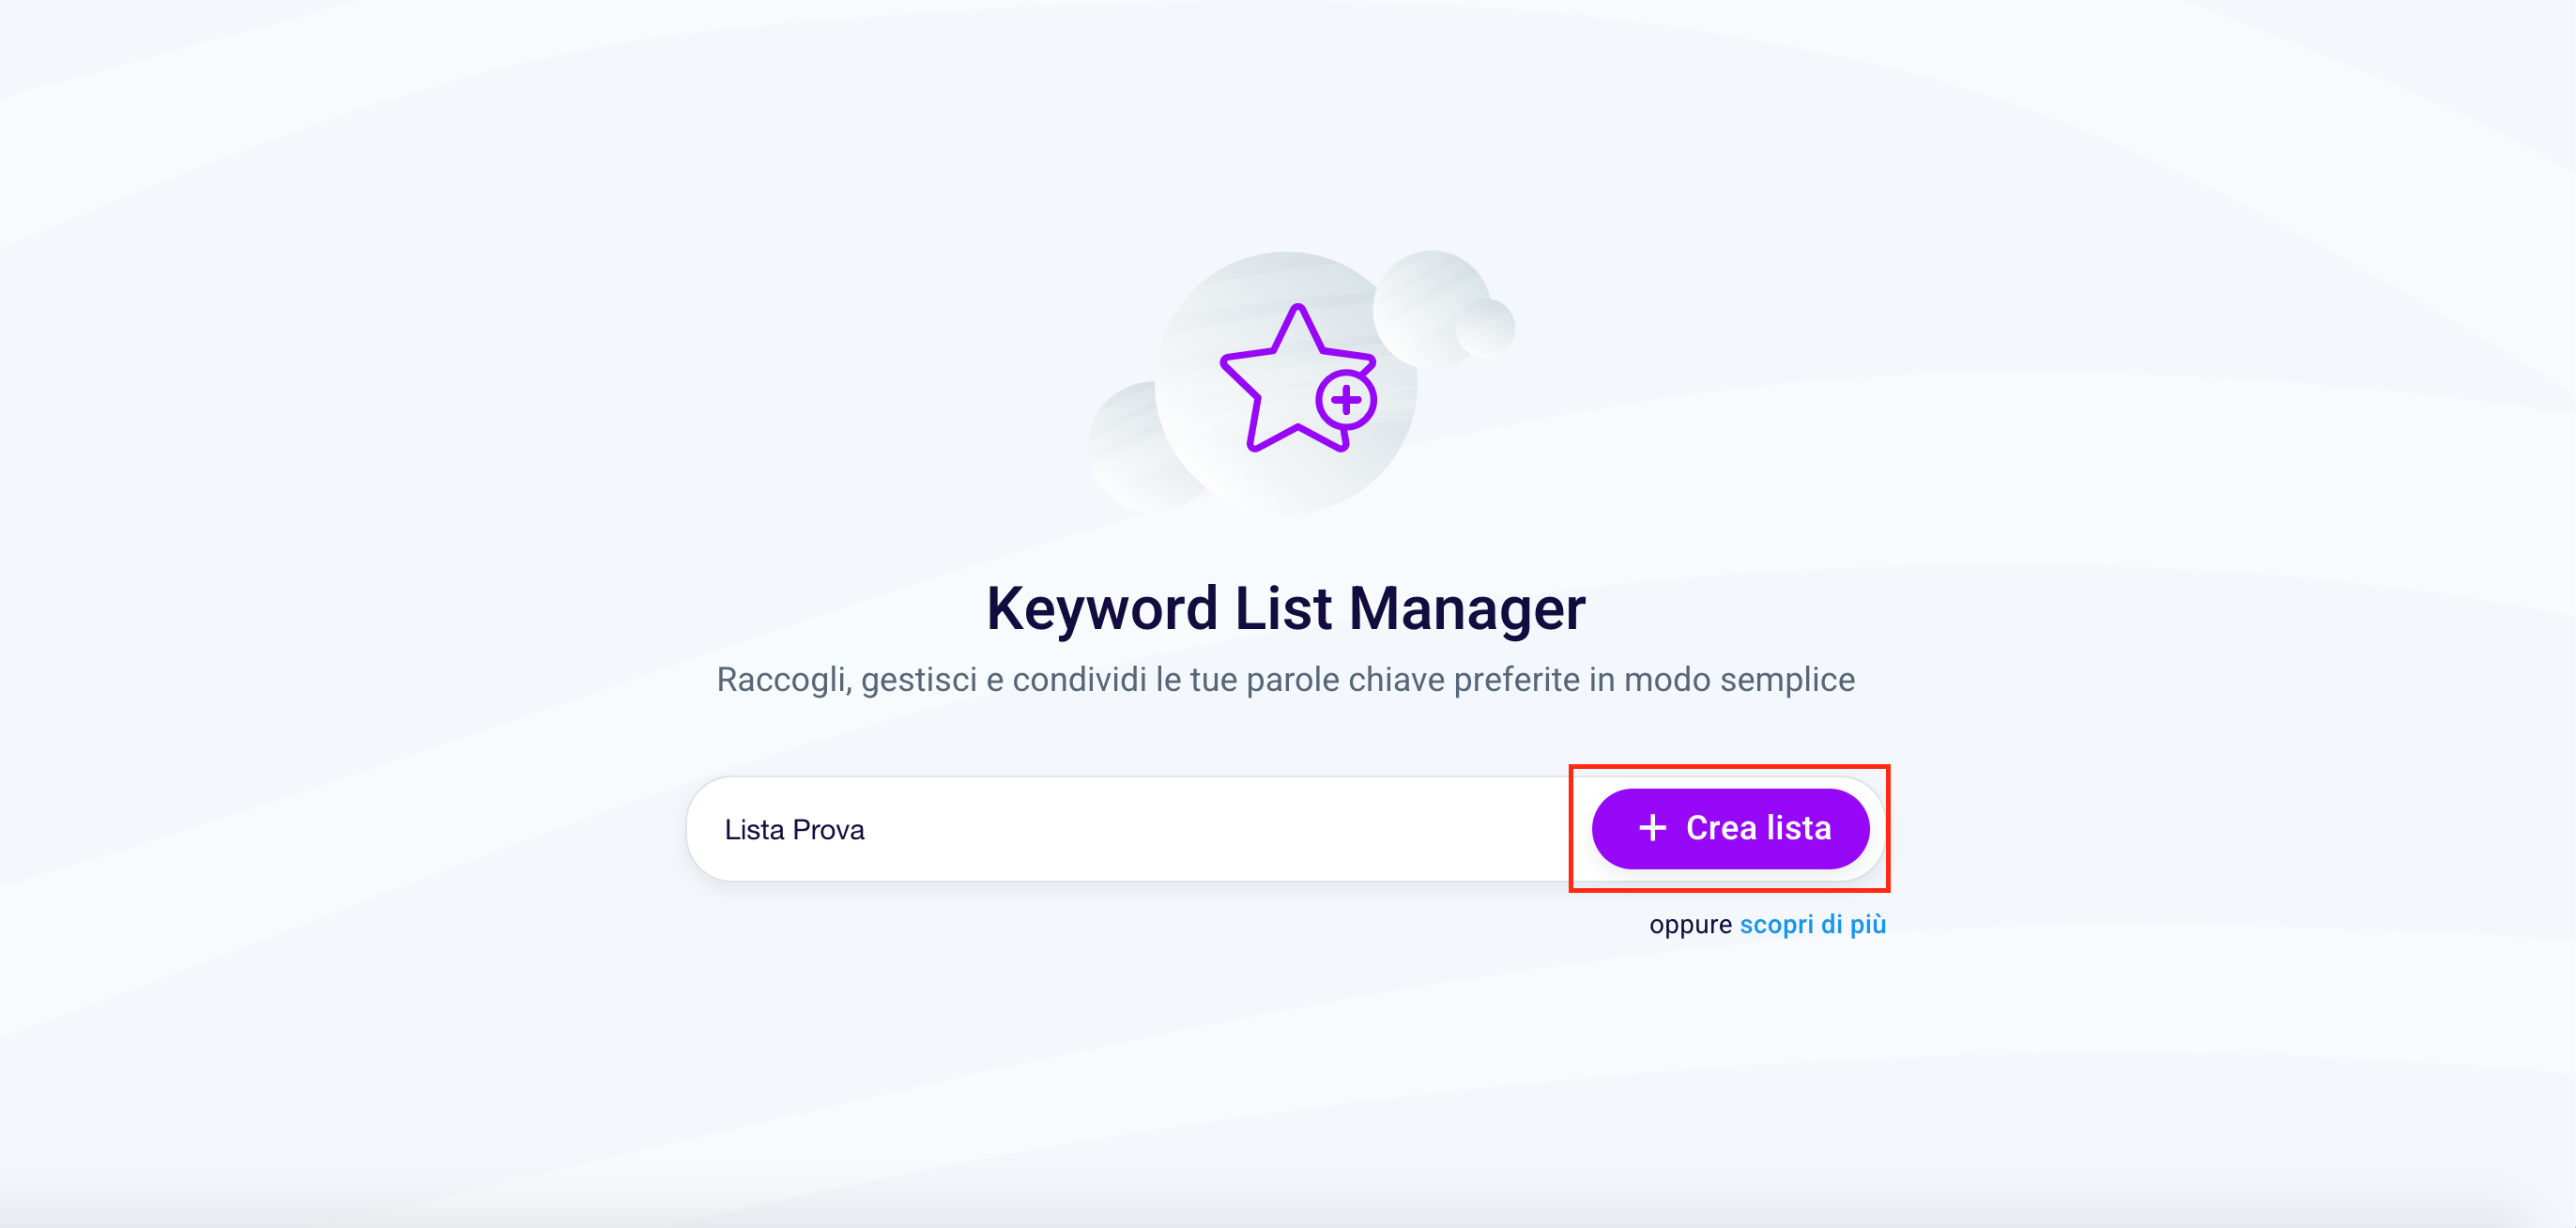
To complete the creation of the list, click “+ Create list”.
Our software will guide you step by step in creating the best keyword list for your needs.
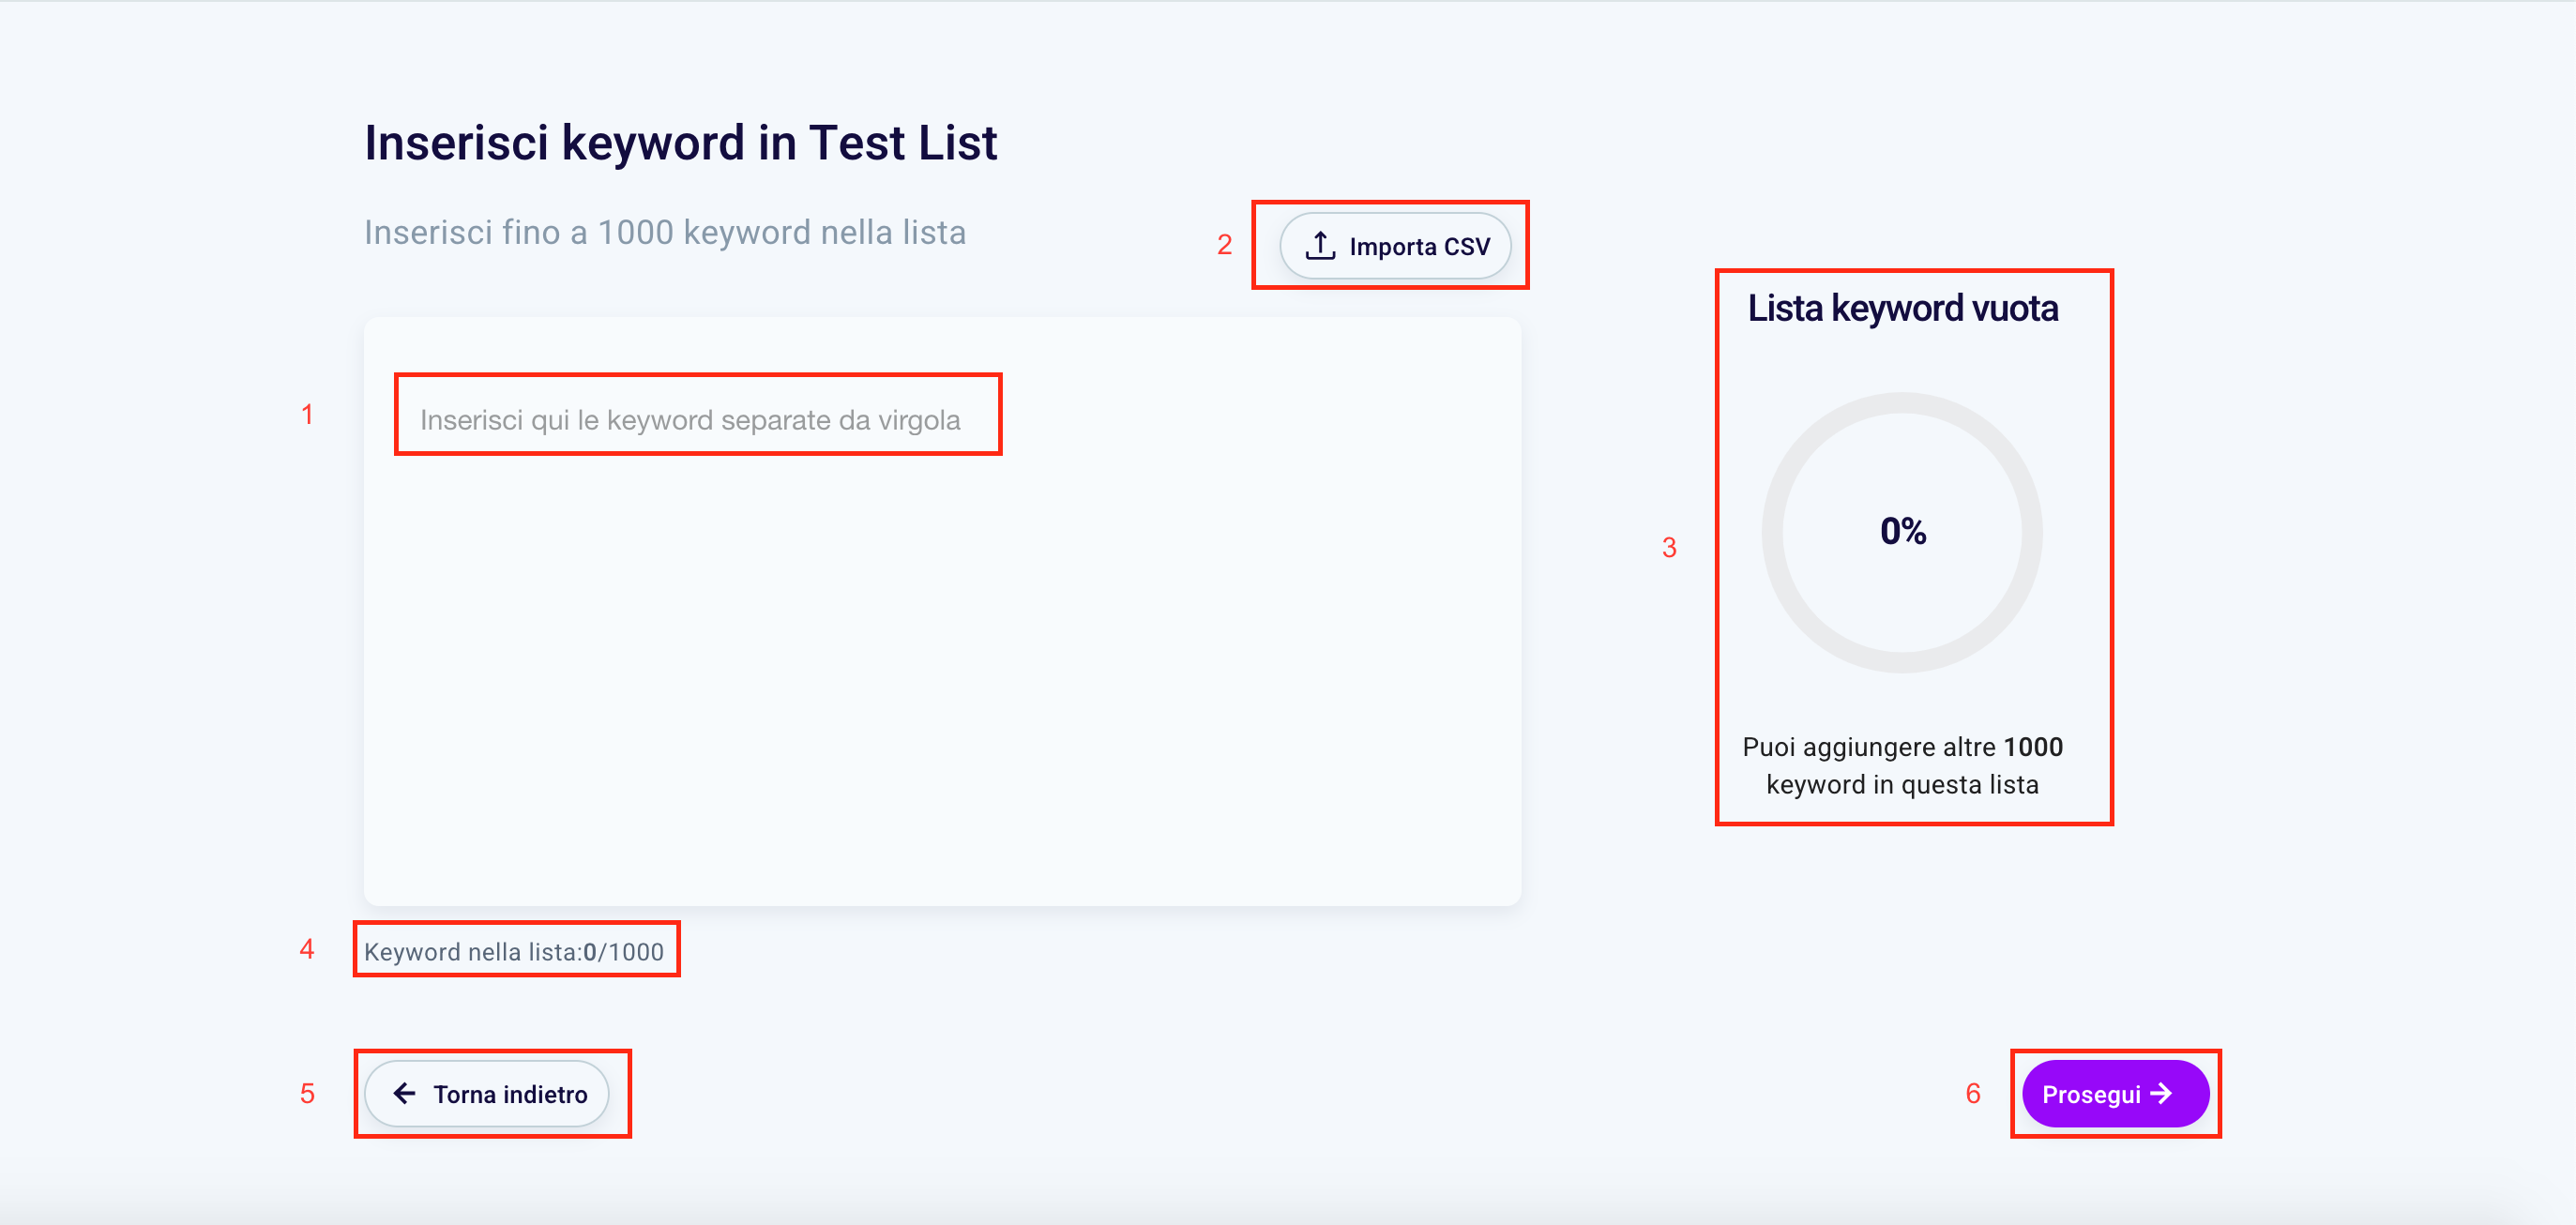
Click on the words “Enter the keywords separated by commas here” (1) and type the words you want to include in your list, and click enter or use the comma to confirm the action. Click “X” to delete a certain previously written keyword.
If you want to insert words in a .csv file, just click the white button “Import CSV” (2) and upload a file to your PC.
On the right you can see the percentage of completion of the list (3). You can add up to a maximum of 1000 keywords (this number includes the words of all the lists you have created or will create within the platform).
As you add keywords, the percentage will increase, the number of words that can be entered will decrease and the circle will turn green, just like in this case illustrated.

Let’s go back to the previous screen.

In any case, you can go back to the main screen or to the previous step by clicking “Go back” (5) or you can confirm the actions taken by clicking “Continue” (6).
After clicking “Continue” we will redirect you to this screen where you will have the possibility to choose one or more countries, in order to analyze and monitor each keyword for different locations.
Write the initial of the country for which you want to observe the keyword metrics. As you can see from the image, a select will pop up with the locations (1), among the 36 included, with that letter.
Use the comma or click the enter key to confirm the operation.
At the bottom right it displays the number of “Selected countries” (2). In this case “1” stands for the number of selected countries instead “36” stands for the places you can still choose.
The more you enter countries, the more the completion rate of the keyword list will increase. Consider that if you have selected 10 keywords and 4 countries, the software will calculate 40 keywords (10 for each of the 4 countries).
Click “Continue” to continue.
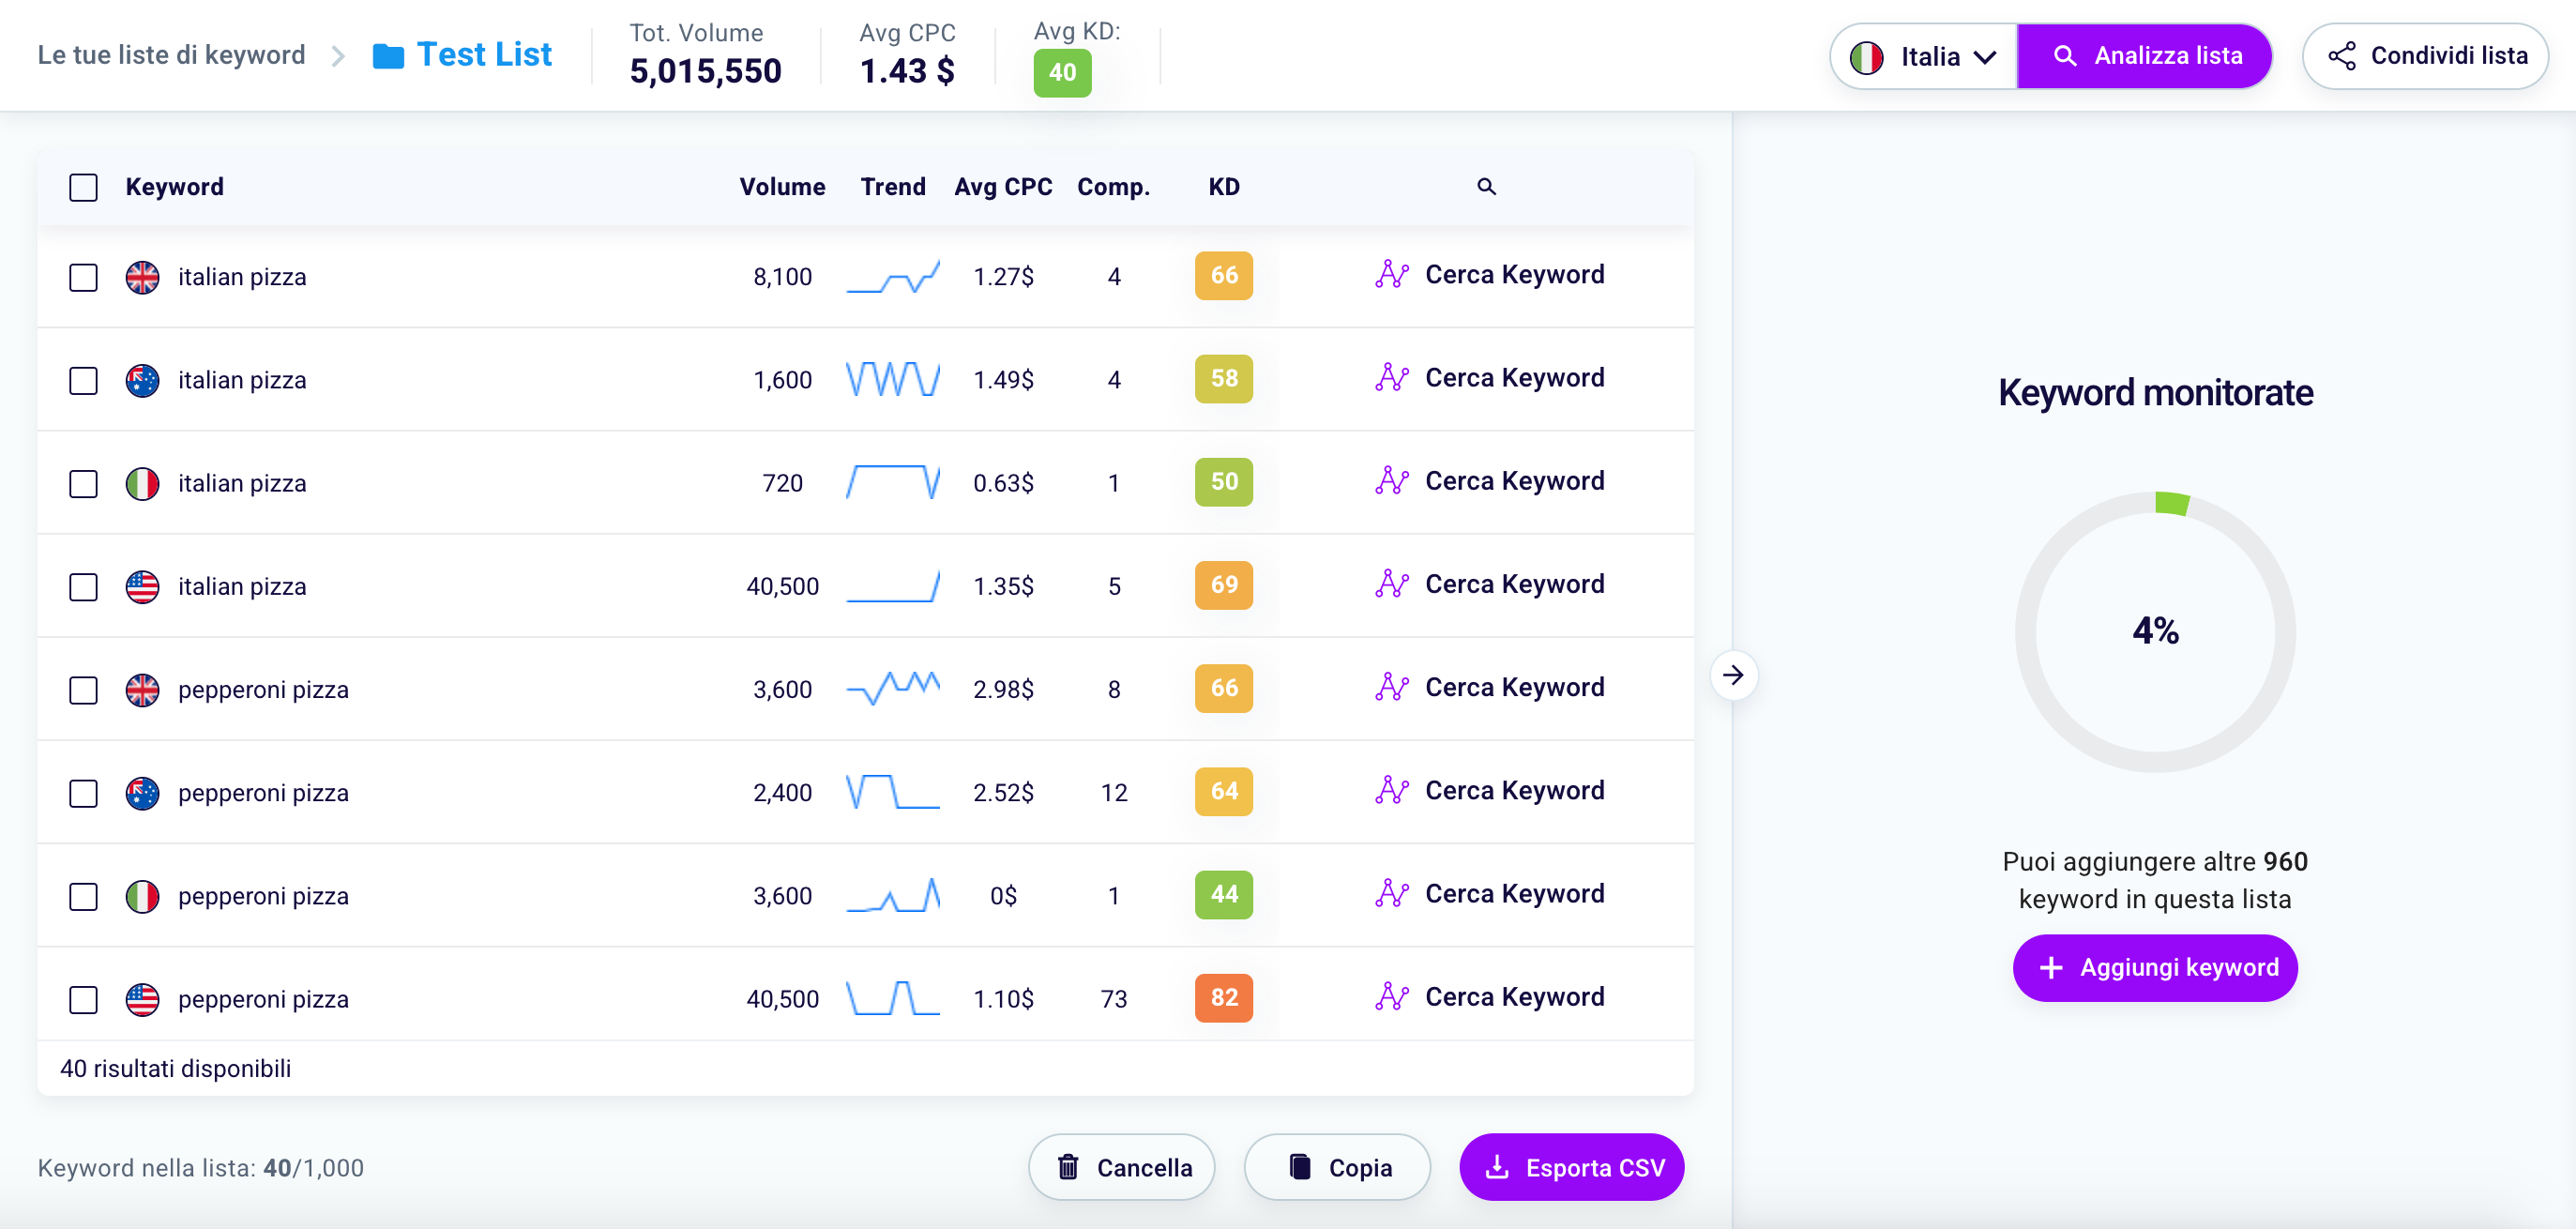
This page contains all the information relating to your favorite keywords. Let’s analyze this screen in detail!
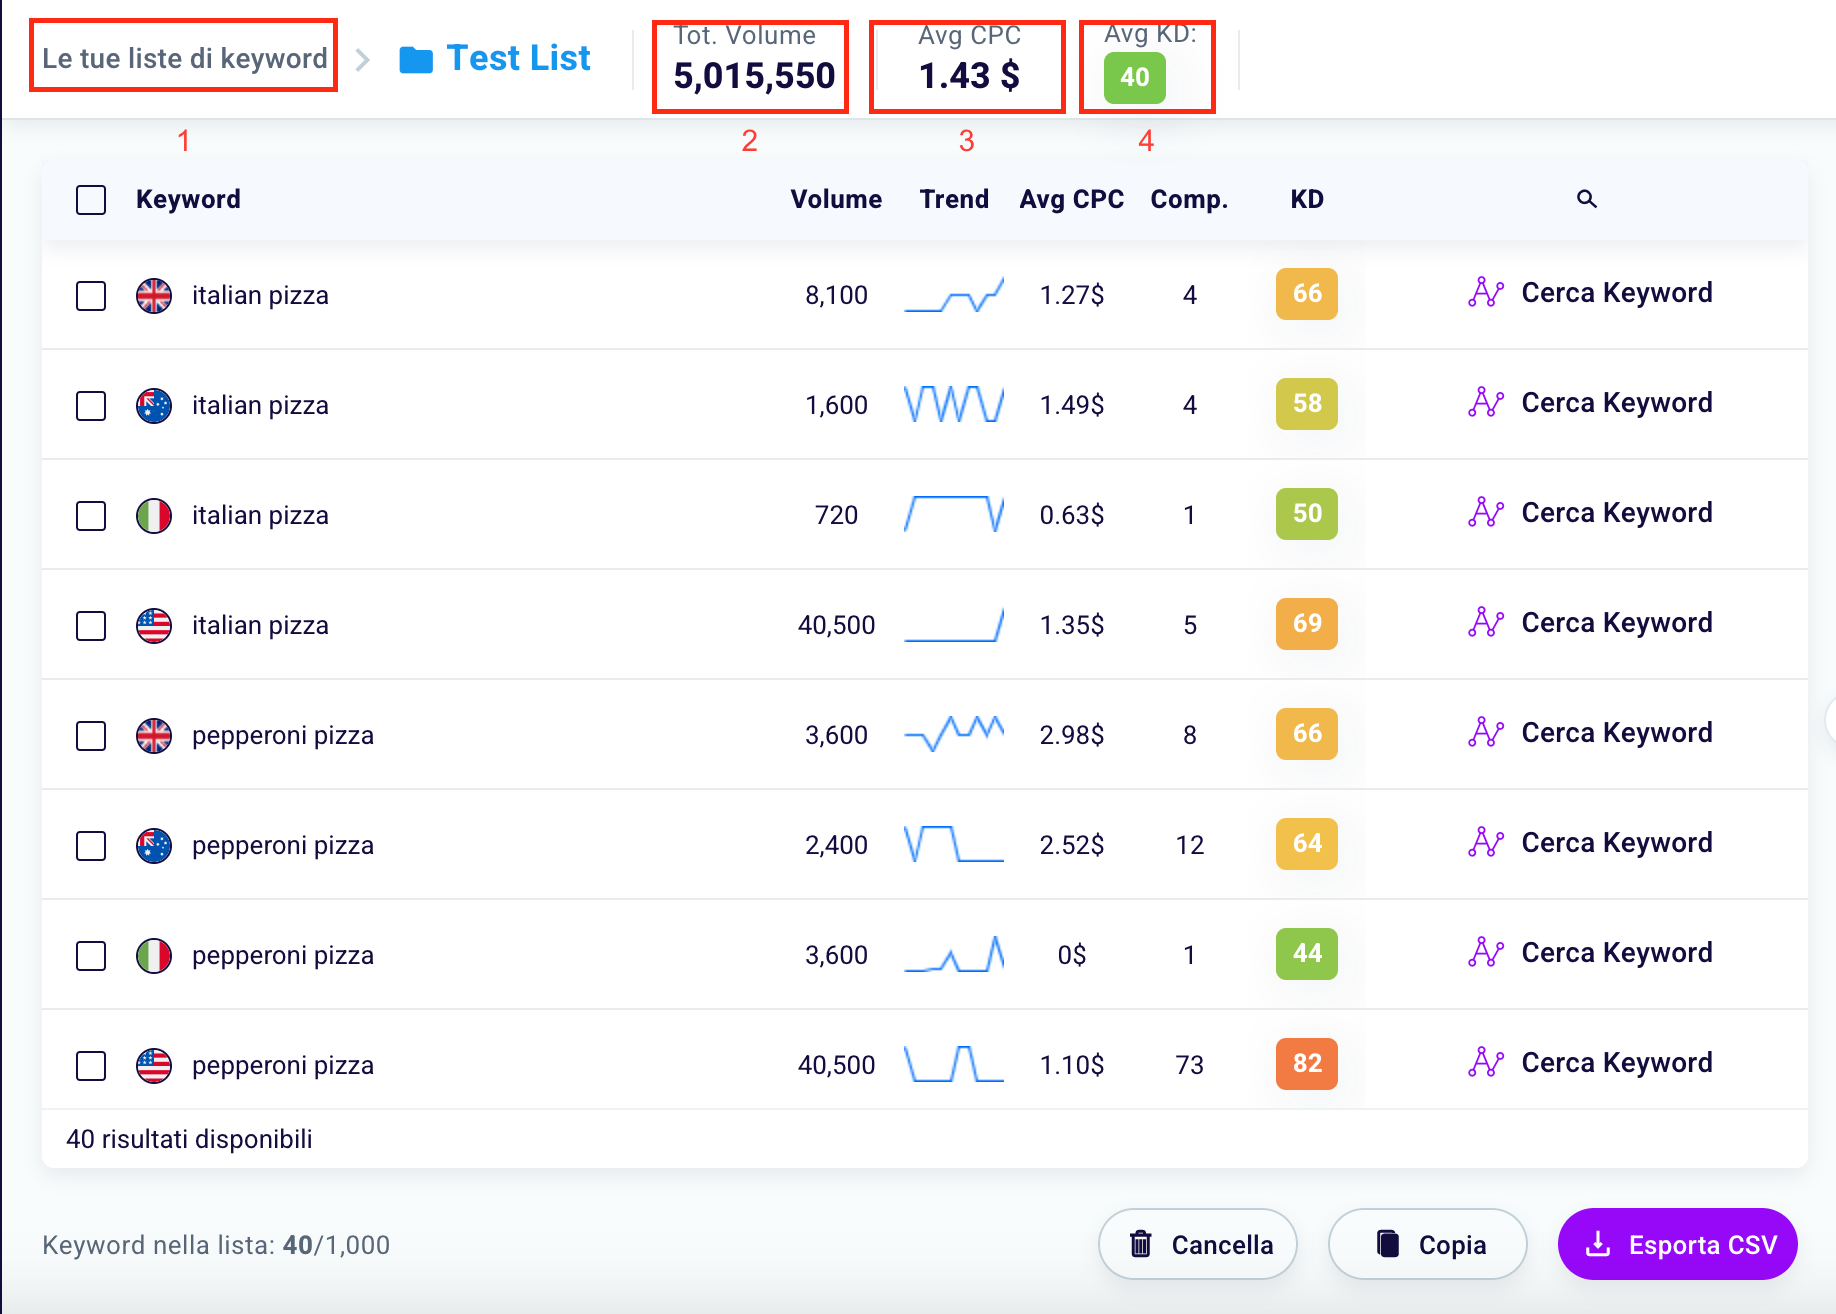
At the top left you can see, next to the wording “Your keyword lists” (1), the name previously given to your word list.
To the right of the list name you will find 3 fundamental data to analyze the value of your list in an overall way.
With Tot. Volume (2) we mean the overall search volumes of all the keywords in the list. In this case, the words in the list have search volumes of “5,015,550”.
Please note that this number includes the results of all words for all locations selected during setup.
How to create an effective keyword list? Read our guide to find out.
With AVG CPC (3) we mean “Average Cost per Click”, that is the average cost of a user click on the ads containing the words in the list. The AVG CPC is calculated in $ (US Dollar).
With AVG KD (4) we mean “Average Keyword Difficulty” or the average difficulty of the keywords in the list. The AVG KD ranges from 0 (minimum difficulty) to 100 (maximum difficulty).
Also on the left is a table in which the metrics related to each keyword are shown in more detail.
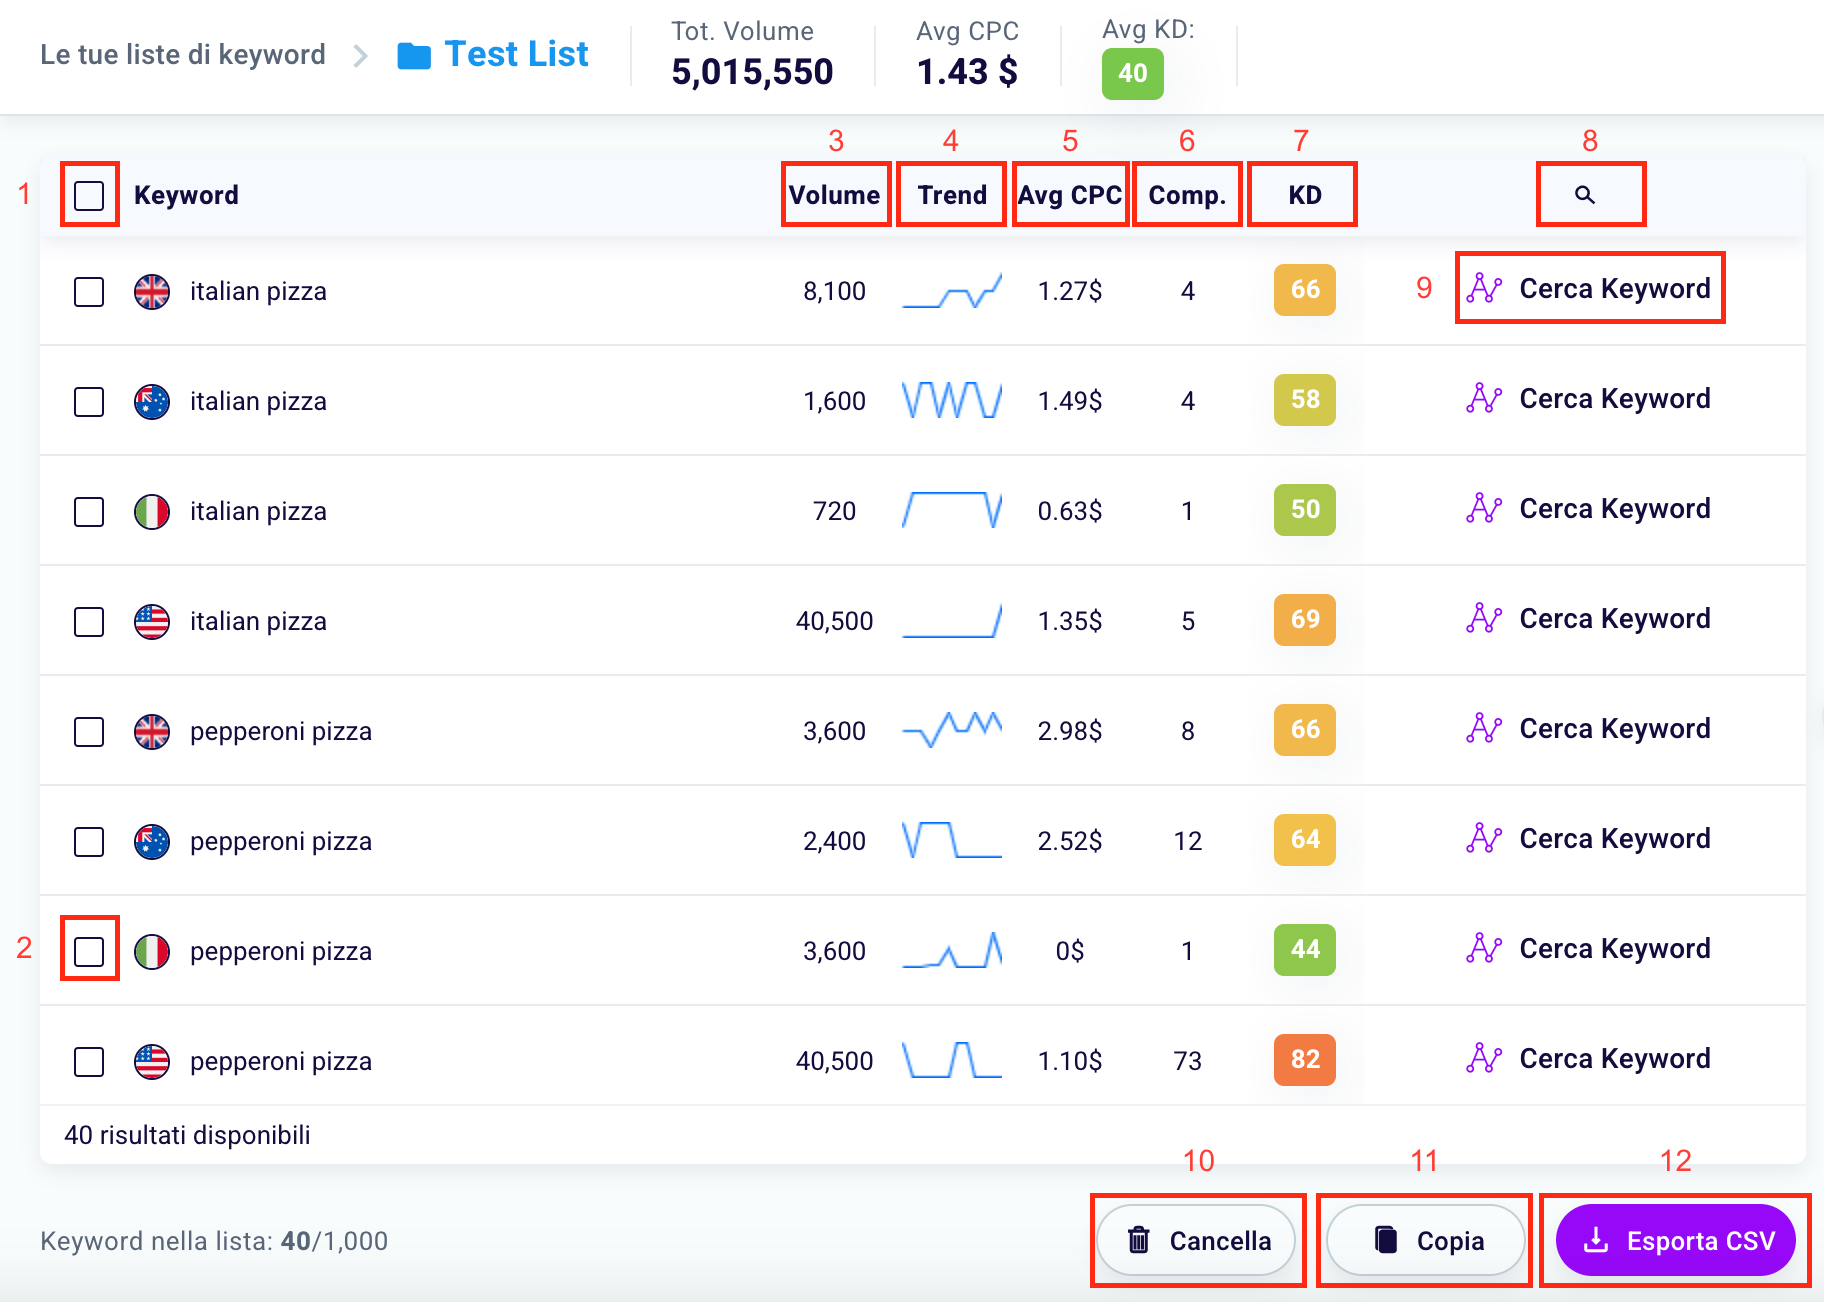
By clicking the empty square to the left of “Keyword” (1) you will select all the keywords available within the list. To choose a specific one, simply click on the empty square to the left of the word (2). To deselect, simply click the checked square again.
Volume (3) means “Search volume” or the average number of monthly searches over 12 months in a given country; a useful metric to estimate the potential traffic for a certain keyword.
With Trend (4) we mean the search performance of a given query over a more or less wide time horizon. It can be increasing, decreasing or stable.
With AVG CPC (5) we mean “Average Cost per Click”, that is the average cost of a user click on the ads containing the analyzed keyword. The AVG CPC is calculated in $ (US Dollar).
Comp (6) means “Competition”, which is the level of competition for a given keyword in Pay-Per-Click (PPC) campaigns.
A higher level of competition results in a higher CPC for that particular keyword.
With KD (7) we mean “Keyword Difficulty”, that is the difficulty of ranking among the top 10 results for a specific keyword.
The KD takes into account various factors such as the authority of the websites positioned and their backlink profile, and it is a fundamental element to be taken into account in the keyword research phase.
If you have created a list with many keywords you can search for a specific word with the respective function (8).
Want to know more about a particular keyword? Click “Search Keyword”; we will redirect you to our Keyword Explorer Tool.
Click “Delete” (10) to remove one or more keywords from your list. Click “Copy” (11) to paste your favorite keywords elsewhere and click “Export CSV” (12) to download your keywords in a .csv file.
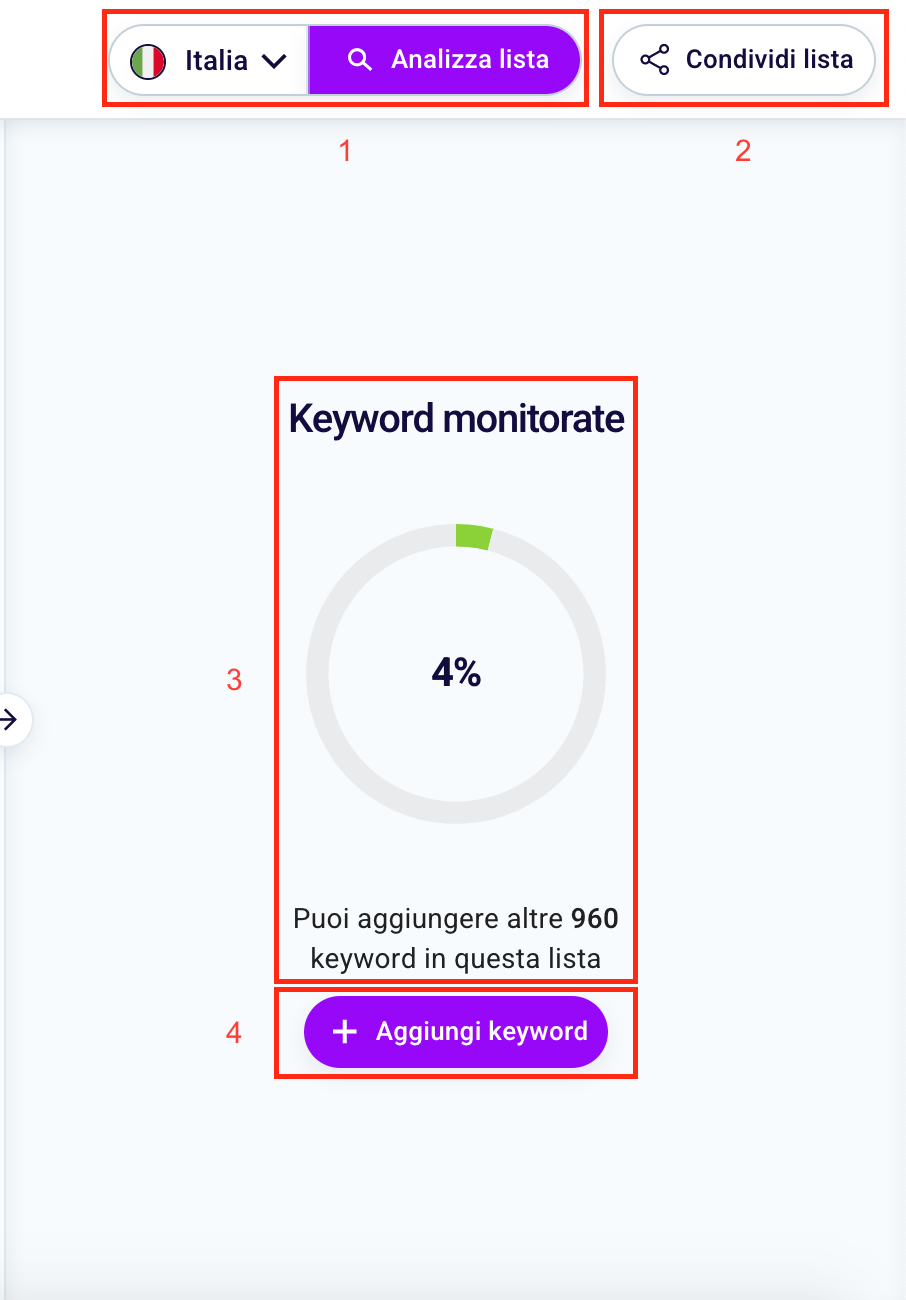
On the right side of the screen you can see four elements. Proceeding in order:
A select in which you can select a country among those set in the previous steps. By clicking “Analyze list” (1) you will be able to see in detail the metrics for all the keywords in a specific location.
You can click “Share list” (2) to send the created list and related metrics to one of your collaborators or clients. Once clicked, this dialog will appear.
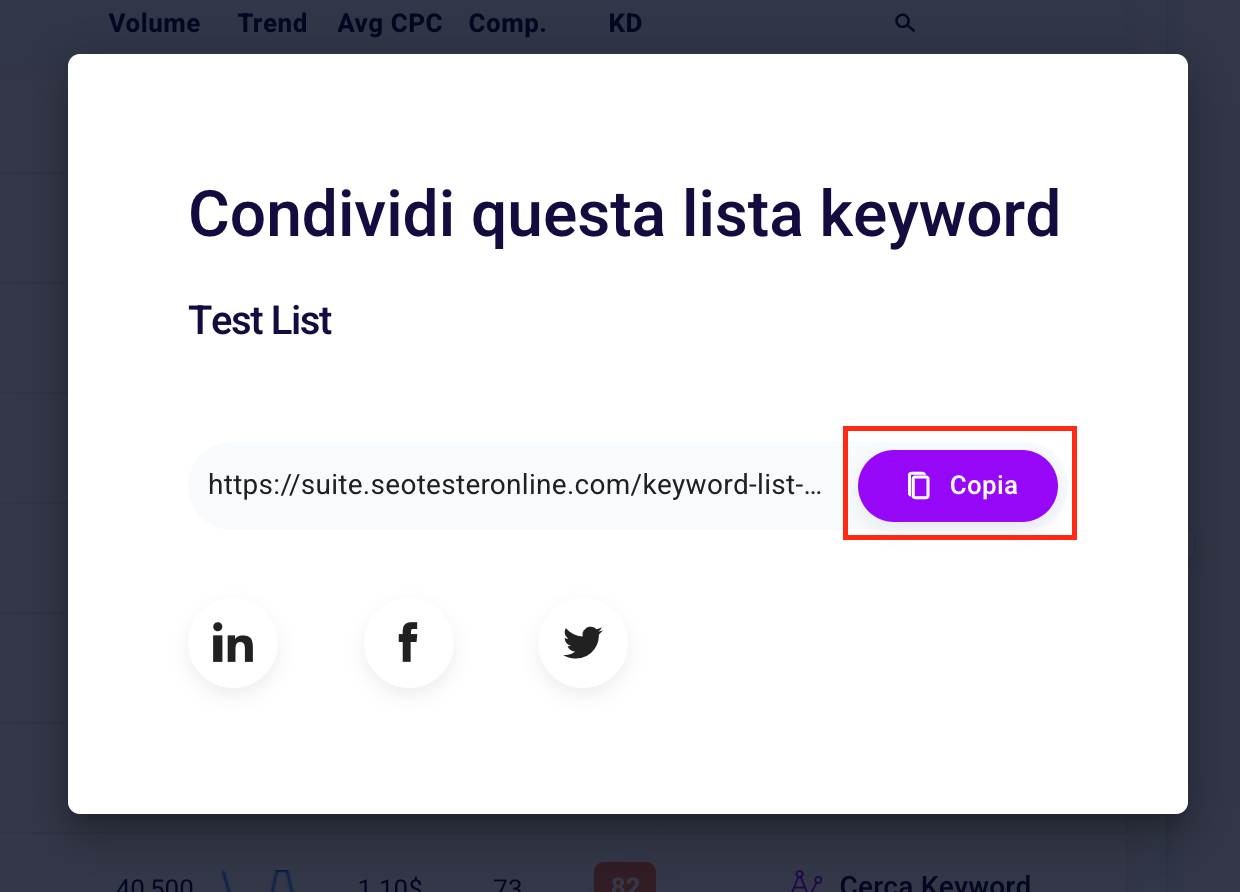
Click “Copy” to copy the link or click one of the icons below to share your keyword list on social networks (Linkedin, Facebook or Twitter).
Returning to the previous screen.
By going down you can monitor the “completion percentage” (3) of your list in the chart and the number of keywords you can still enter (in this case “960”).
You can insert new words whenever you want by clicking the purple button “+ Add keyword” (4).
Return to the Keyword List Manager dashboard whenever you want by clicking the icon on the side menu. You will land on a page similar to this one.
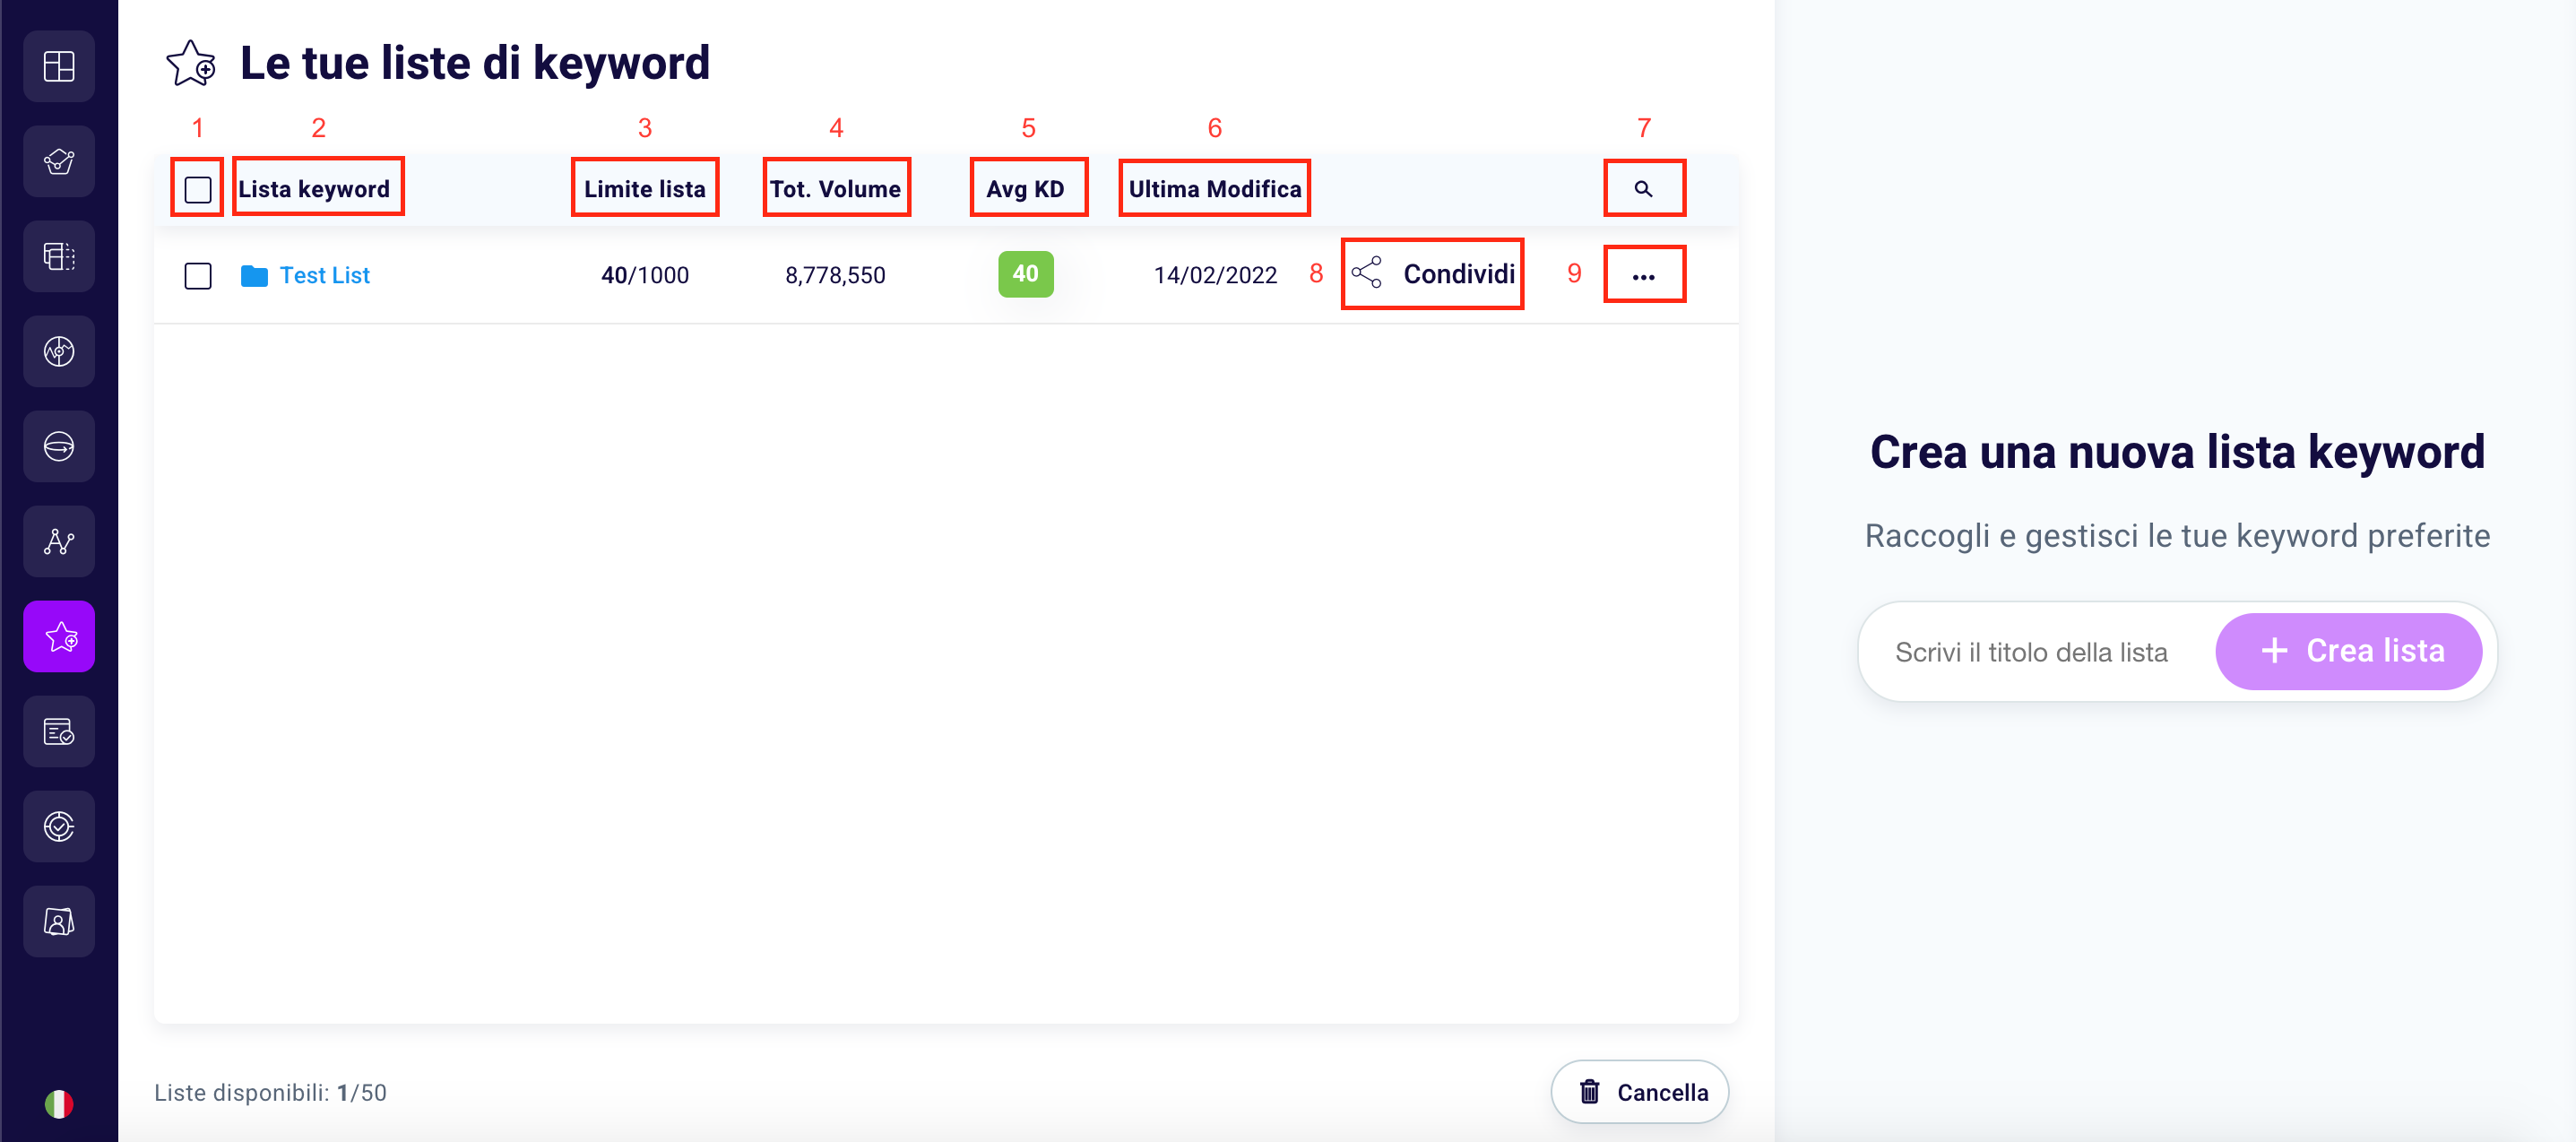
On the left side you will be shown the lists of keywords created within a table.
Click the square to the left of the word “Keyword List” (1) to select all your lists. Under the wording “Keyword List” (2) you can see the name of your lists. Below “List limit” (3) observe the maximum number of words that can be entered (in this case “1000”) compared to the number of words entered (in this case “40”). For each list you can also see the AVG KD (5), or the Average Keyword Difficulty, explained above, and the date of the last modification made (6).
If you have created more keyword lists you can search for a specific one with the respective function (7).
Click “Share list” (8) to send the created list and related metrics to your collaborator or customer.
In case you decide to click “…” (9) you will get this dialog with 4 options.
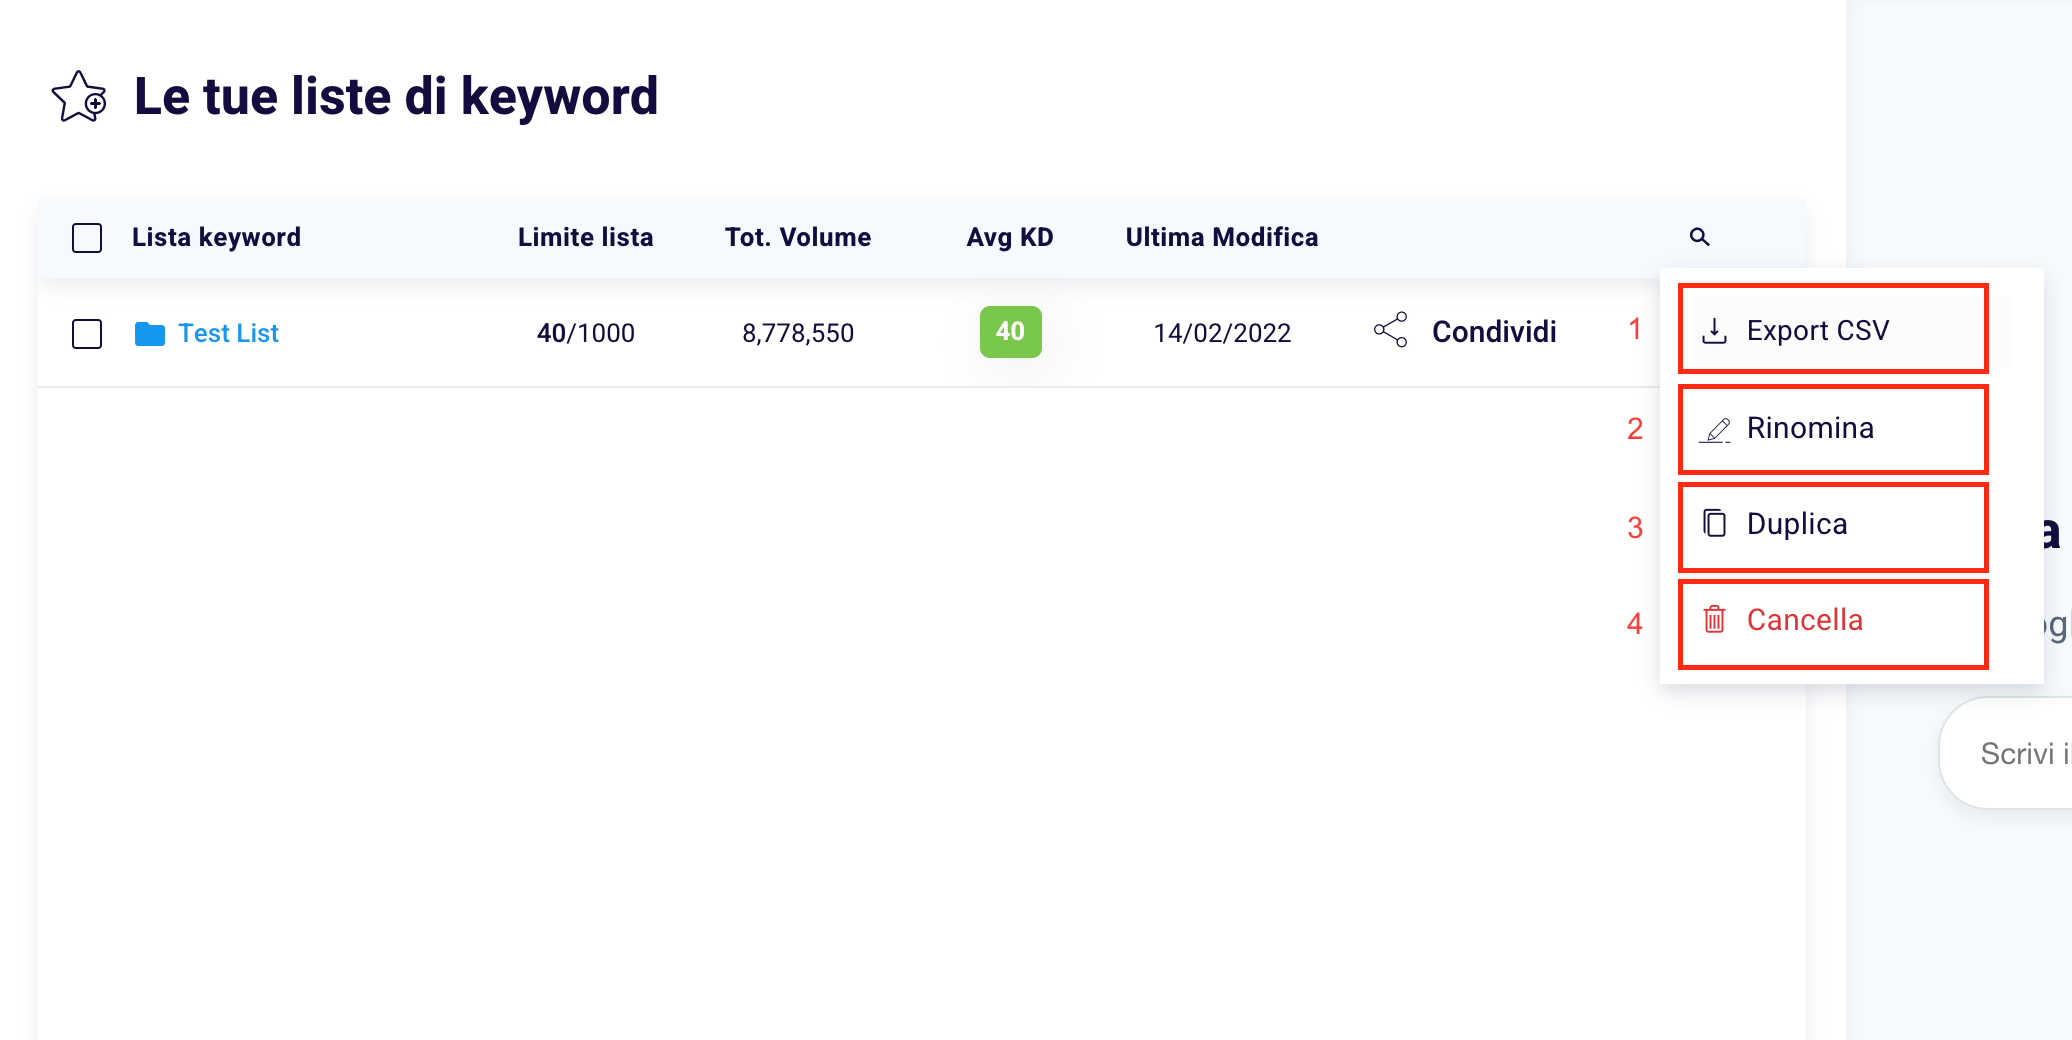
Select “Export CSV” (1) to export your list in .csv format, “Rename” (2) to give your list a new name, “Duplicate” (3) to create a copy of the list, “Delete” ( 4) to delete the list.
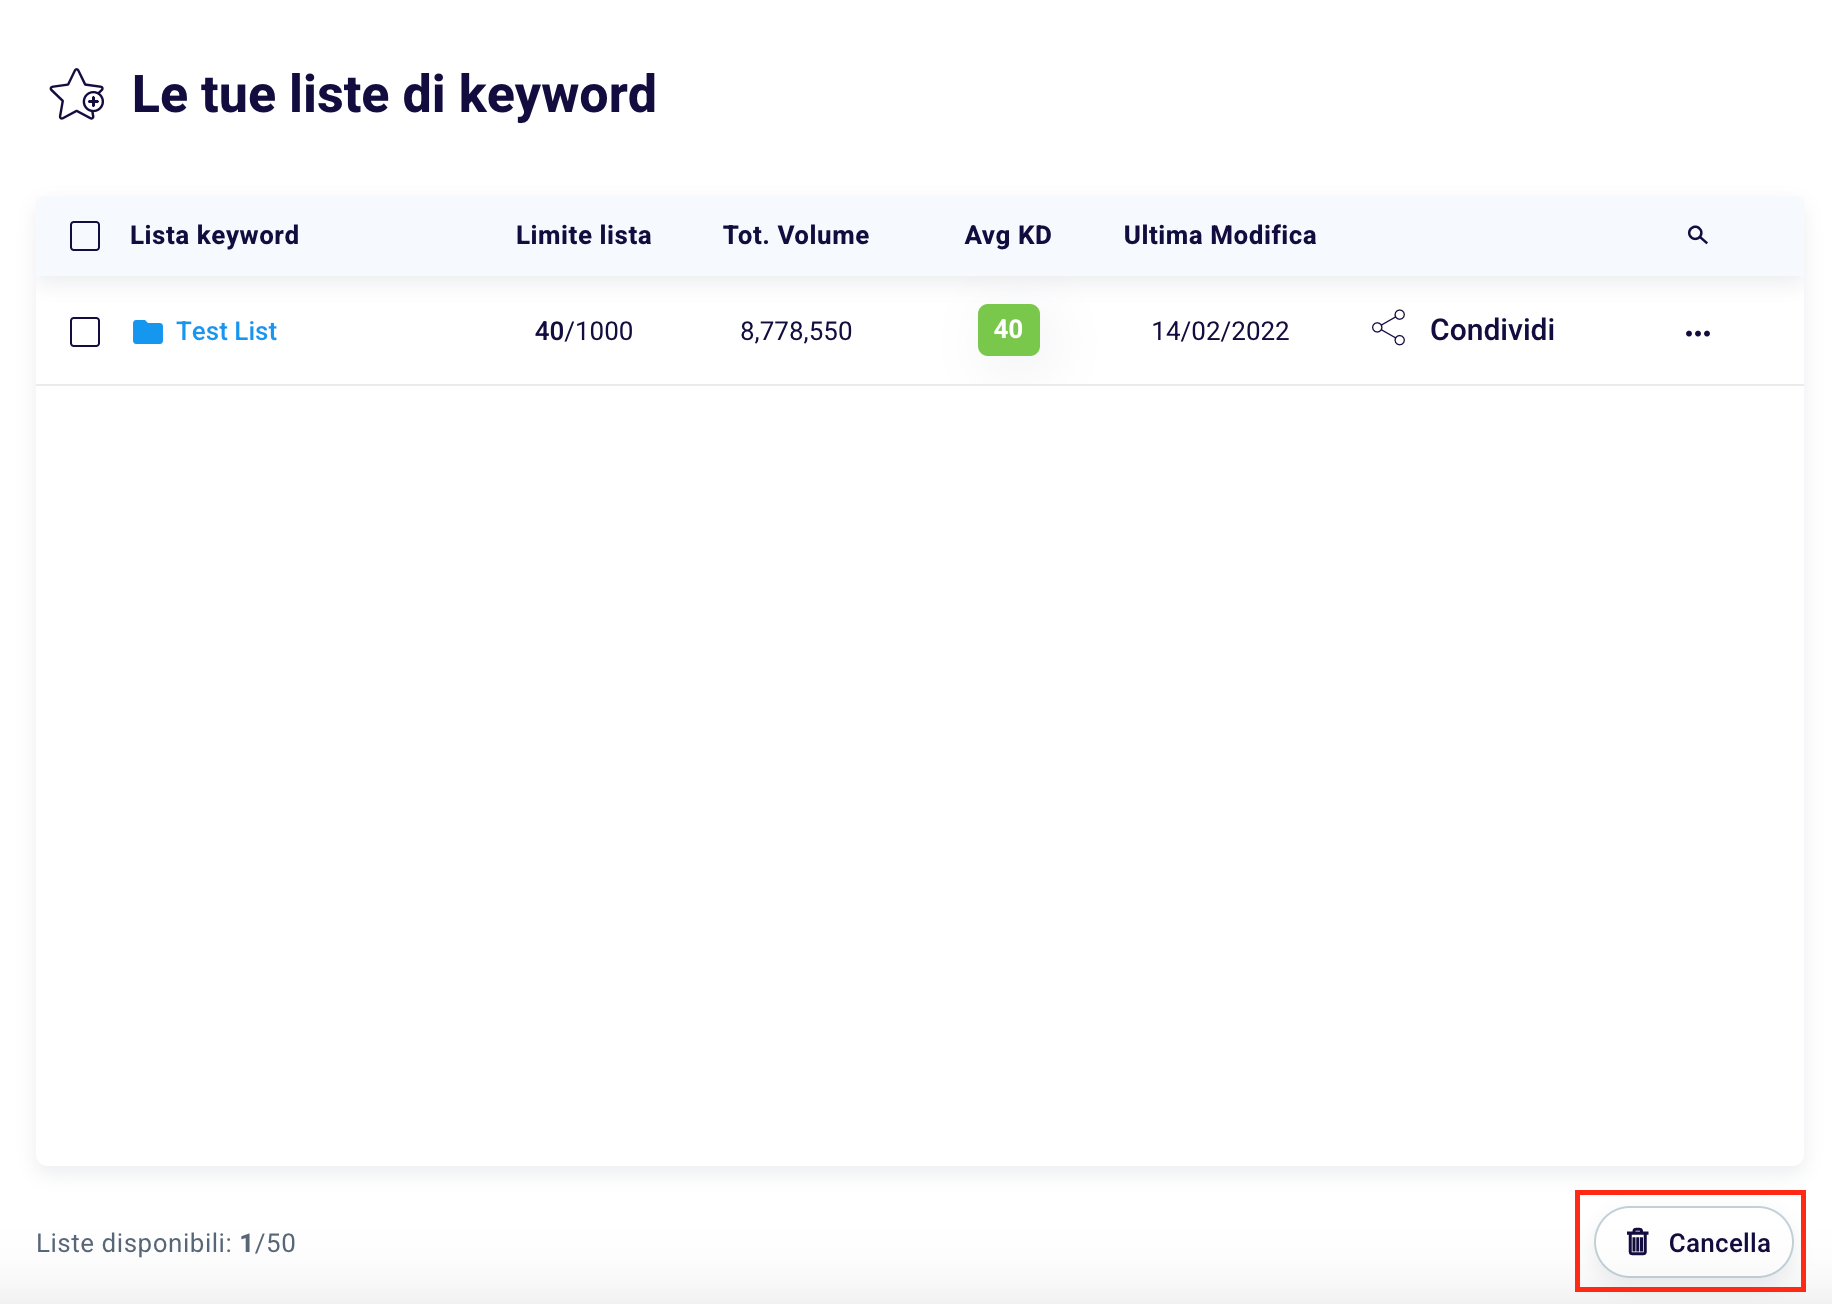
Do you want to delete one or more lists? You can also click the white button, bottom right under the table, “Delete”.
Finally click “+ Create list” to add a new list to those already present.
We hope this knowledge base was useful to you. If you have any concerns or questions, please leave a comment or contact us at support@seotesteronline.com.