
Workspace Guide
The Workspace is the SEO Tester Online function that allows you to involve better and manage the collaborators who work on your SEO projects.
In this short guide, we will explain how to access your Workspace section, add your team, and take full advantage of it to make your workflow more efficient.
How to access the Workspace?
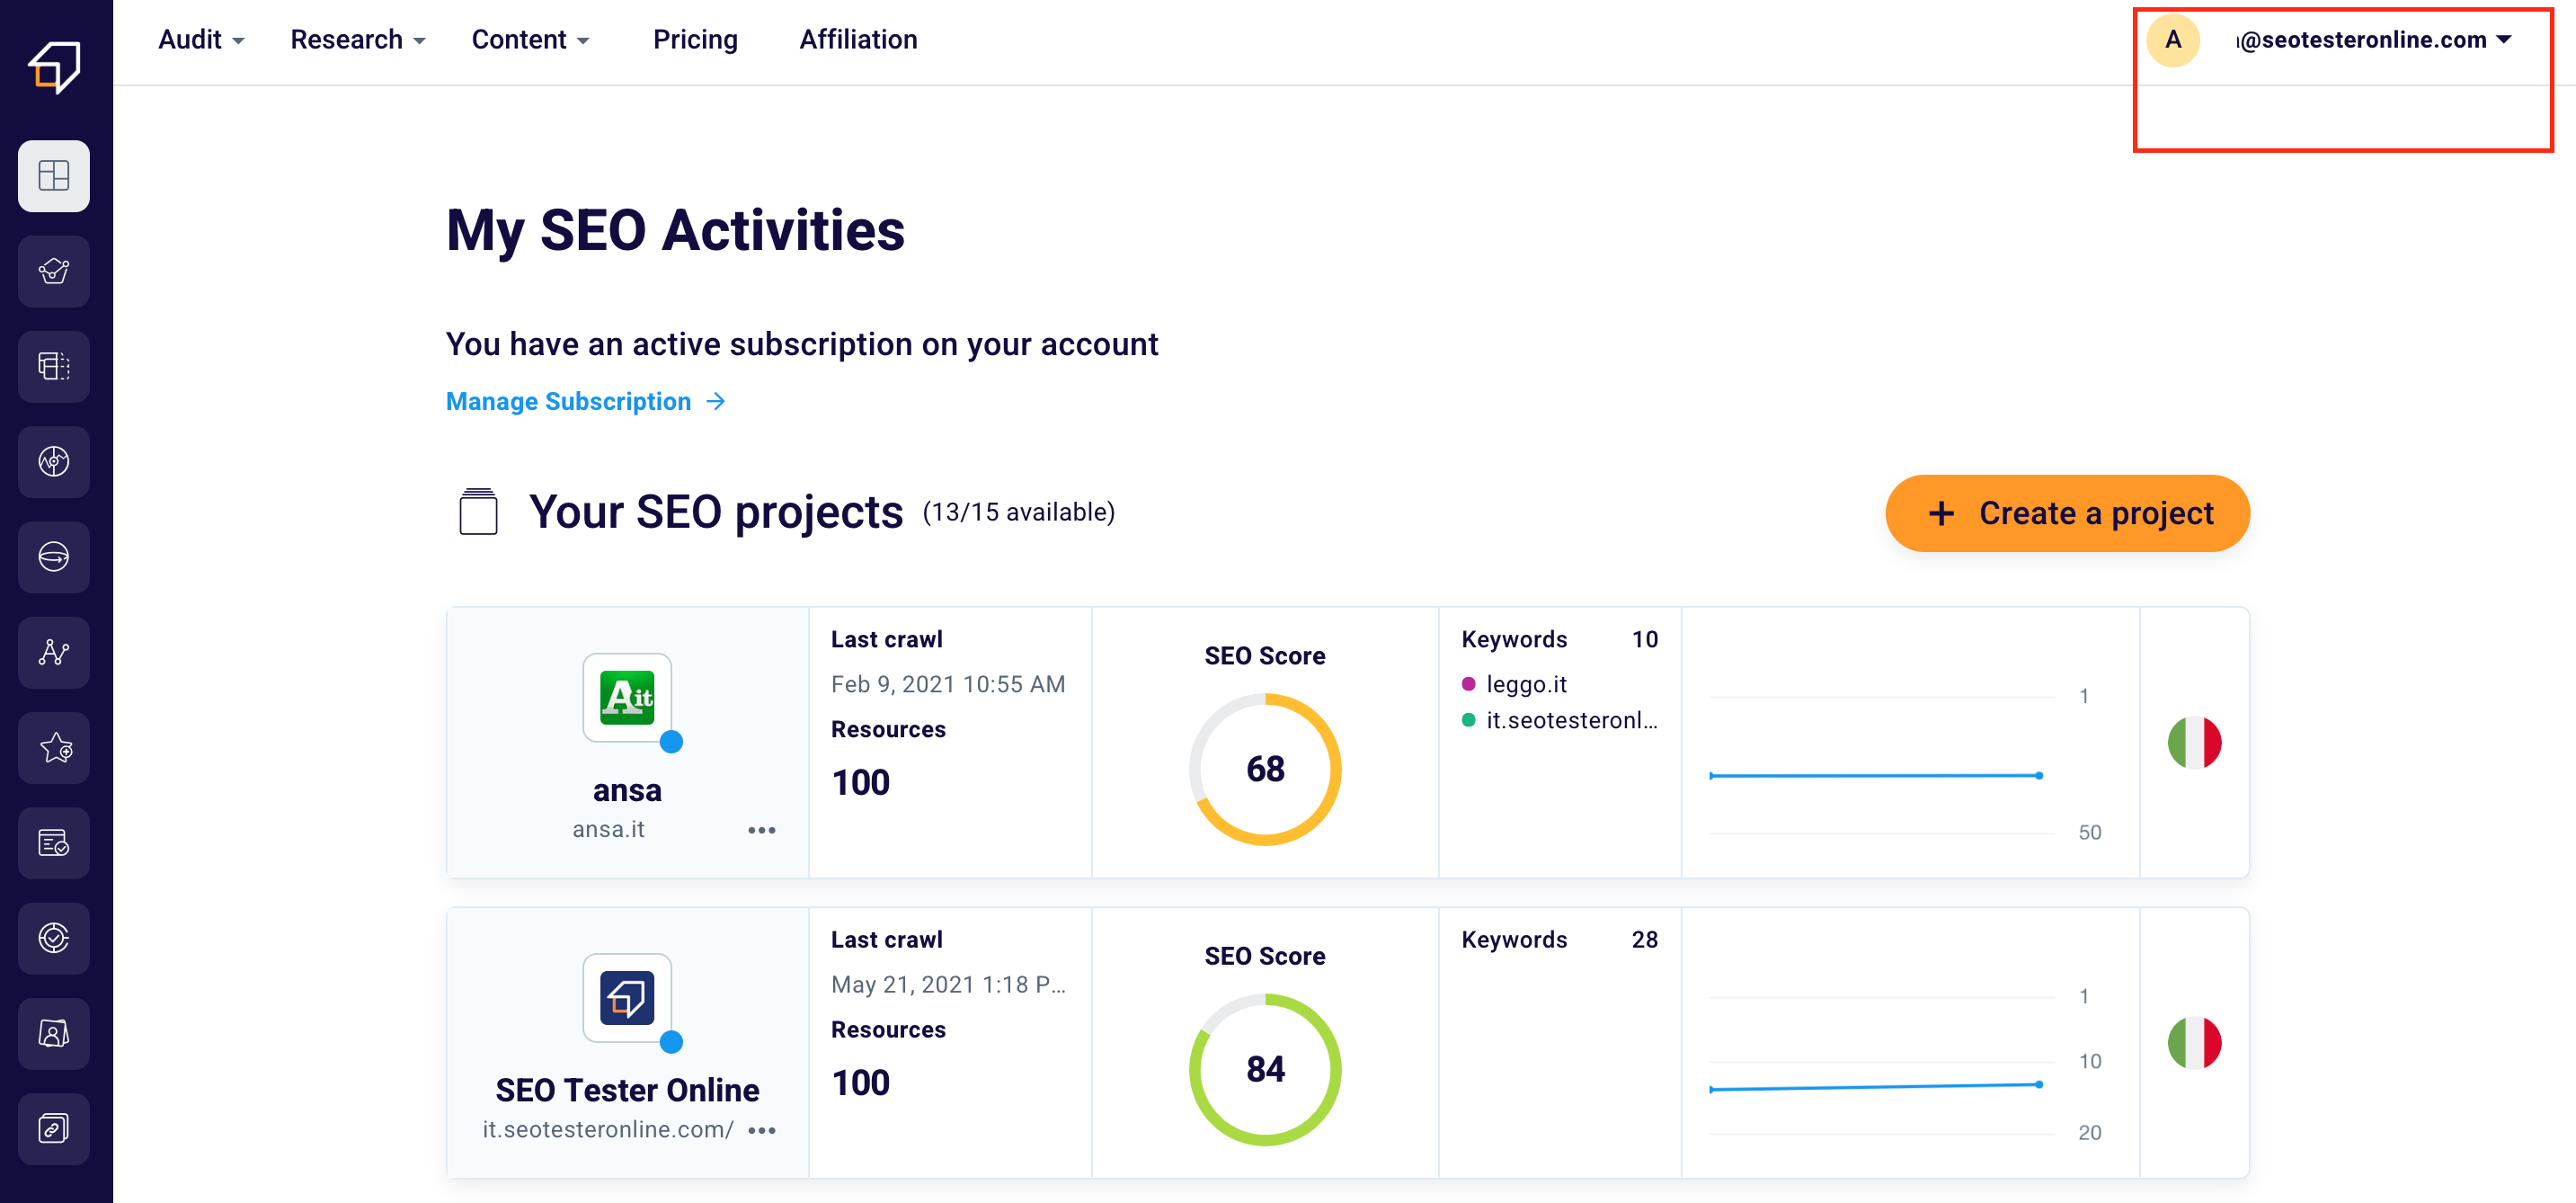
To start using the Workspace feature, just click on the top right next to your account icon.
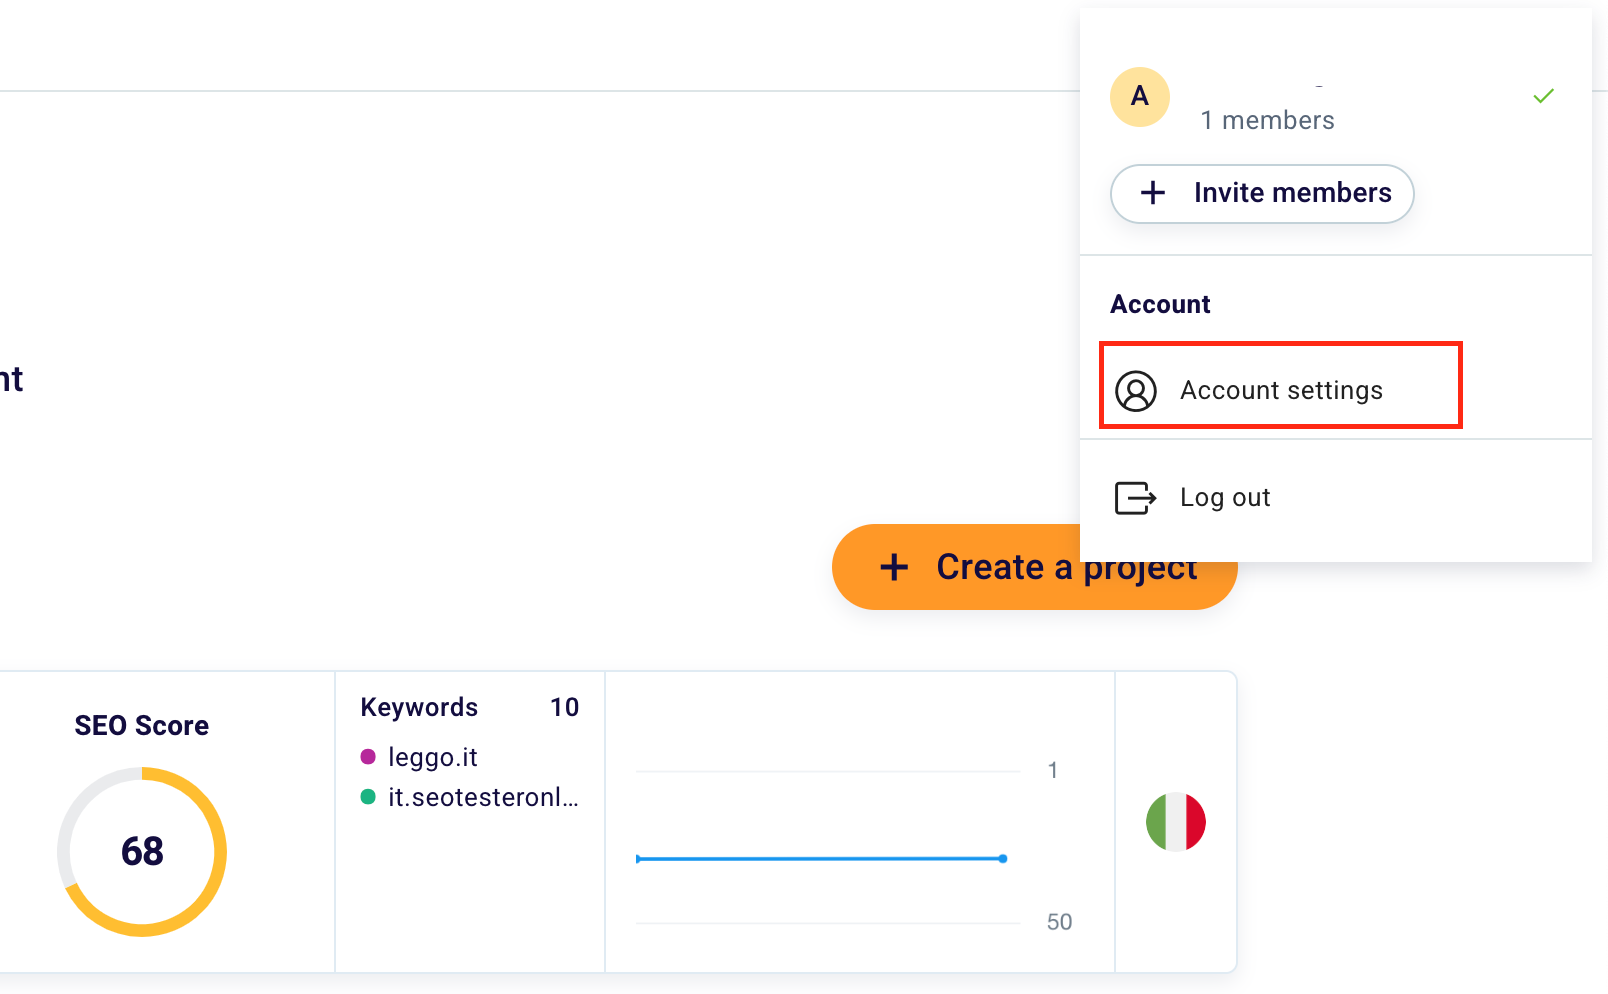
Then select “Account settings“. We will redirect you to the “Profile” section in the Account.
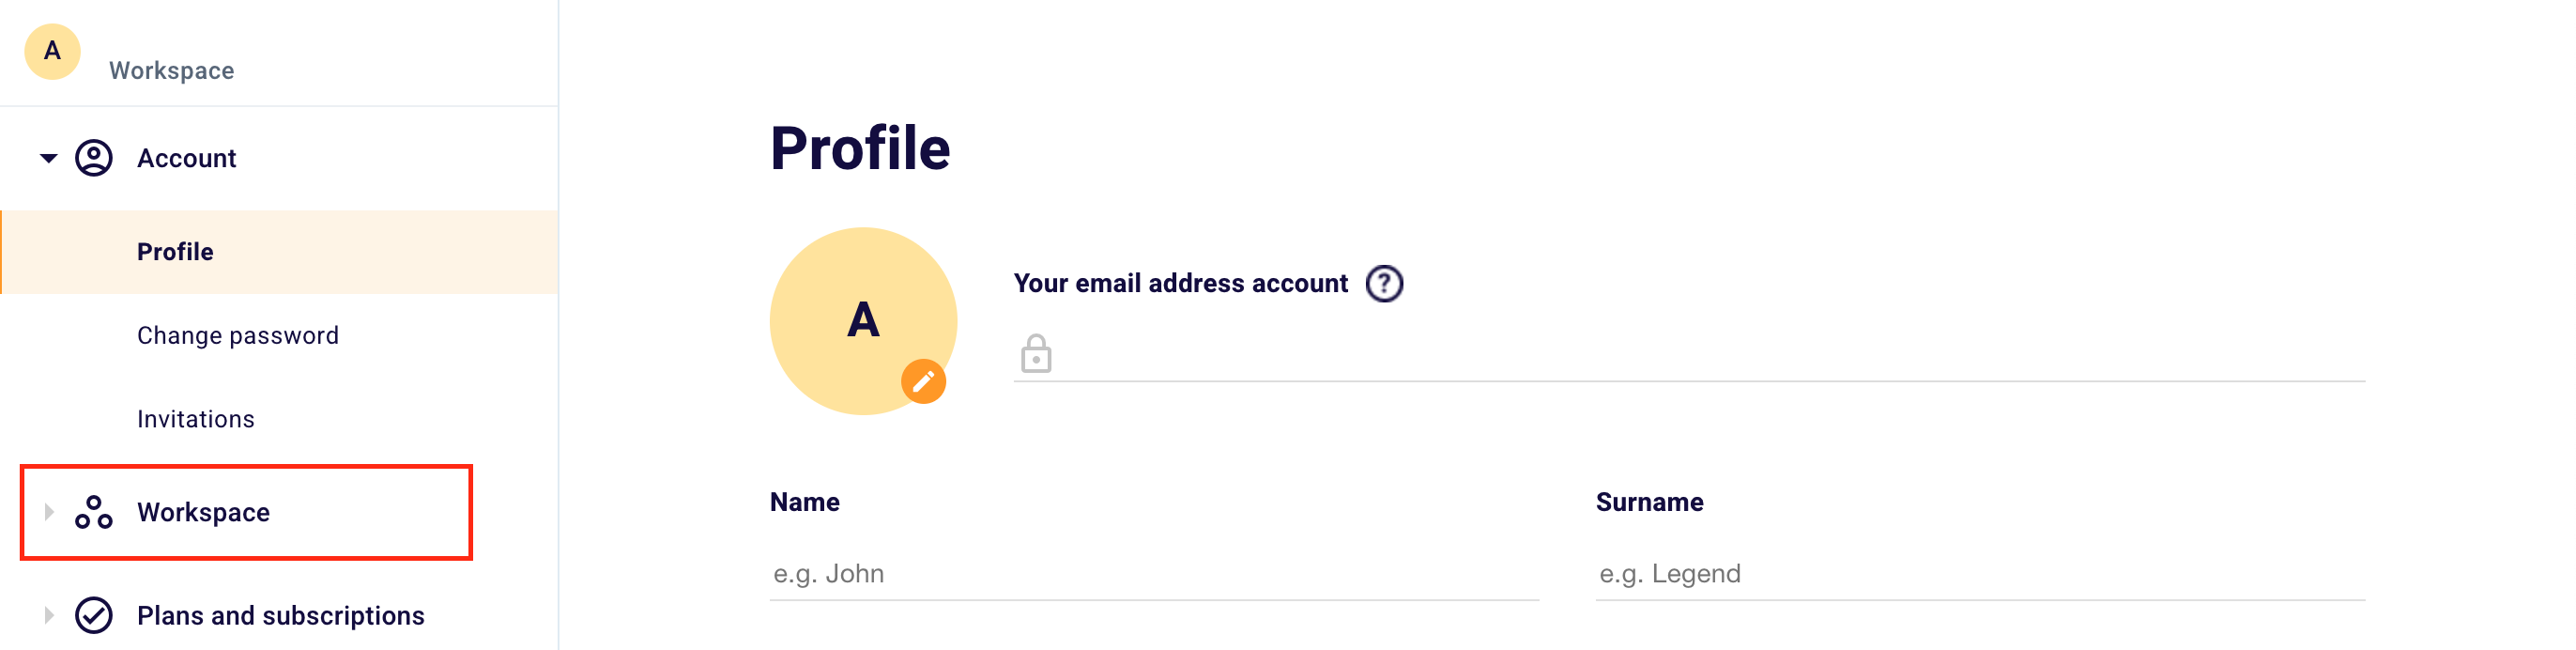
Click “Workspace” in the left side menu to reach the section of the same name.
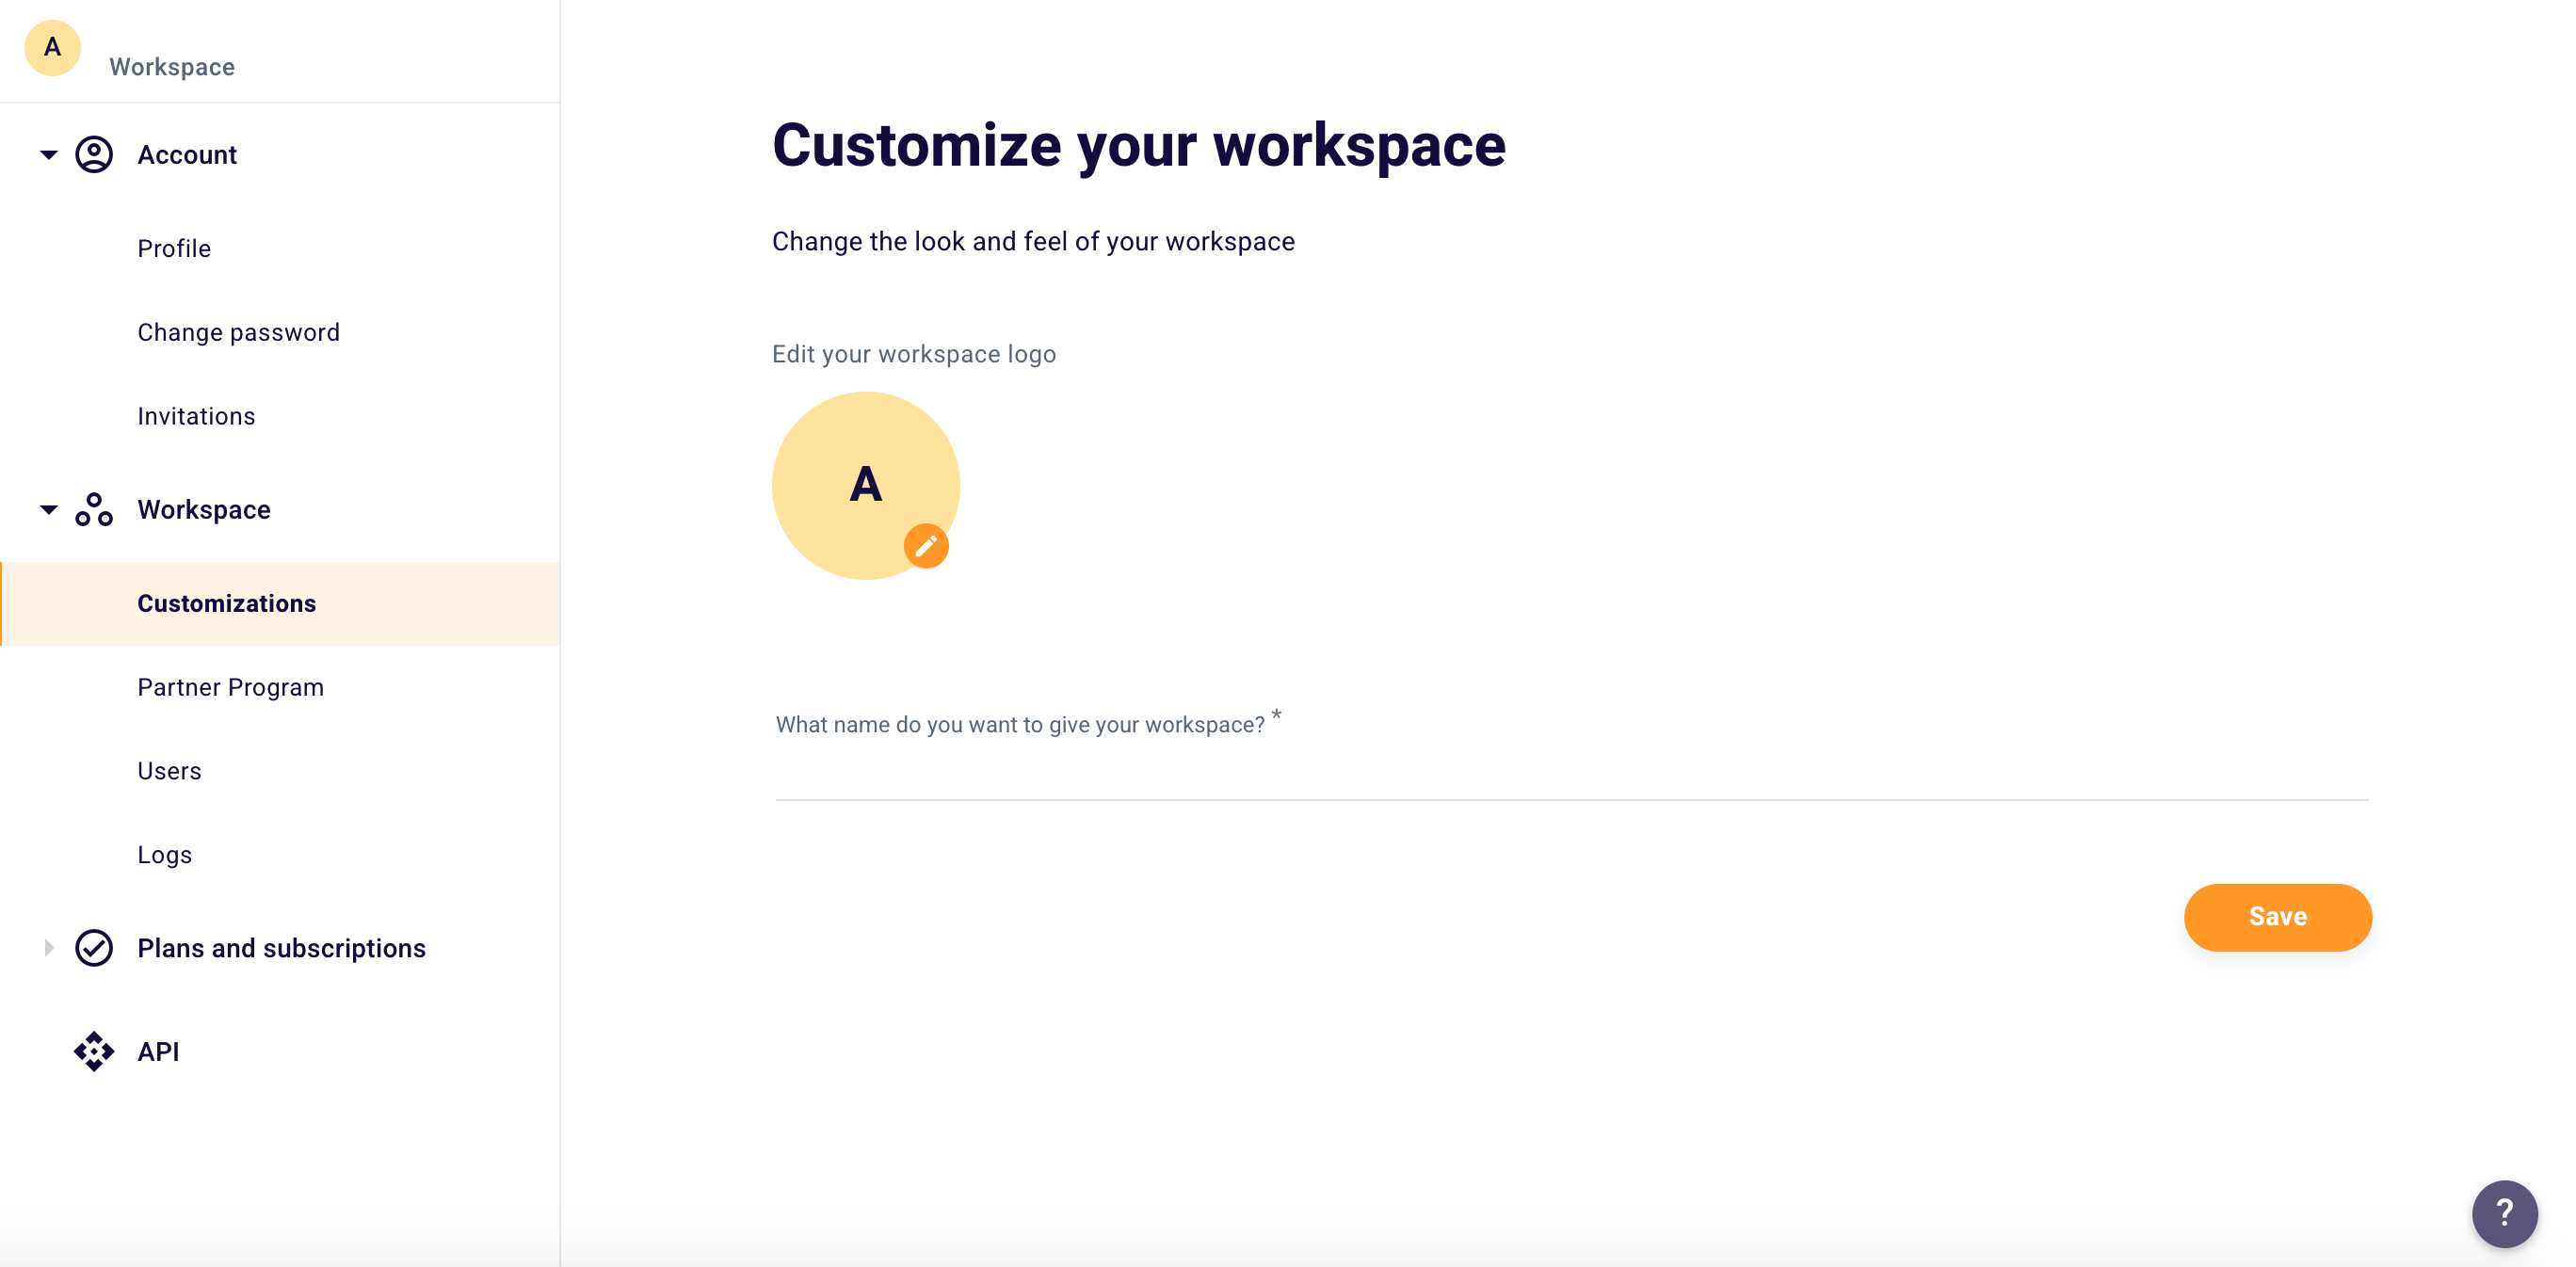
Here, in the “Customizations” section you can change the appearance and name of your workspace.

Click the button next to your profile icon (1) to change the aspect of your Workspace, enter the name of your workspace in the appropriate box (2), and don’t forget to click “Save” (3) once finished, to make the changes made definitive.
How to manage your Workspace invitations and collaborators?
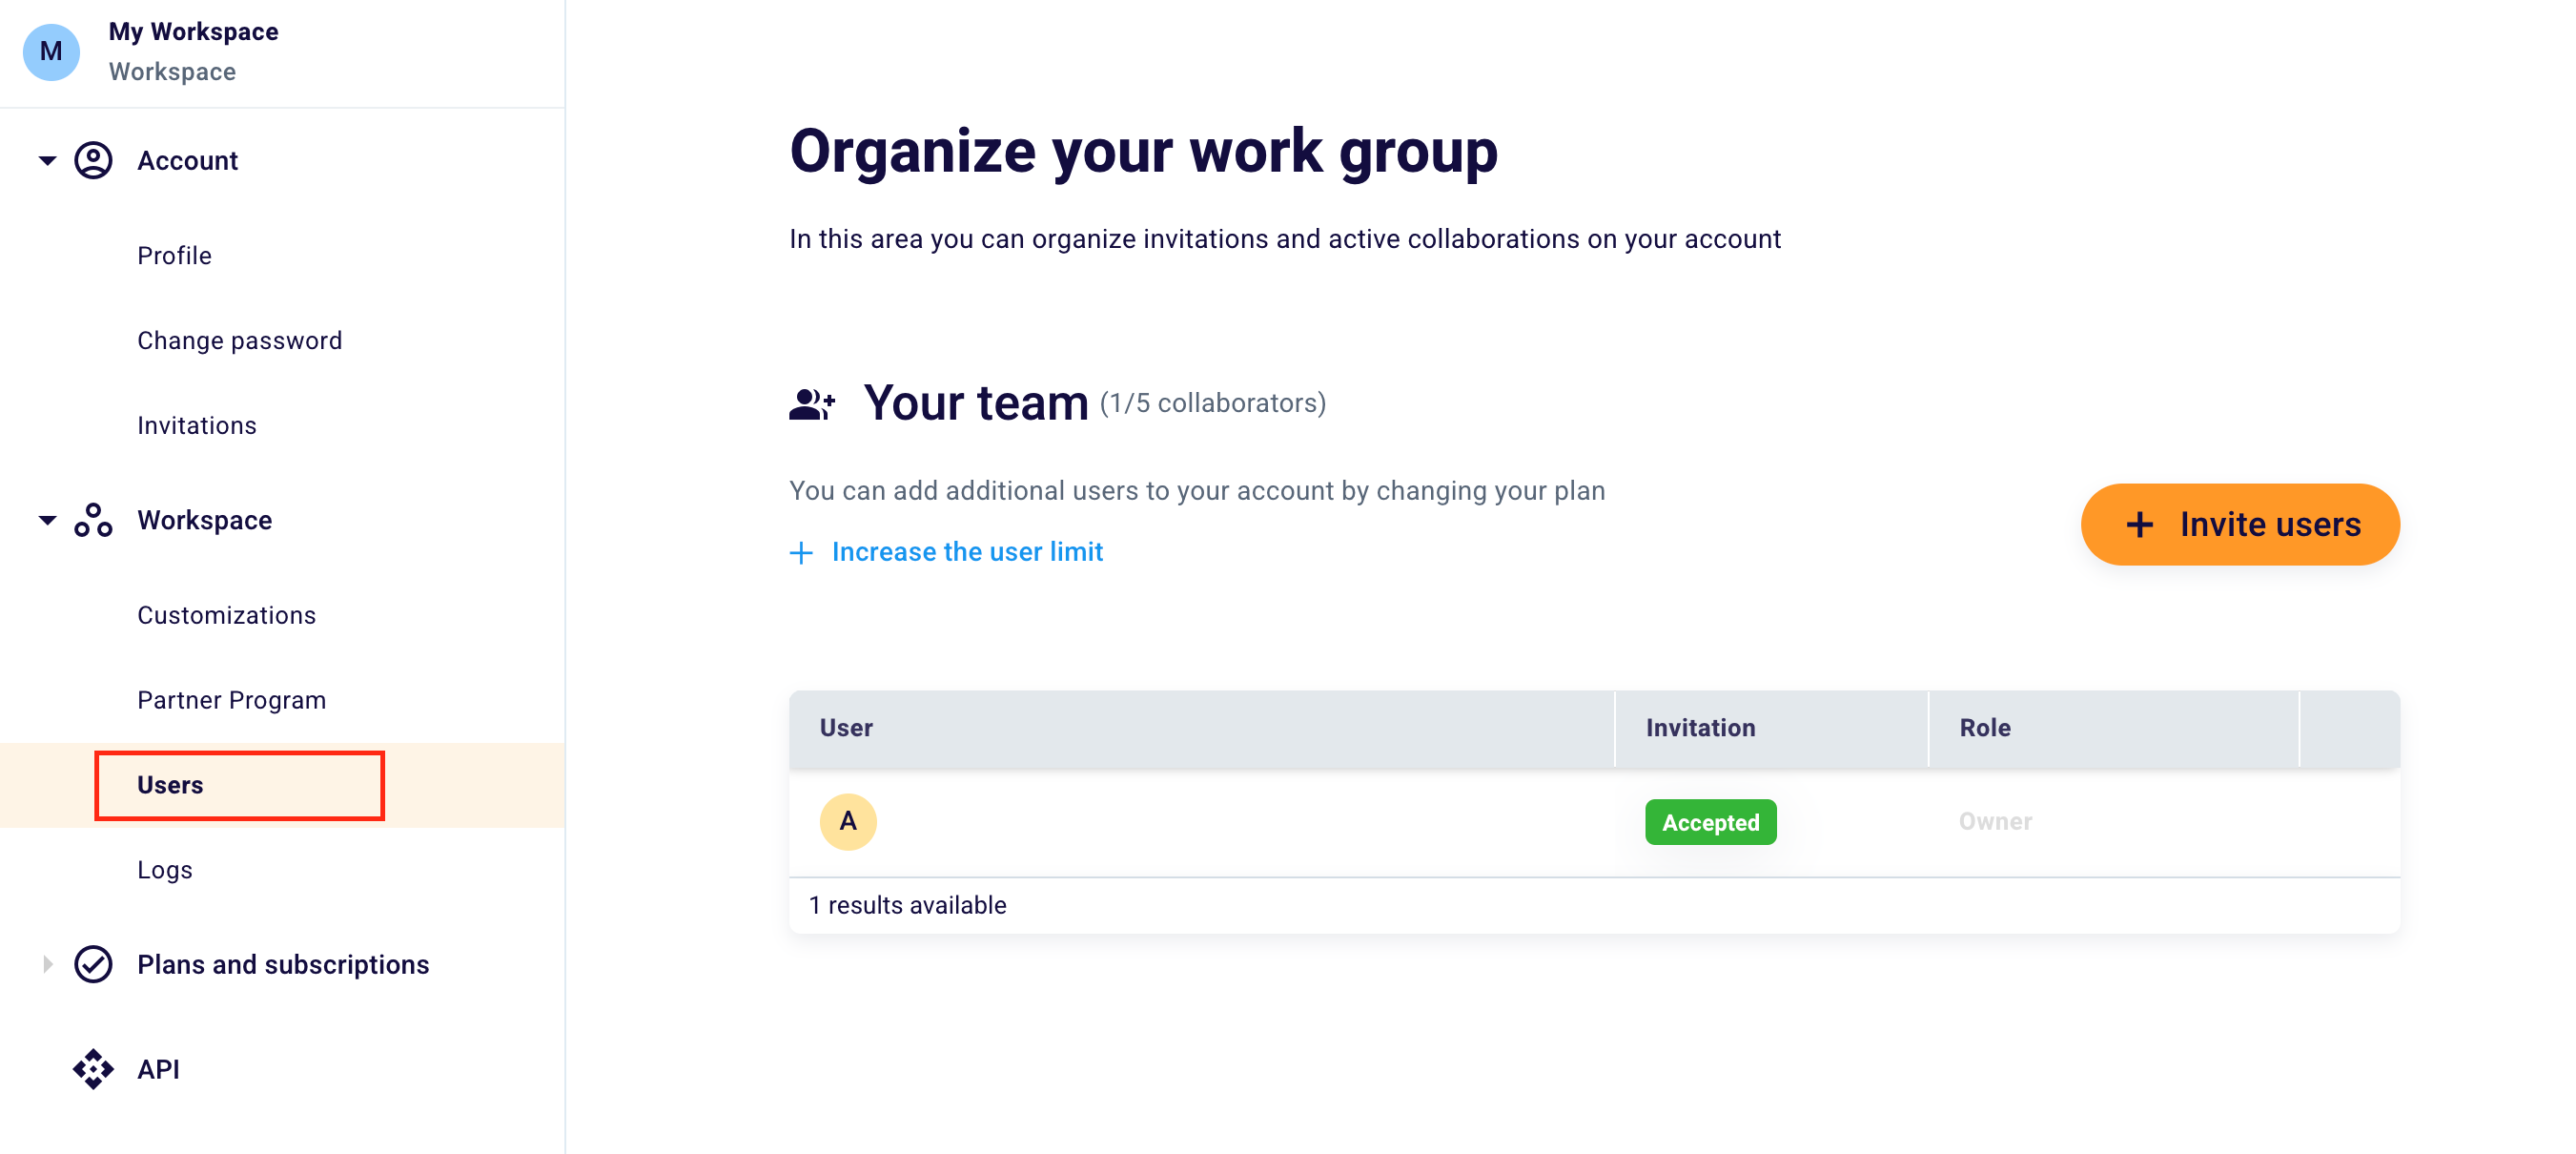
To better coordinate the activities of your work group within your workspace, just click the “Users” item in the menu on the left.
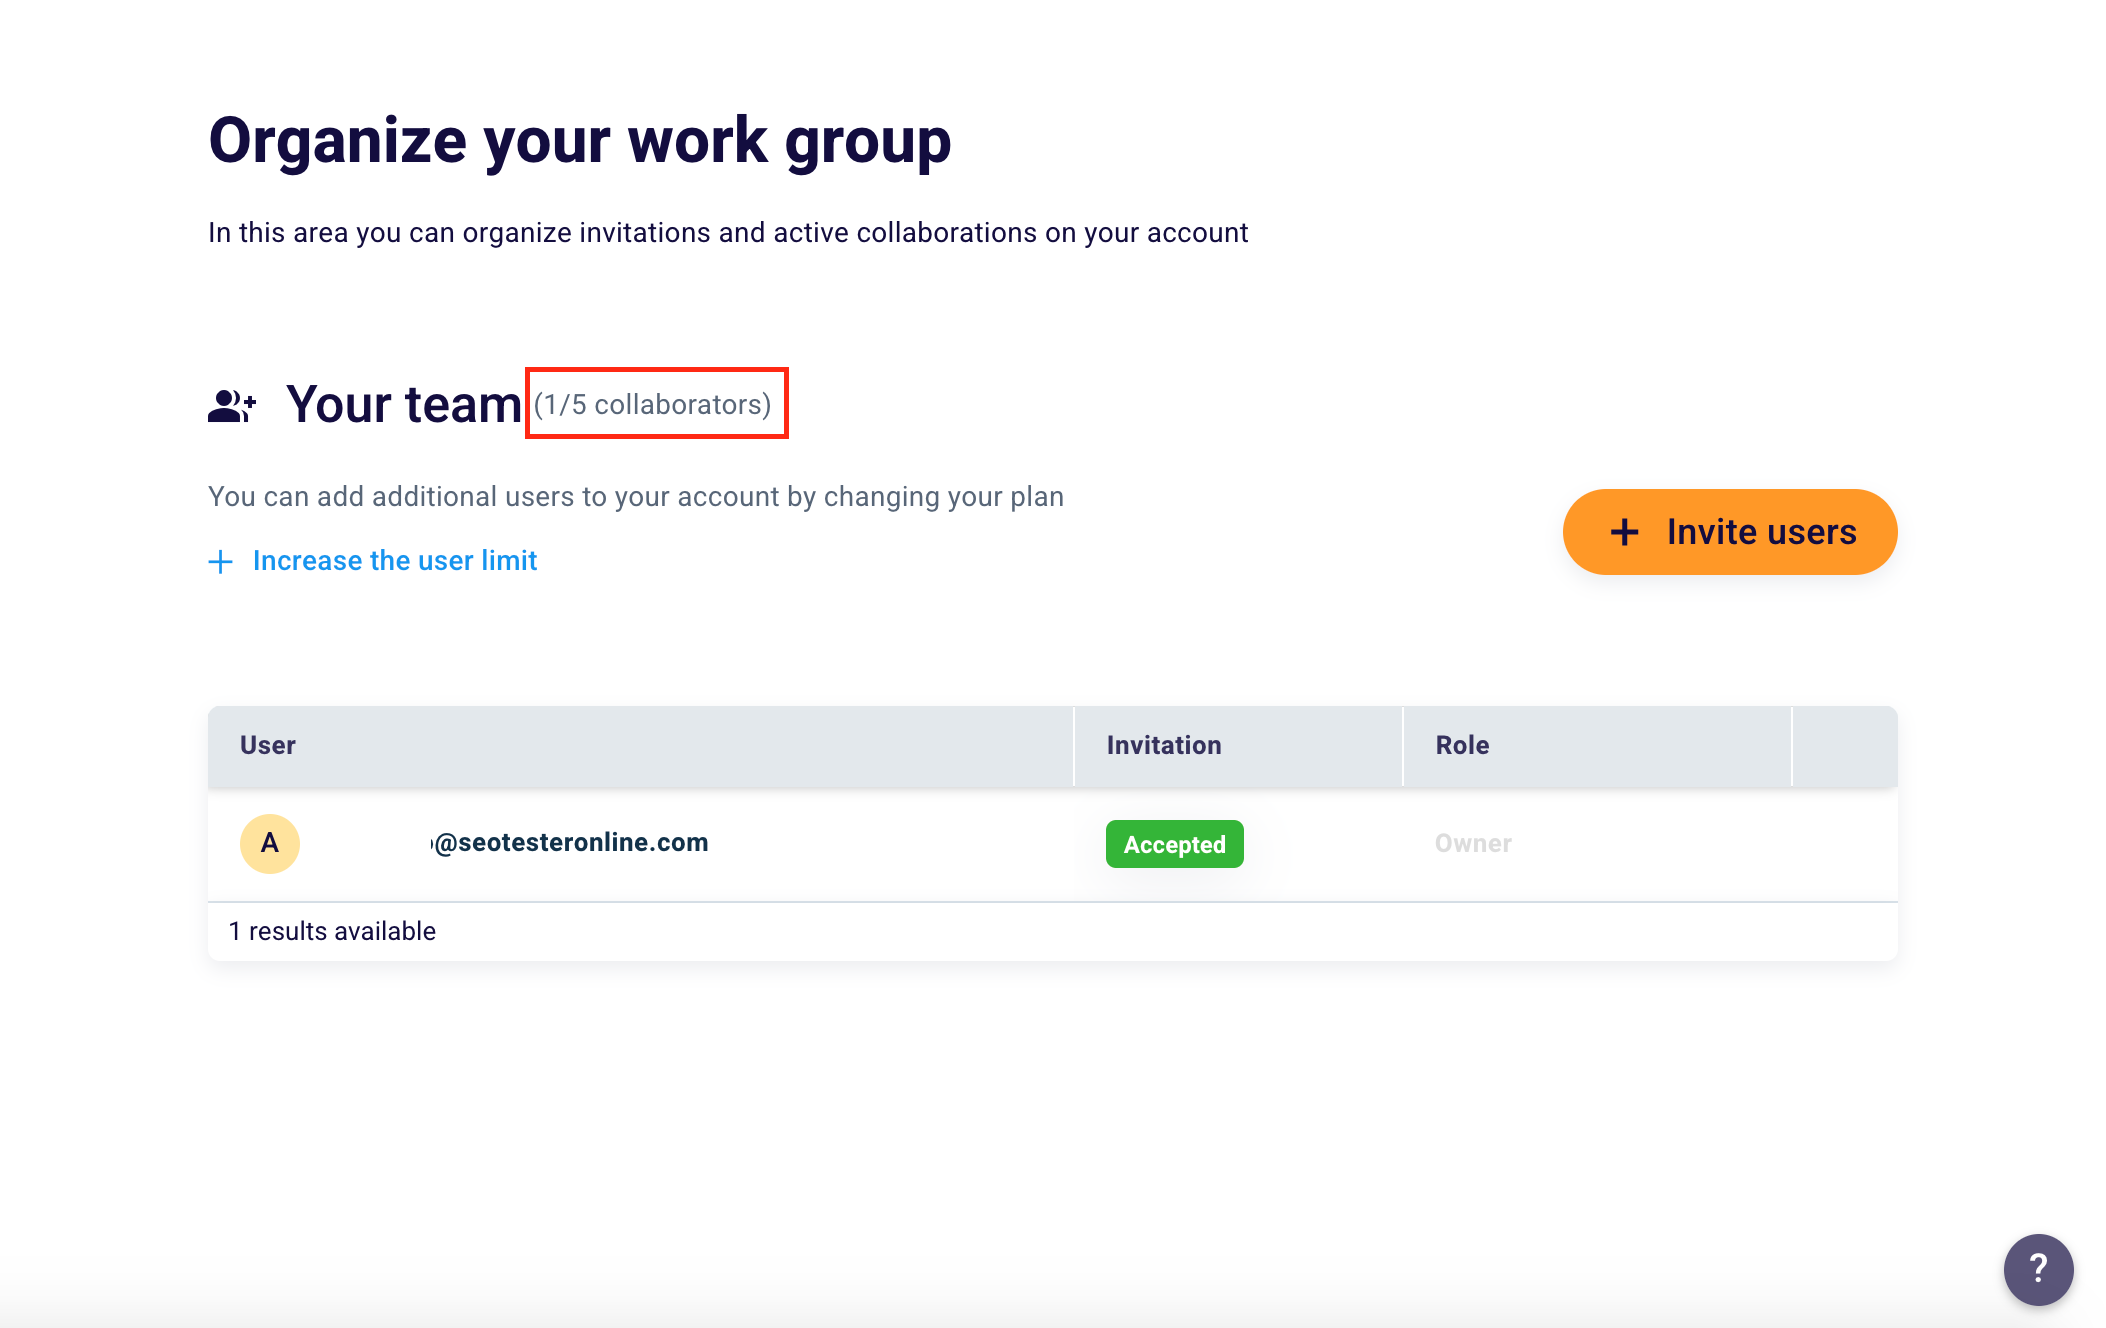
Here you can monitor your team. In the case examined in this workspace, there is only 1 user out of 5 allowed (1/5 collaborators). This makes you aware of how many users you can still add within the workspace (in this case 4).
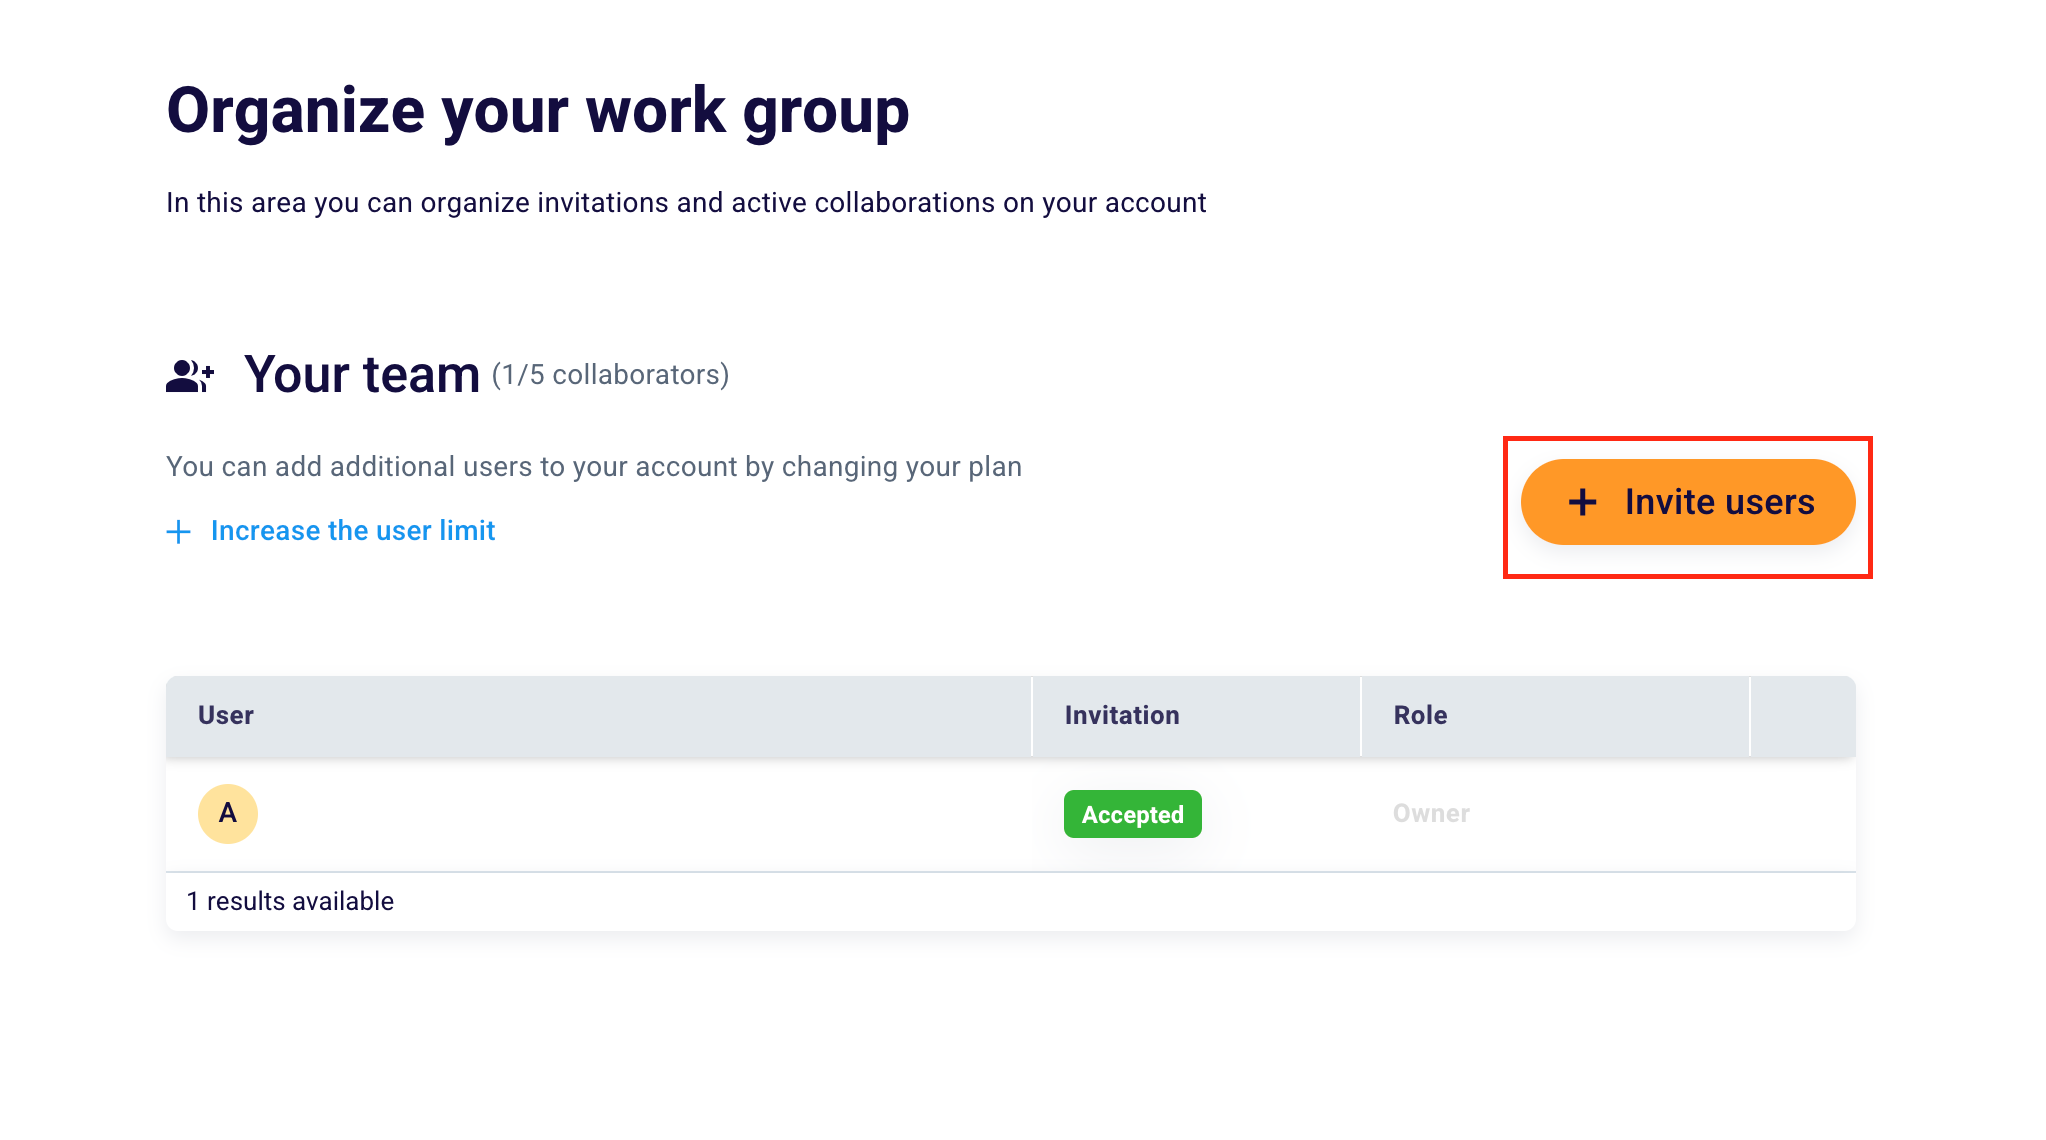
In this section, you can invite new users to your Workspace. To do this, click the orange button “+ Invite users“.
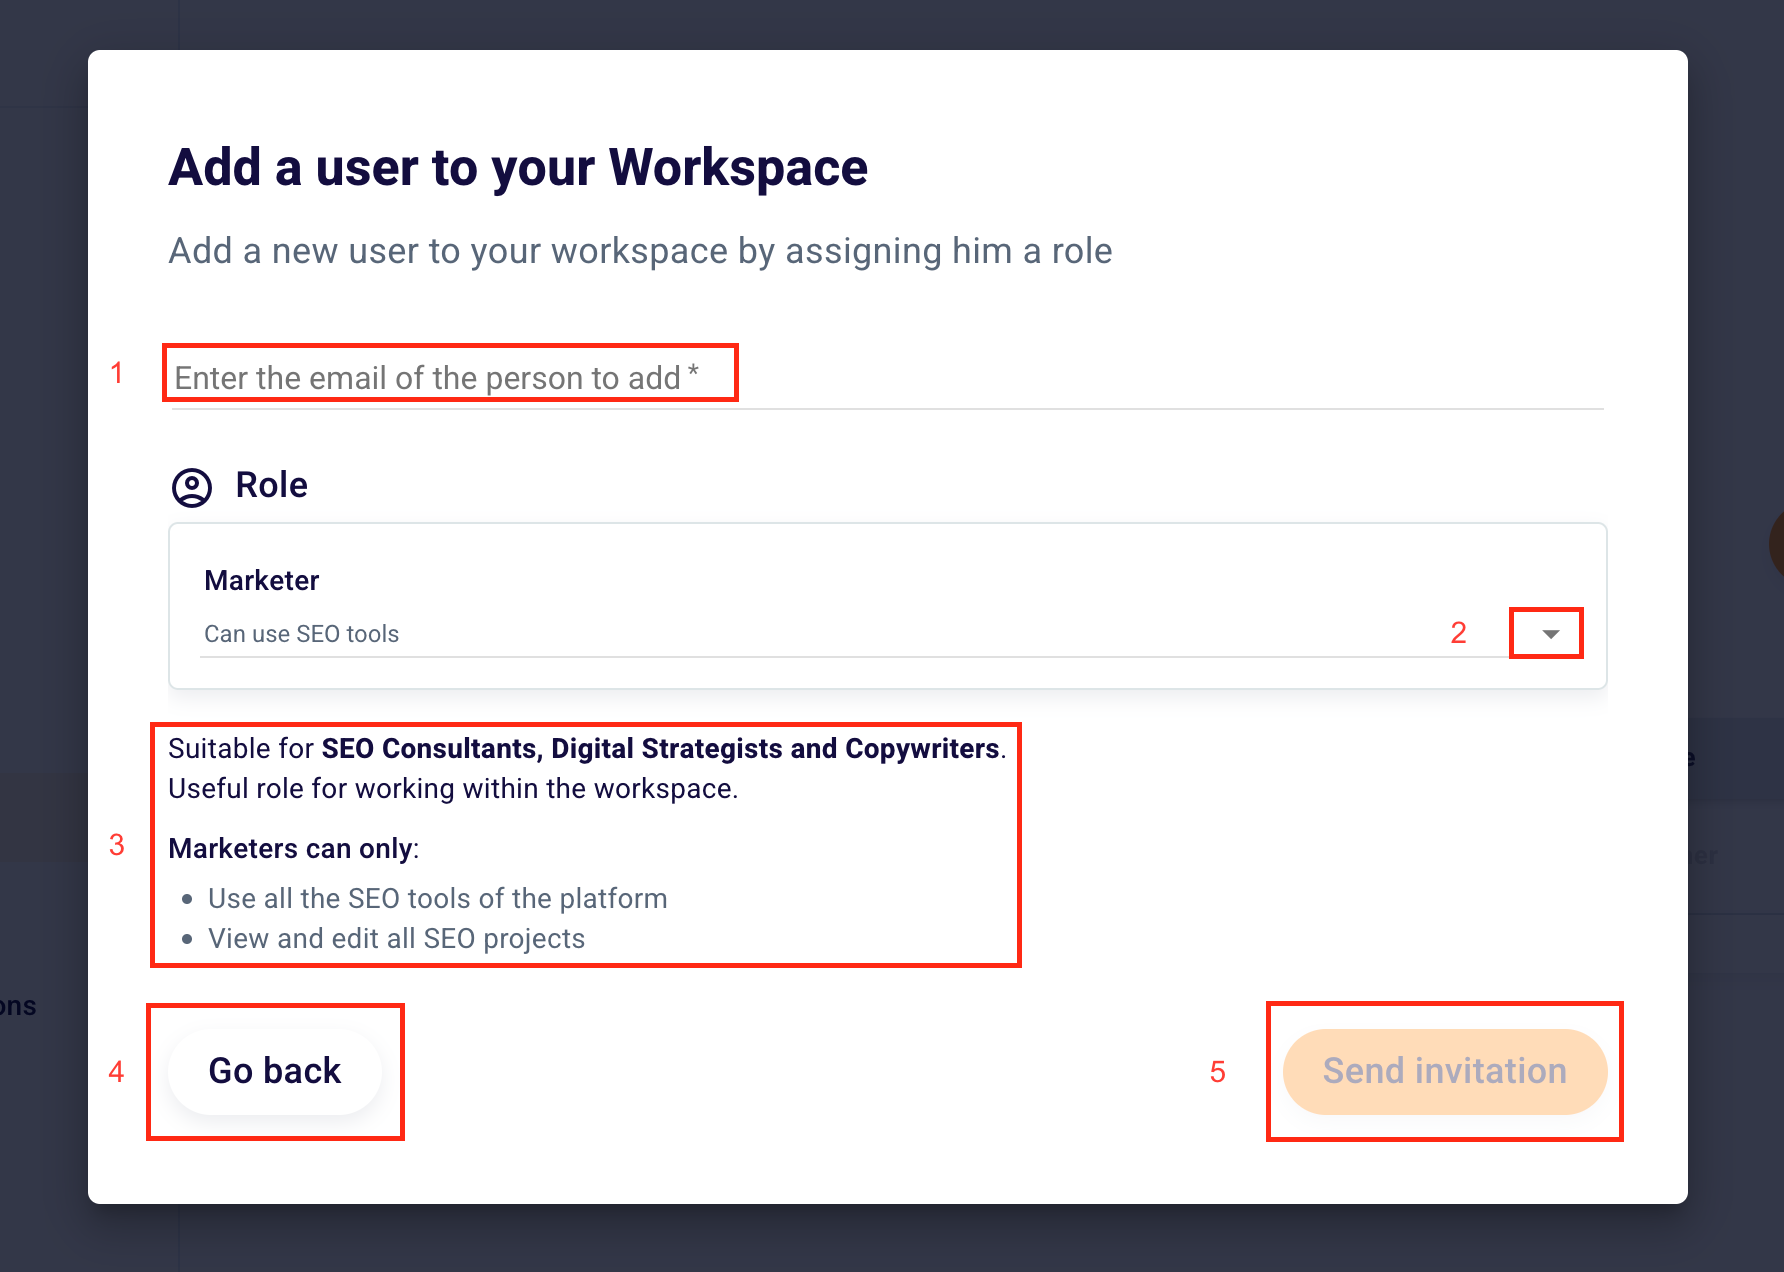
When this screen is shown you can invite one of your collaborators to your workspace in a few seconds.
Write the email address of the person to add in the appropriate section (1), and select the role you want to assign to the new Workspace member by clicking the select on the right (2).
When adding a new user you will be able to choose between 4 roles:
- Marketer: suitable for Digital Marketing Strategists, Consultants, and SEO Copywriters. The person added to this role will be able to use all the tools in SEO Tester Online and view and edit all SEO projects.
- Bookkeeper: suitable for CFO (Chief Financial Officer), Accountants, and Bookkeepers. The person added to this role will be able to access the billing area and download and view the generated invoices relating to our software.
- Manager: suitable for area managers and project managers. The person added to this role will be able to use all the tools on the platform, view and modify all SEO projects, and add and remove users from the Workspace assigned the “Marketer” role.
- Admin: suitable for business owners, CMO (Chief Marketing Officer, Marketing Managers), CGO (Chief Growth Officer), and COO (Chief Operating Officer, Operational Managers). The person added with this role will be able to use all the tools on the platform, view and modify all SEO projects, add and remove users from the Workspace assigned the “Marketer”, “Bookkeeper” or “Manager” role, customize the ‘aspect of the workspace, view and modify all the information in the partner area, view and download the invoices generated in the respective section, and modify the roles within the workspace (so make sure to provide the Admin role only to people you trust).
Remember that as Admin you can change the role of other users within your Workspace at any time.
You can also view this information on the platform under select (3). Click the “Go back” button (4) to reach the “Users” section of the Workspace or select “Send invitation” to confirm and send the collaboration proposal.
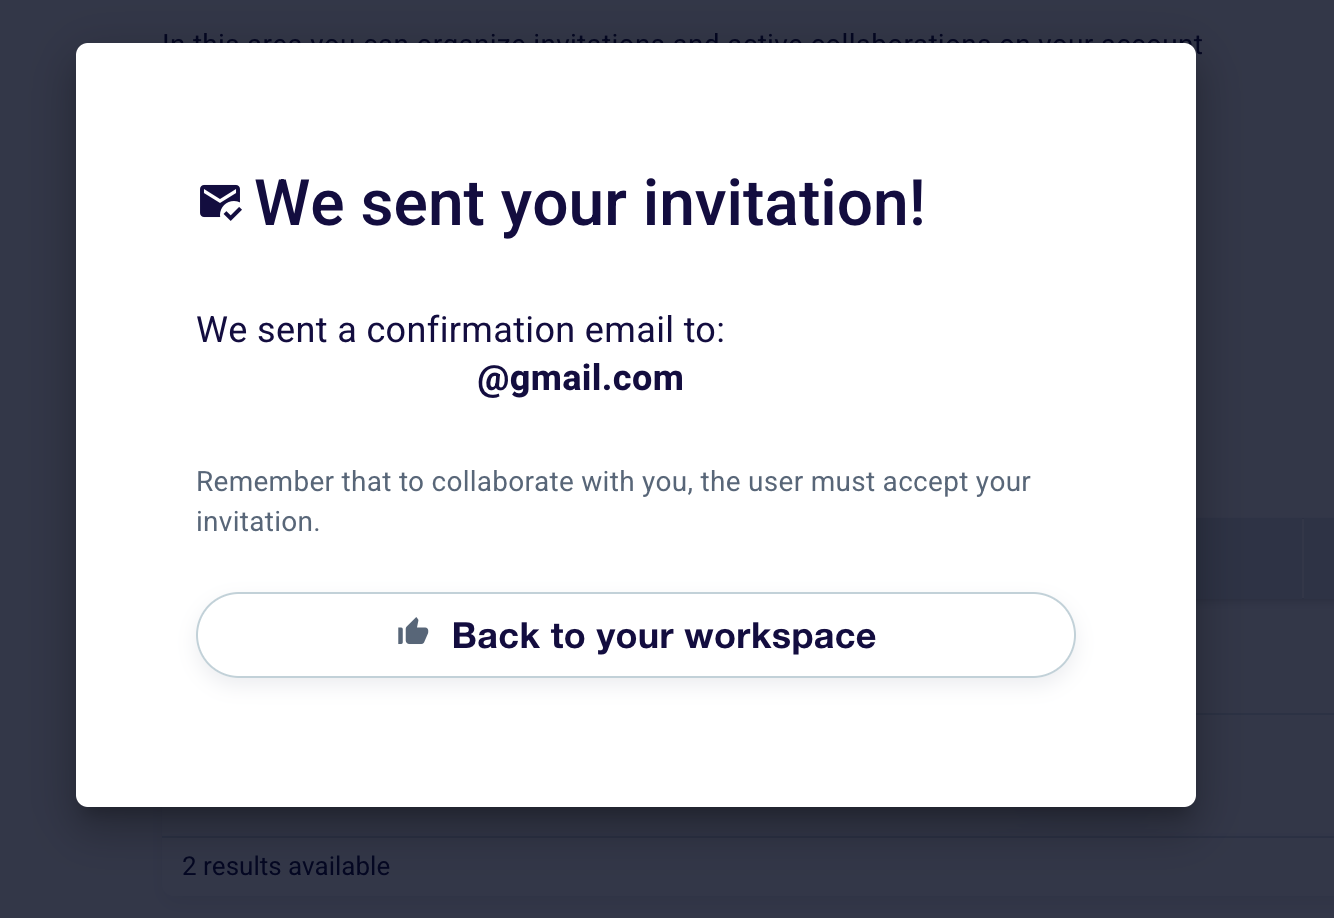
In this case, you will see the confirmation message that the invitation has been sent. Before viewing the user in your work area, the latter must accept the invitation. Click “Back to your workspace” to go to your workspace.
The user to whom you sent the invitation will receive an email with the subject “You’re invited to join a Workspace”.
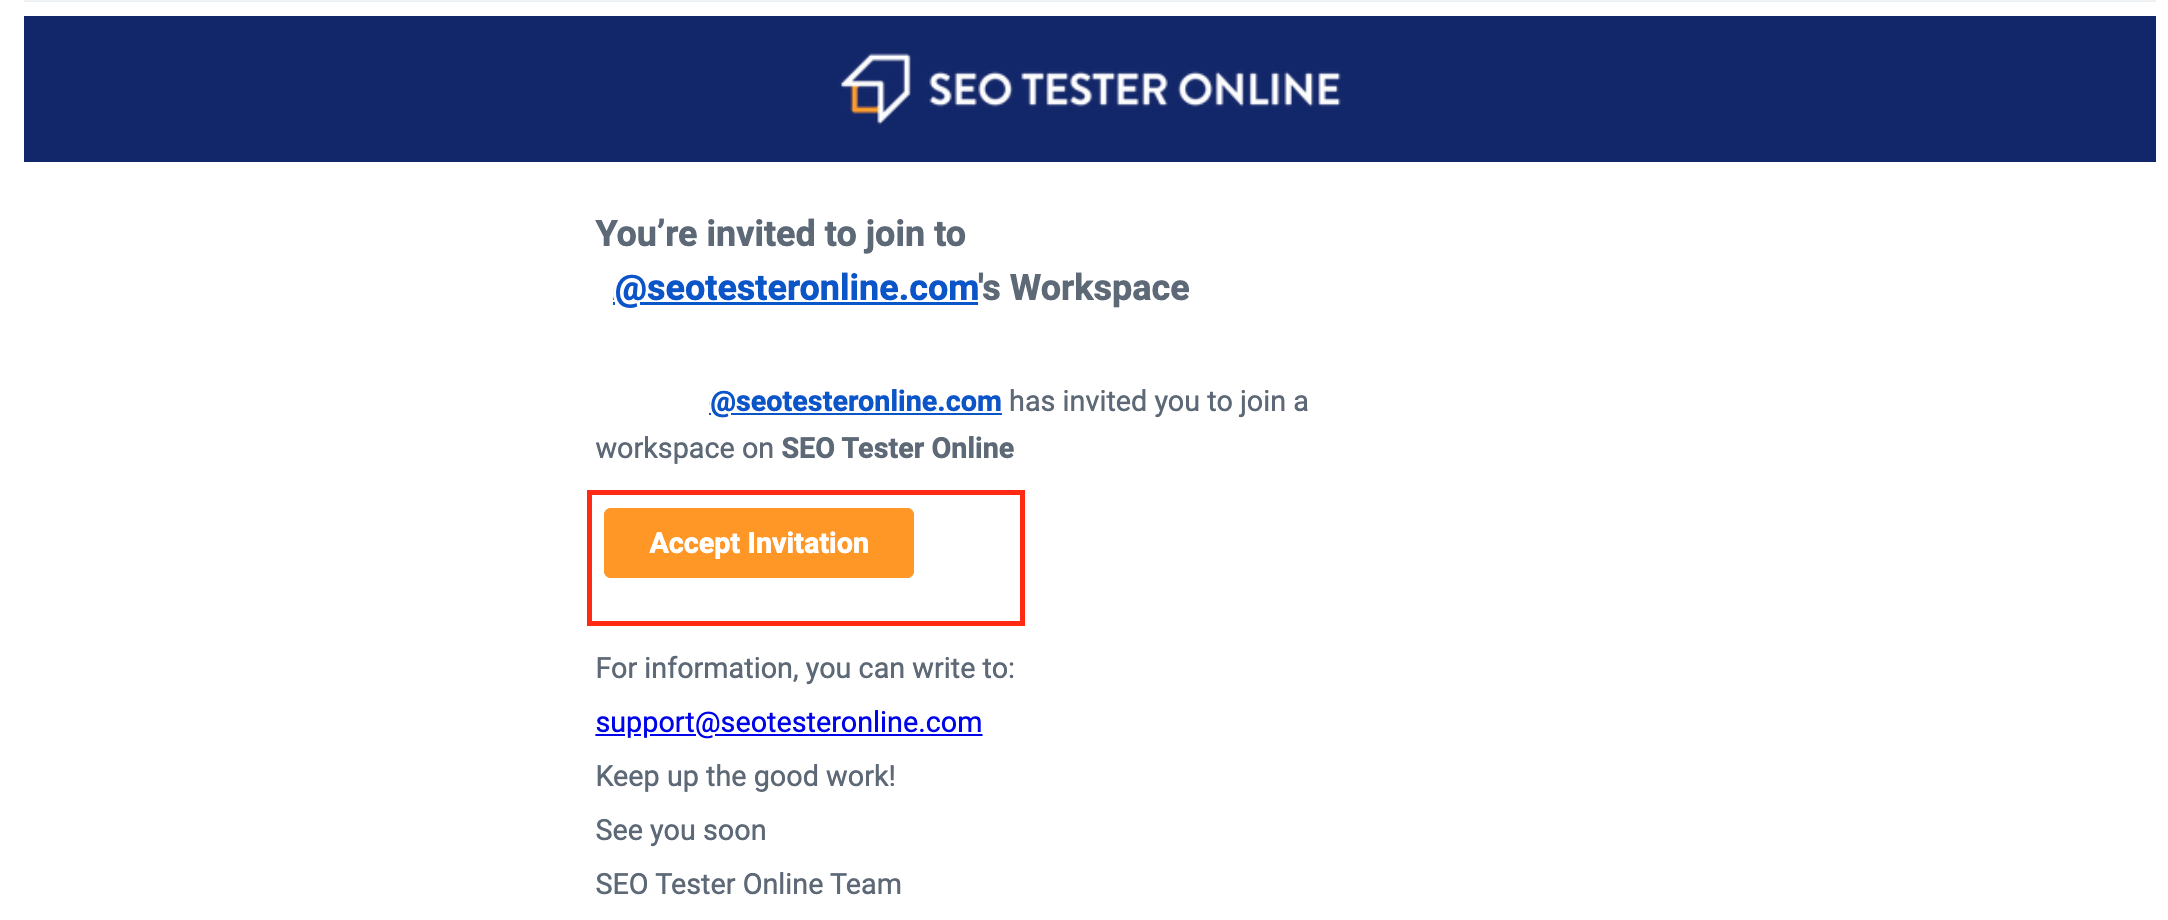
Once received, your collaborator will just have to click the orange button highlighted in the previous screen.
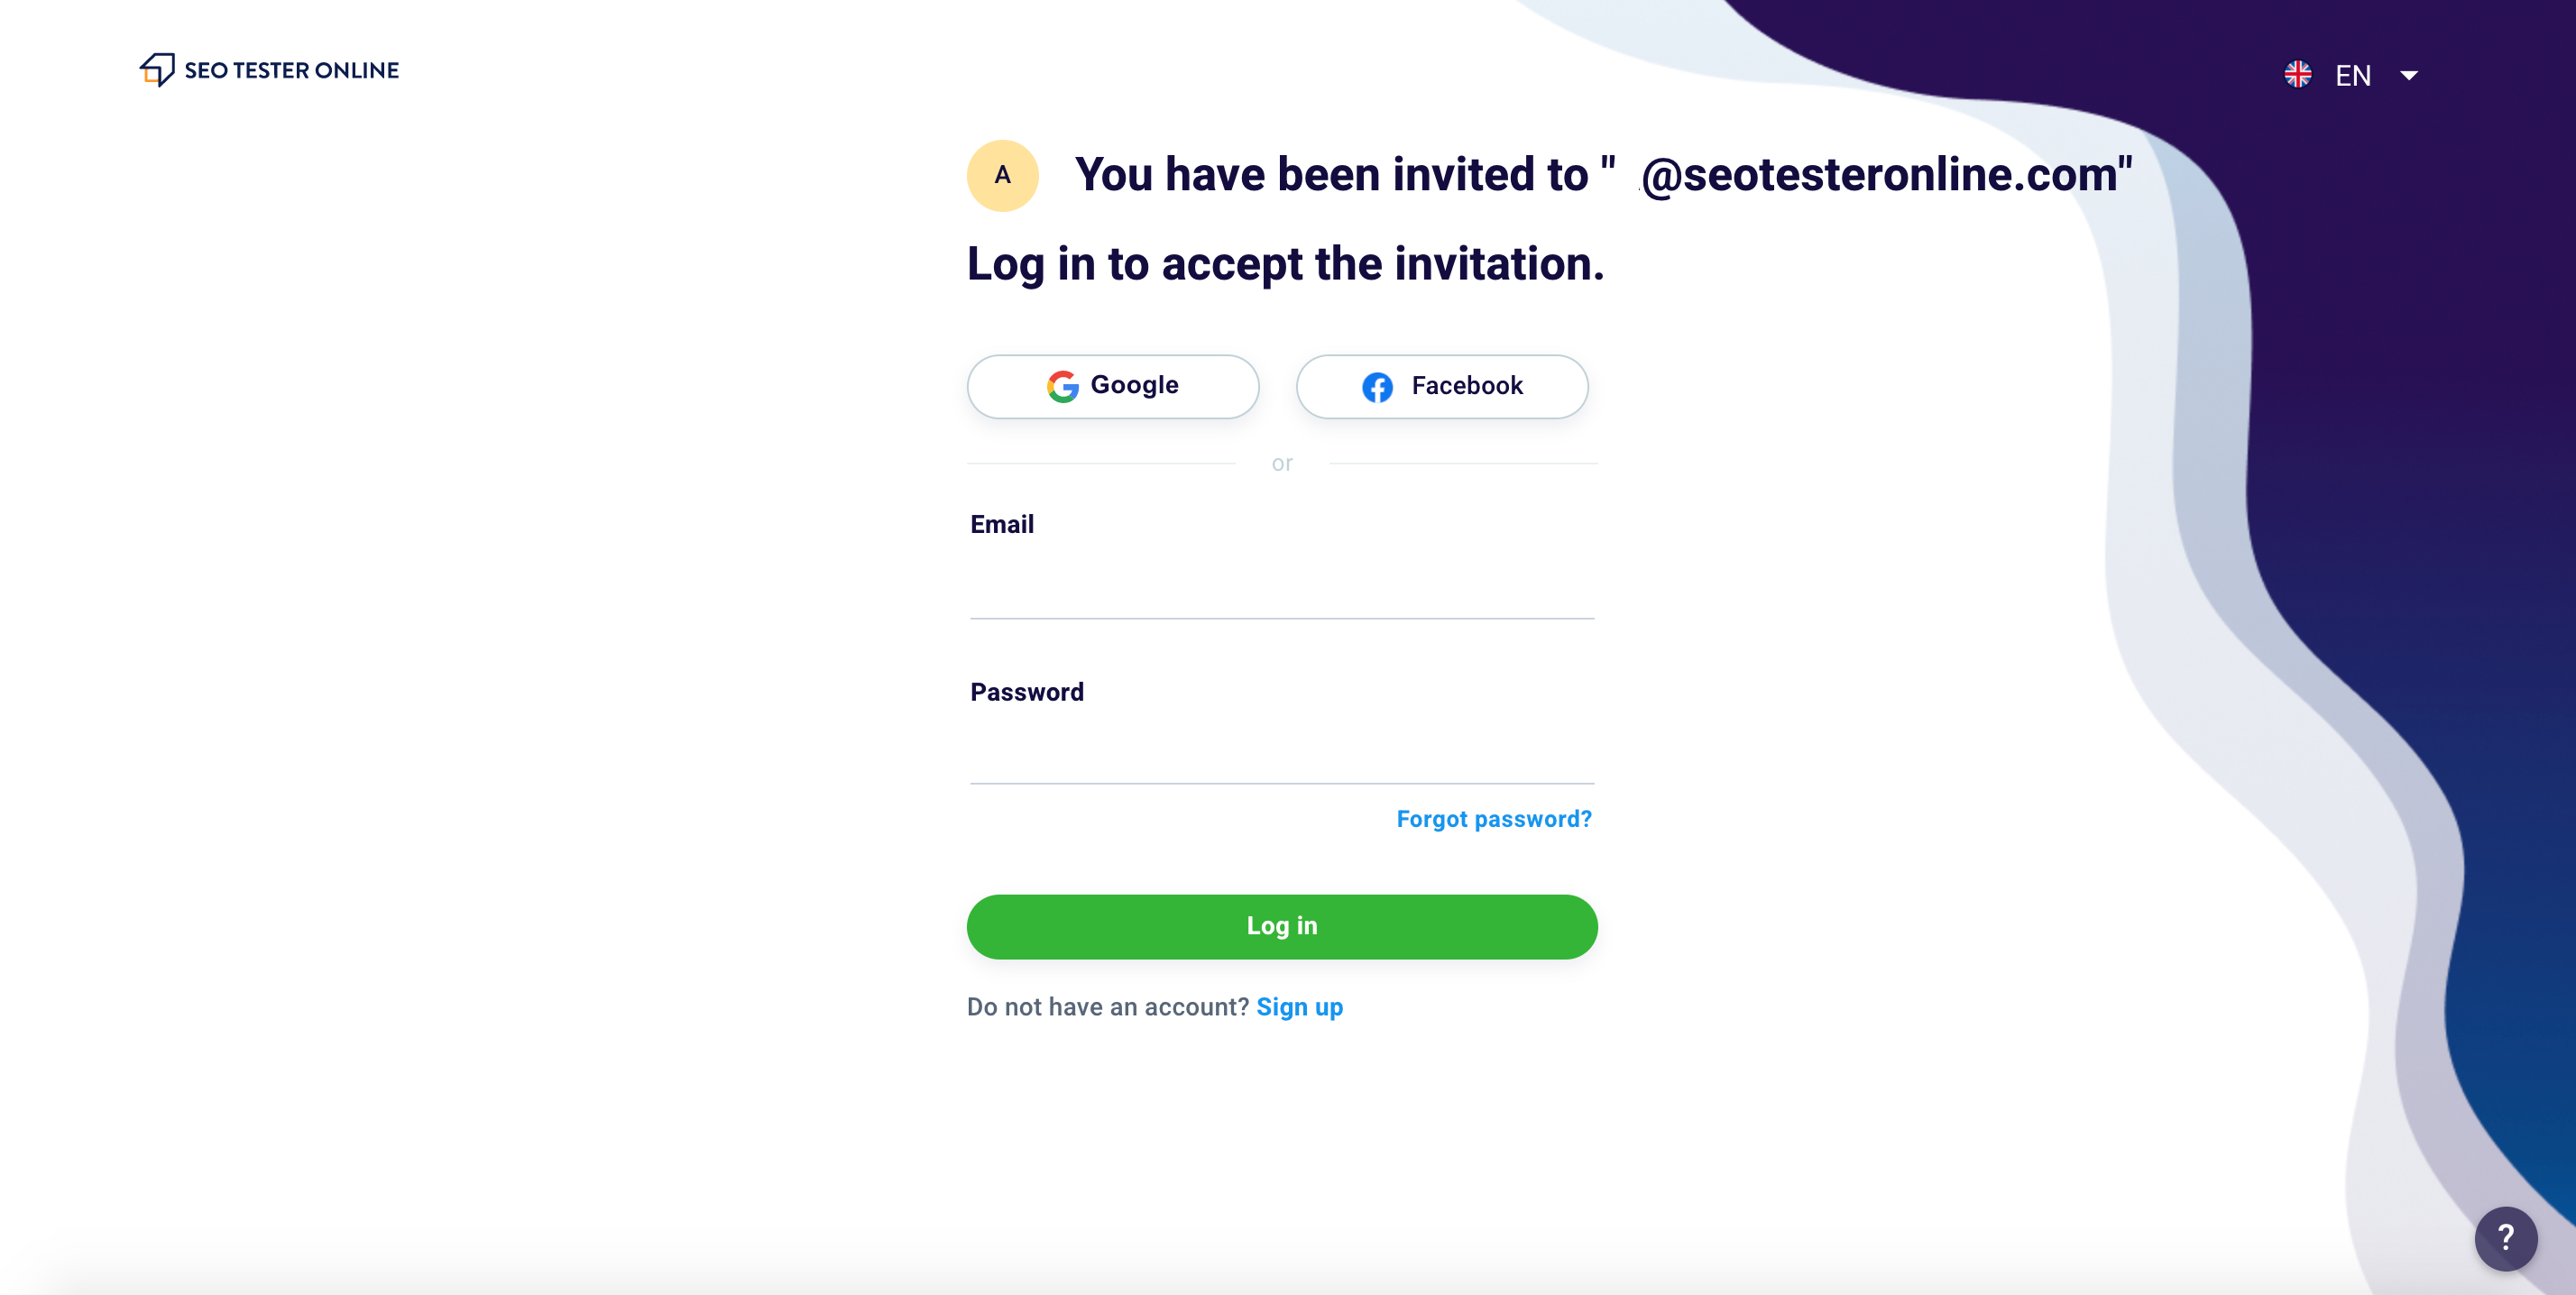
Clicking the button on the email will be directed to this page which you can access in a few seconds with your credentials.
Doesn’t your collaborator you invite to have an SEO Tester Online account? No problem, you can create one in seconds, and in that case, it will be redirected here.
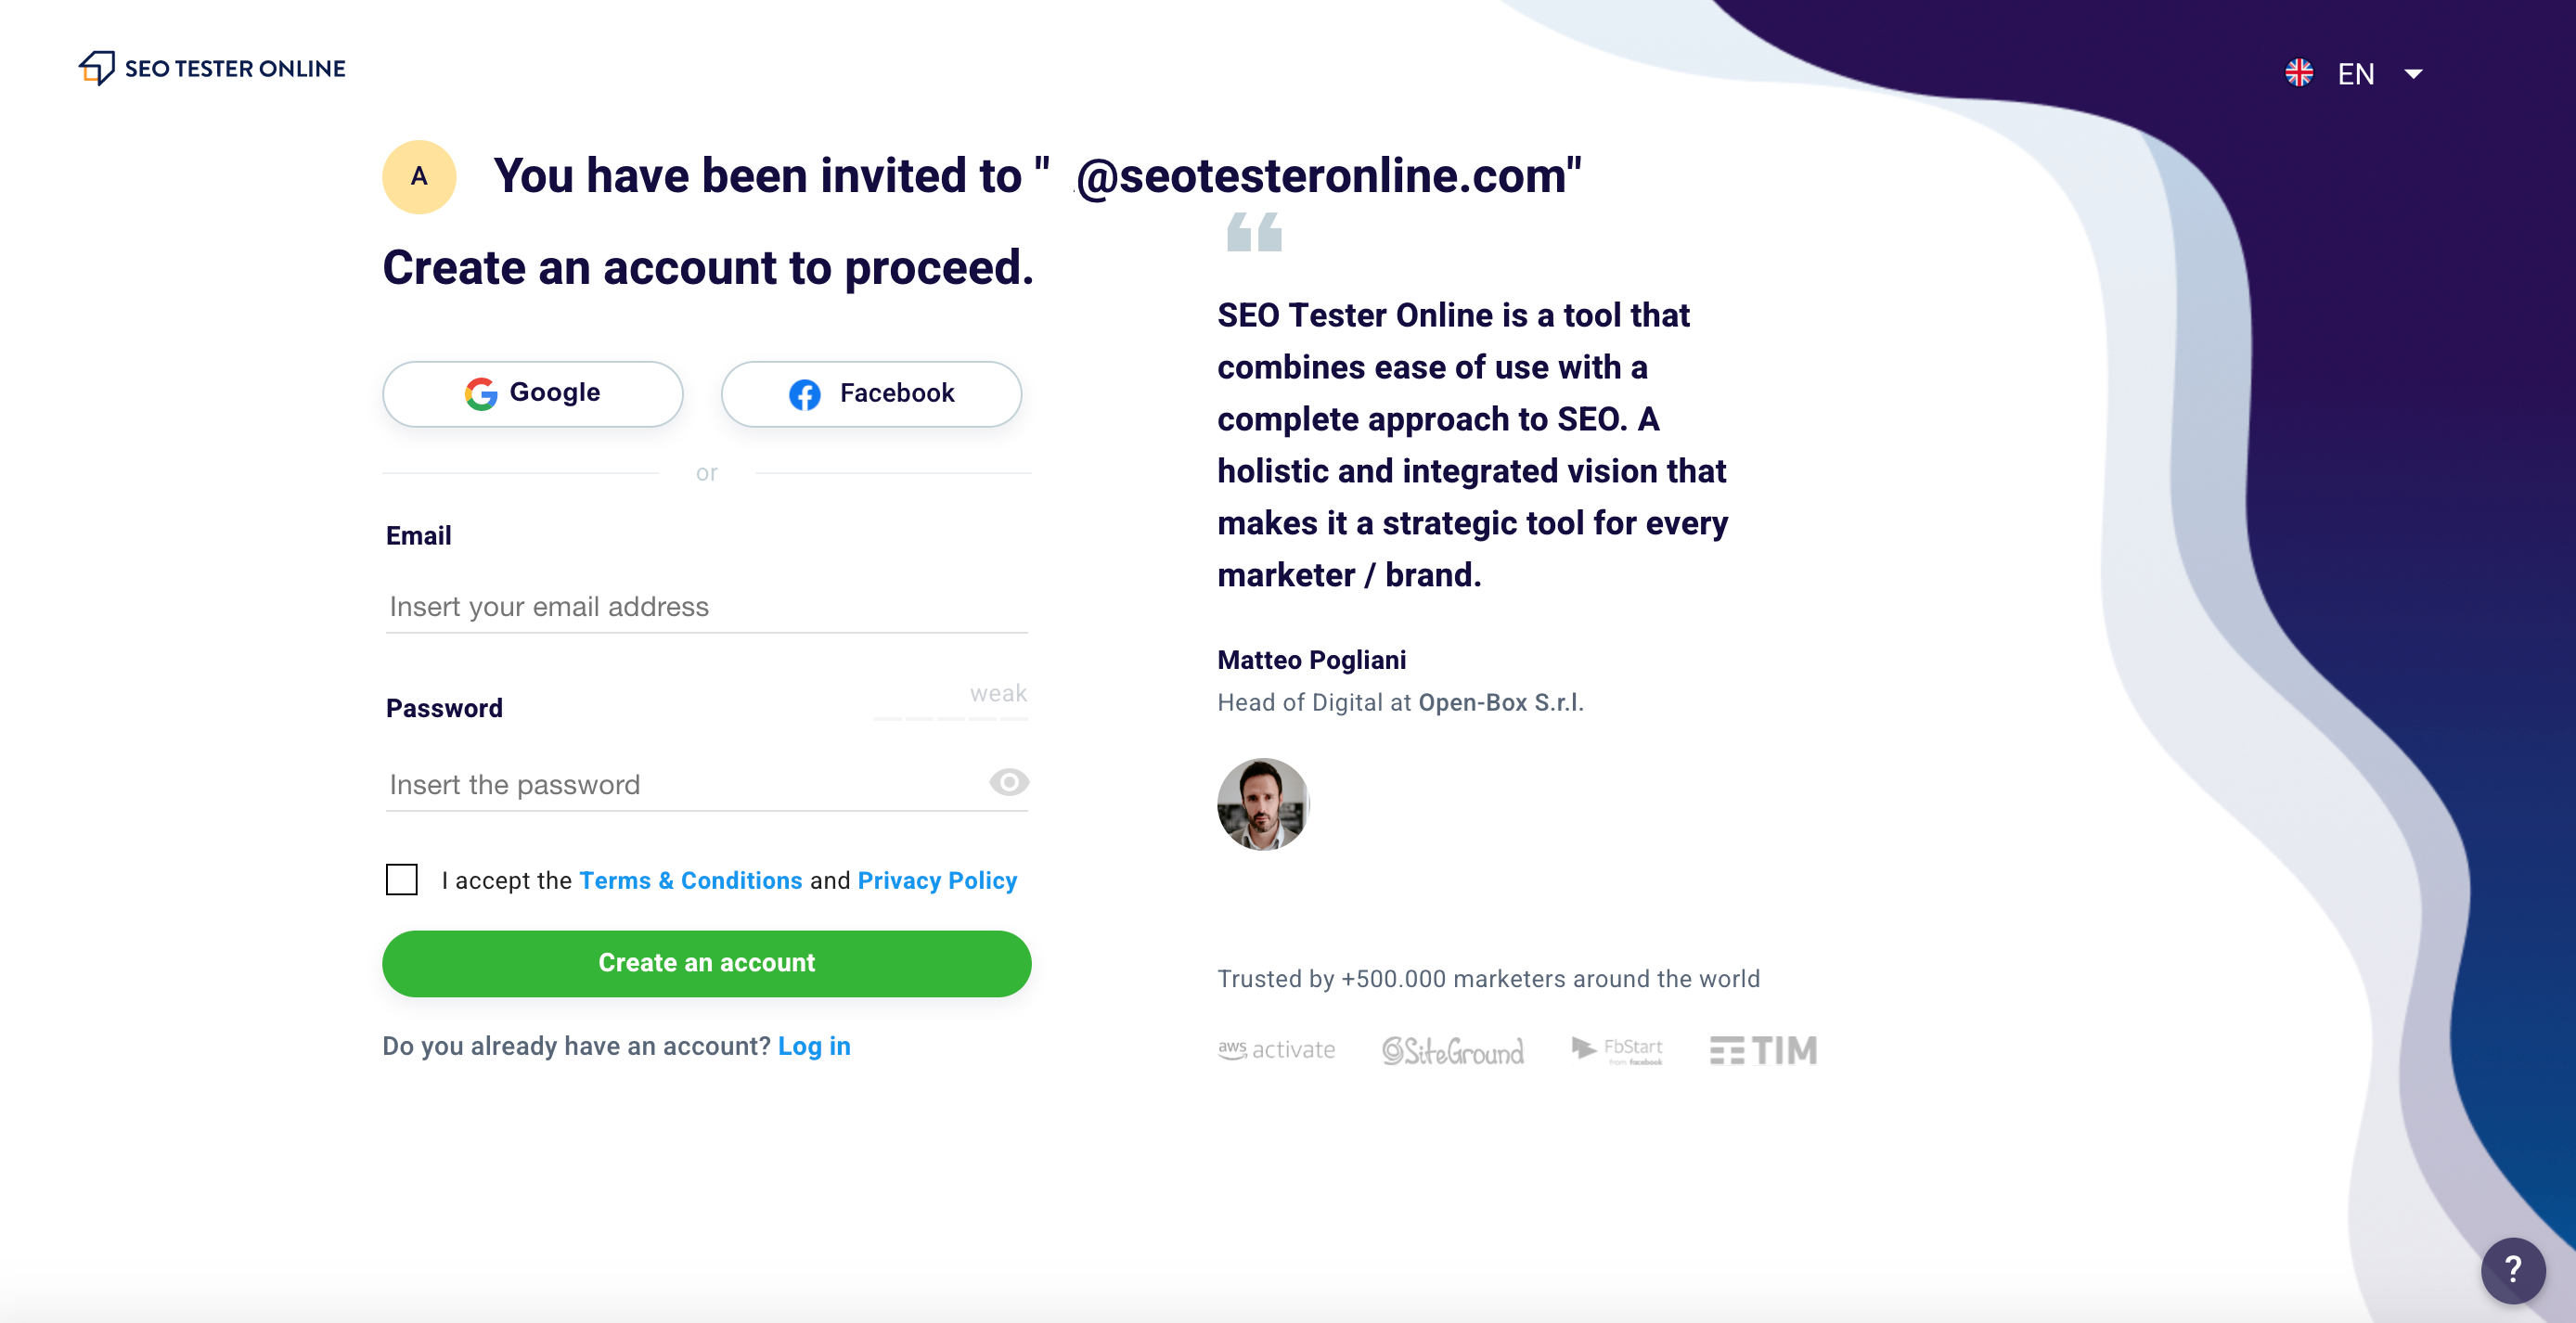
Just enter an email and password, or log in with his Google or Facebook account, to create an account. To do this and complete this step, you will need to accept the Terms and Conditions and Privacy Policy.

Then our system will ask him to verify his email address by copying the code sent by email to the email from the subject “SEO Tester Online – Activation Code” within the boxes shown on the screen.
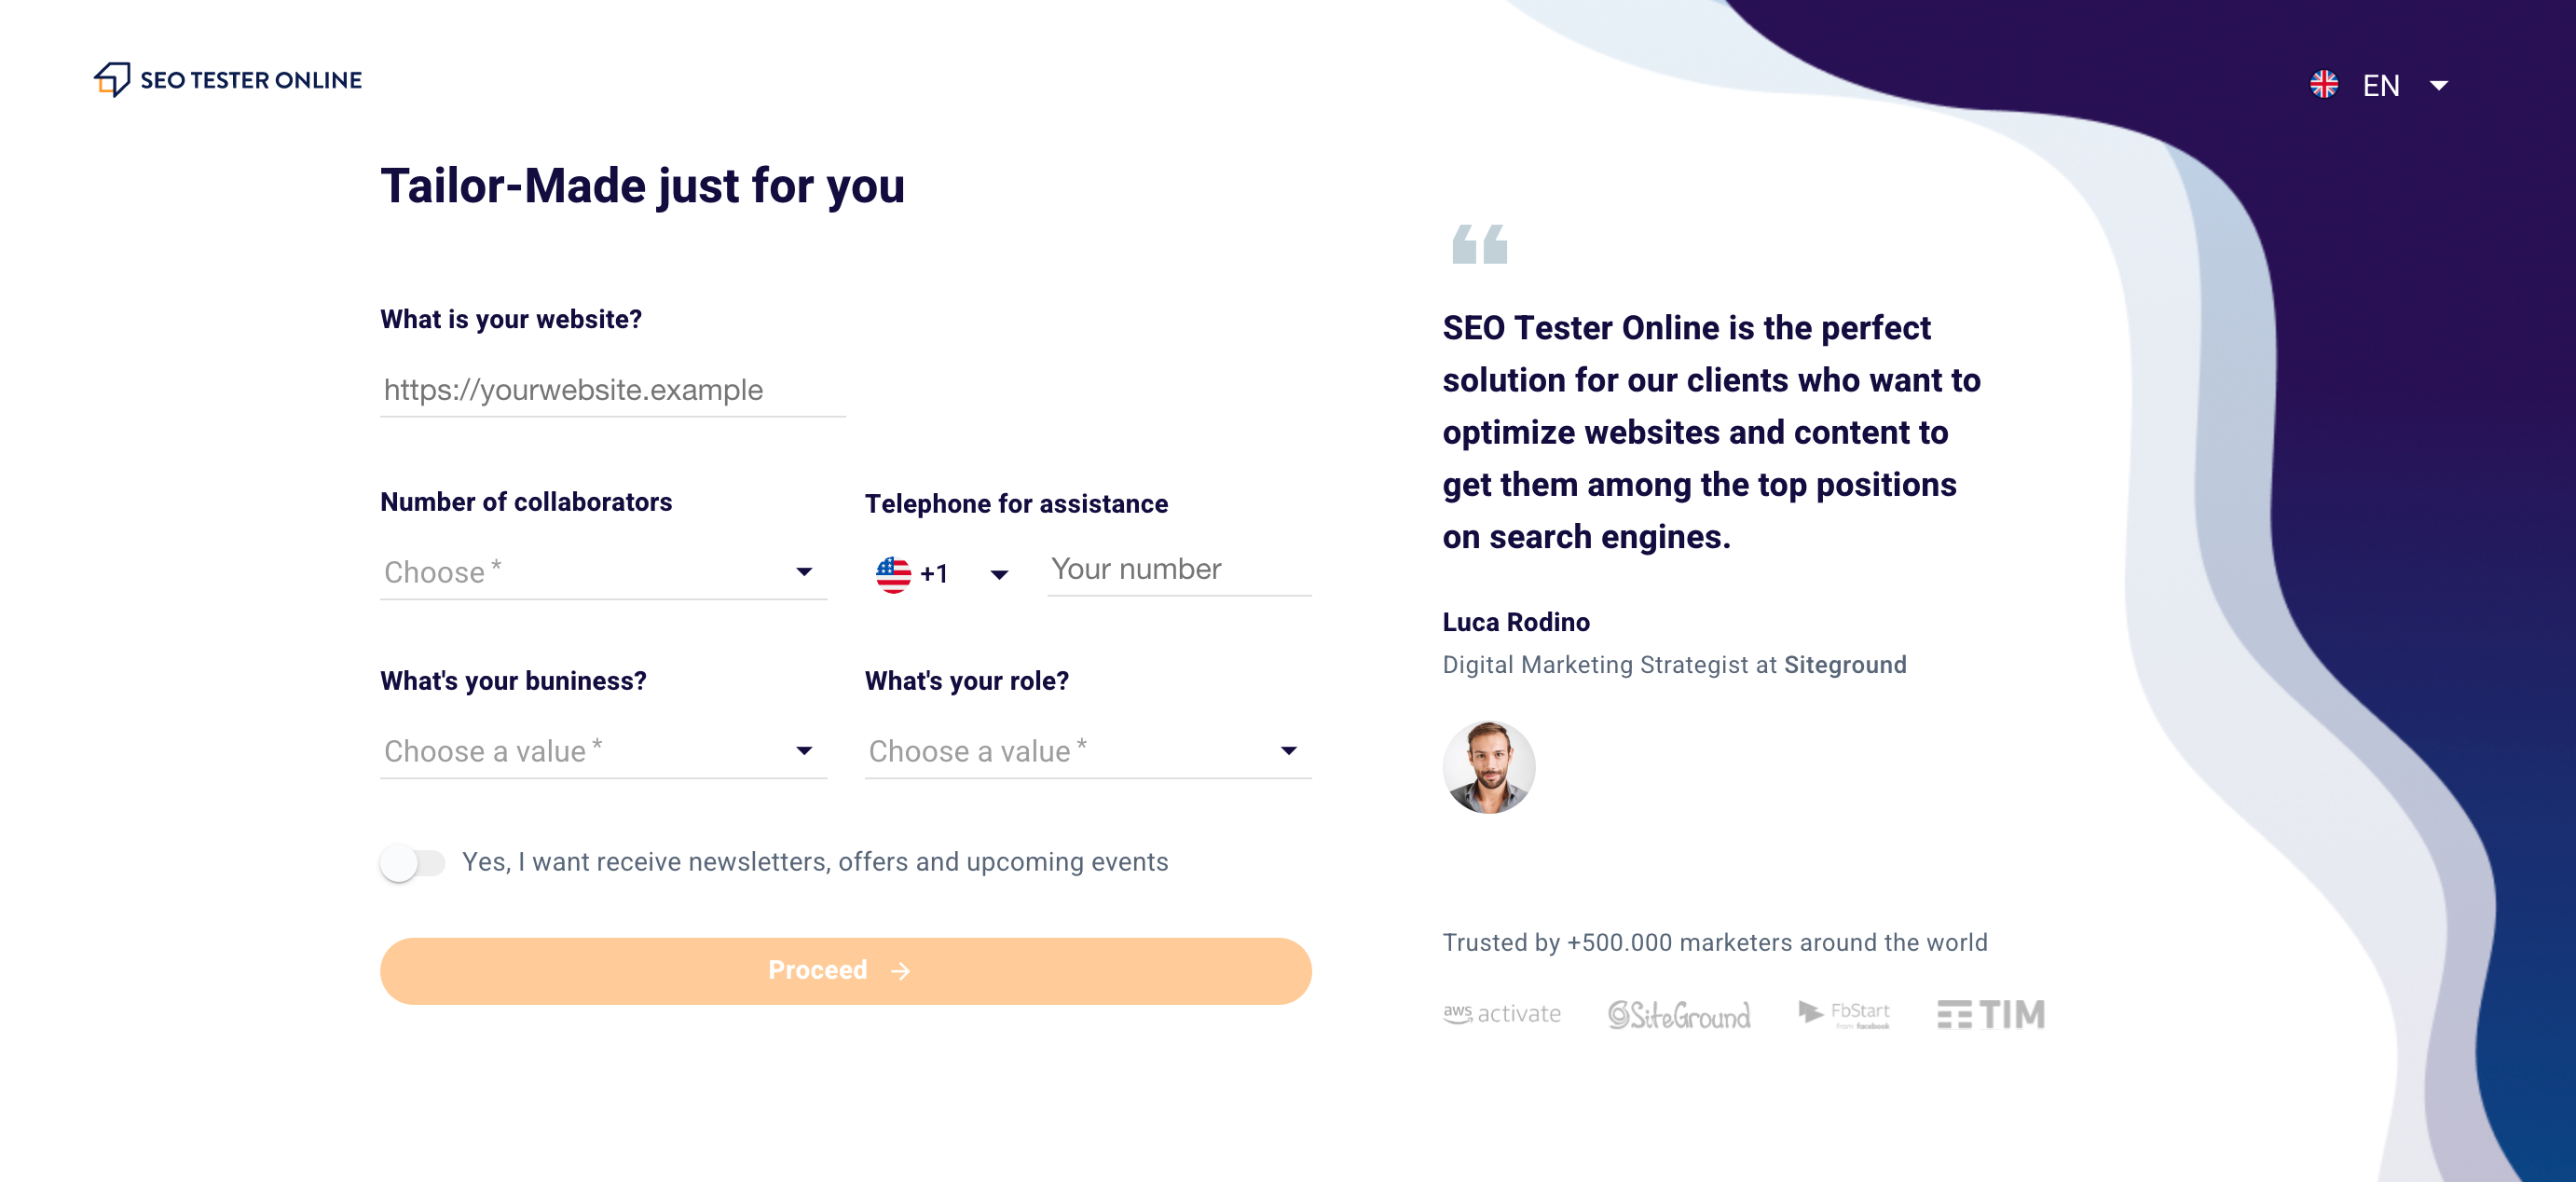
Finally, in order to create an experience that best suits the needs of your collaborator, you can complete the creation of your account by entering the latest information requested. Once entered, simply click “Proceed“.

It will be sent to this page where you can accept or decline the invitation.
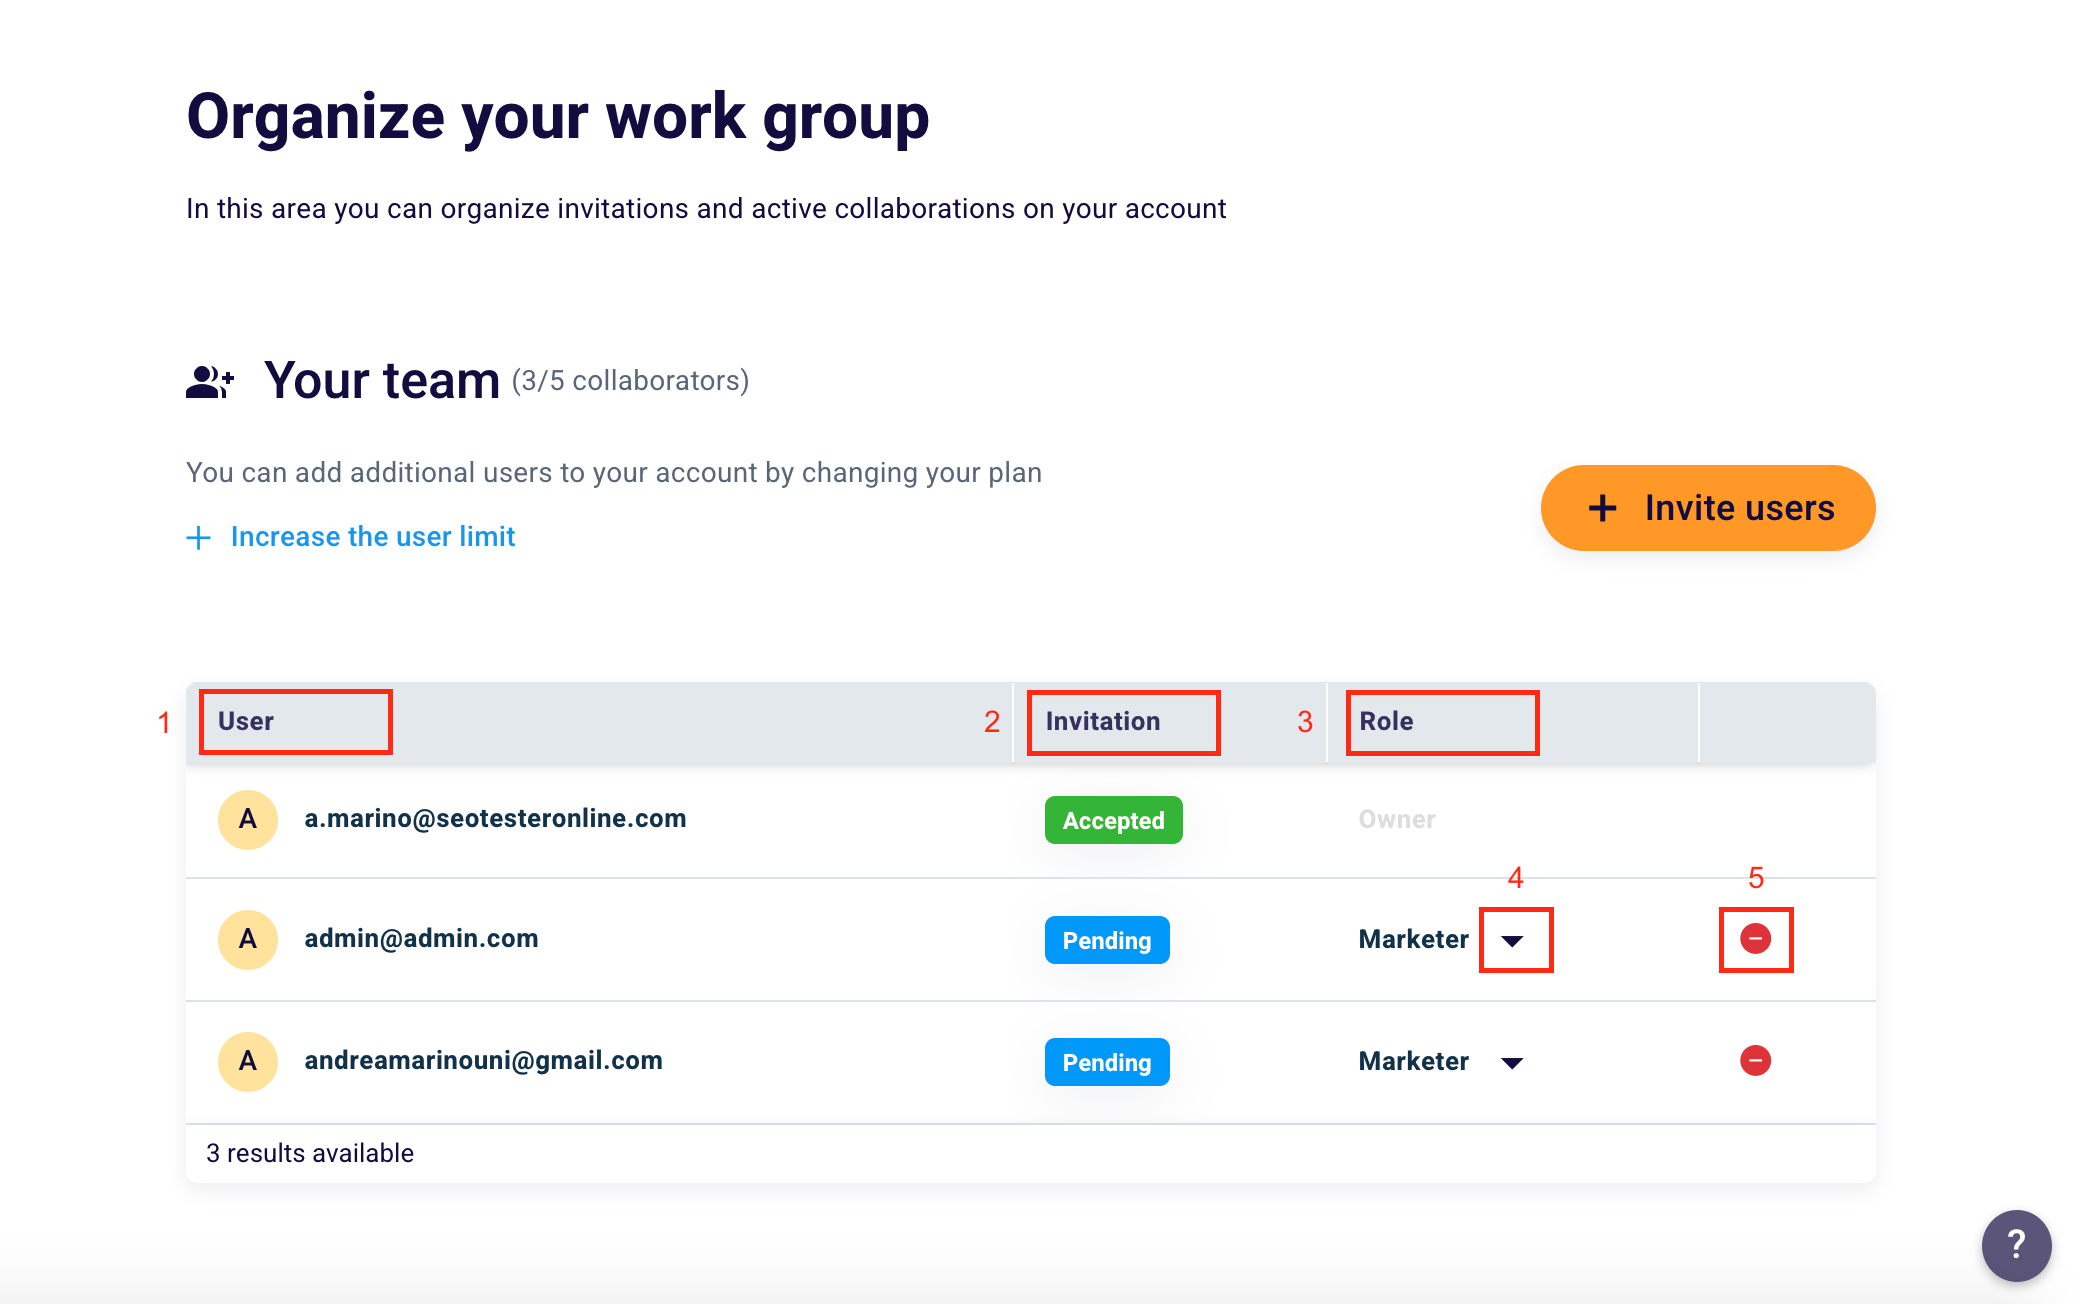
In the “Users” area you can find the people invited and their email addresses (1), the status of the invitation (2), and the chosen role (3).
Click to the right of the role (4) if you want to change it or in the last red button on the right (5) if you want to remove the user from the Workspace.
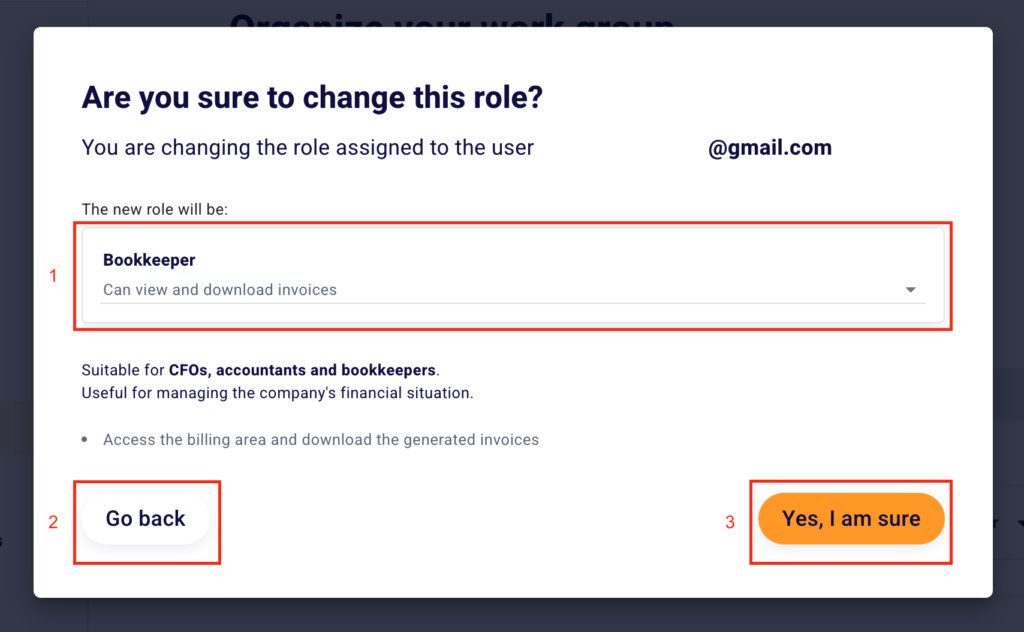
In case you choose to change the Workspace user role, this screen will appear. Click the select under the wording “The new role will be:” (1) and select the new function of your collaborator. Click “Go Back” (2) to go back to the previous settings or “Yes, I’m sure” (3) to confirm the change.
How to increase the number of users of your Workspace?
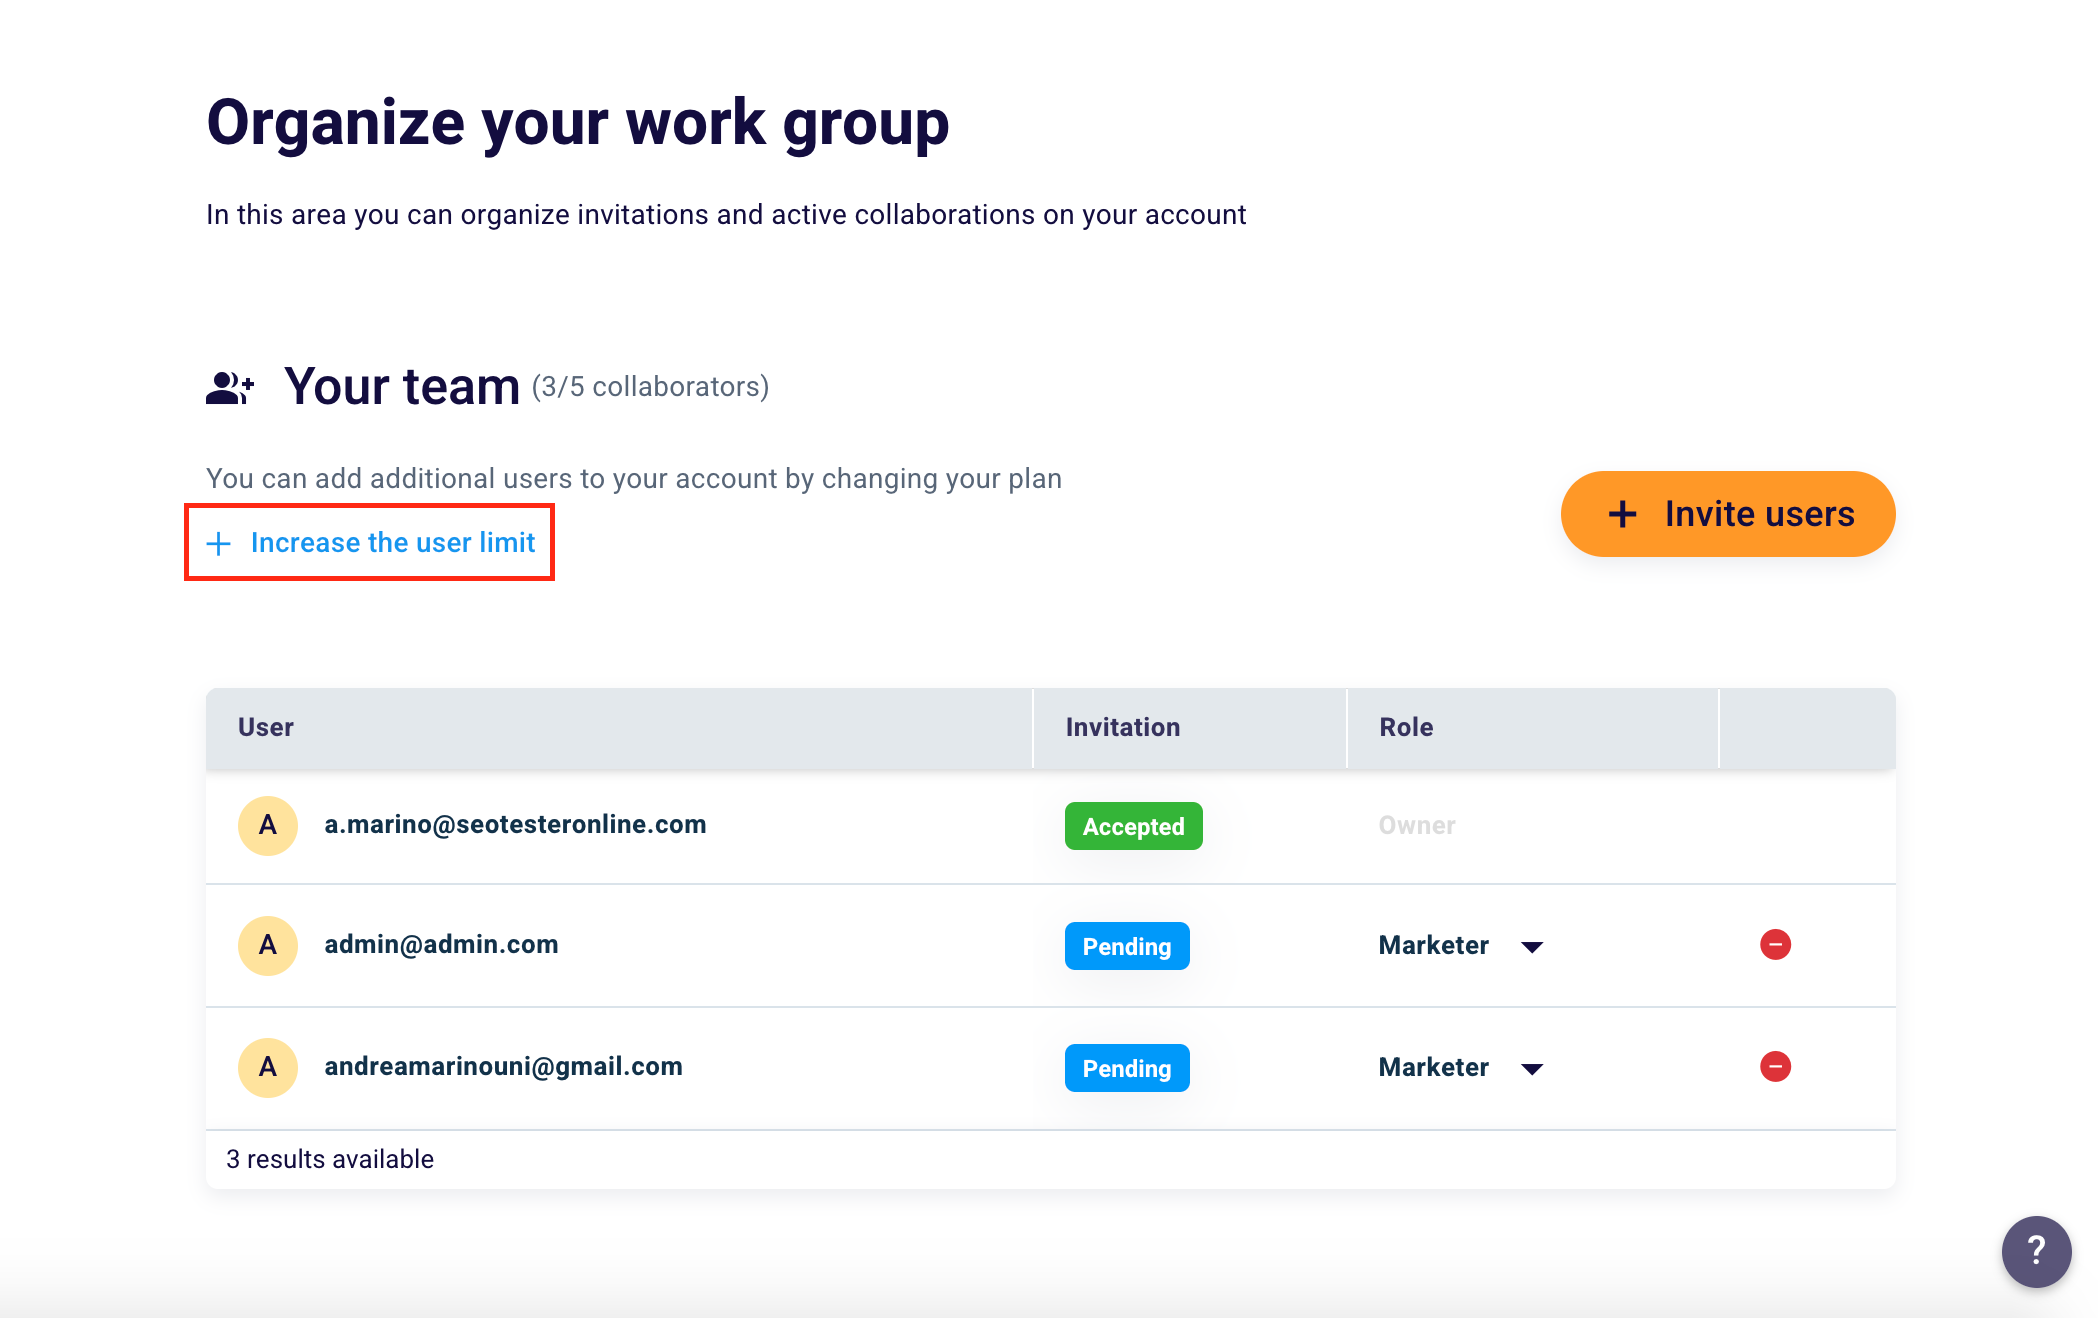
Have you exceeded your limits? Does your subscription plan not allow you to have more than a certain number of collaborators? No problem, click “+ Increase user limit” and expand the threshold of people allowed within your workspace.
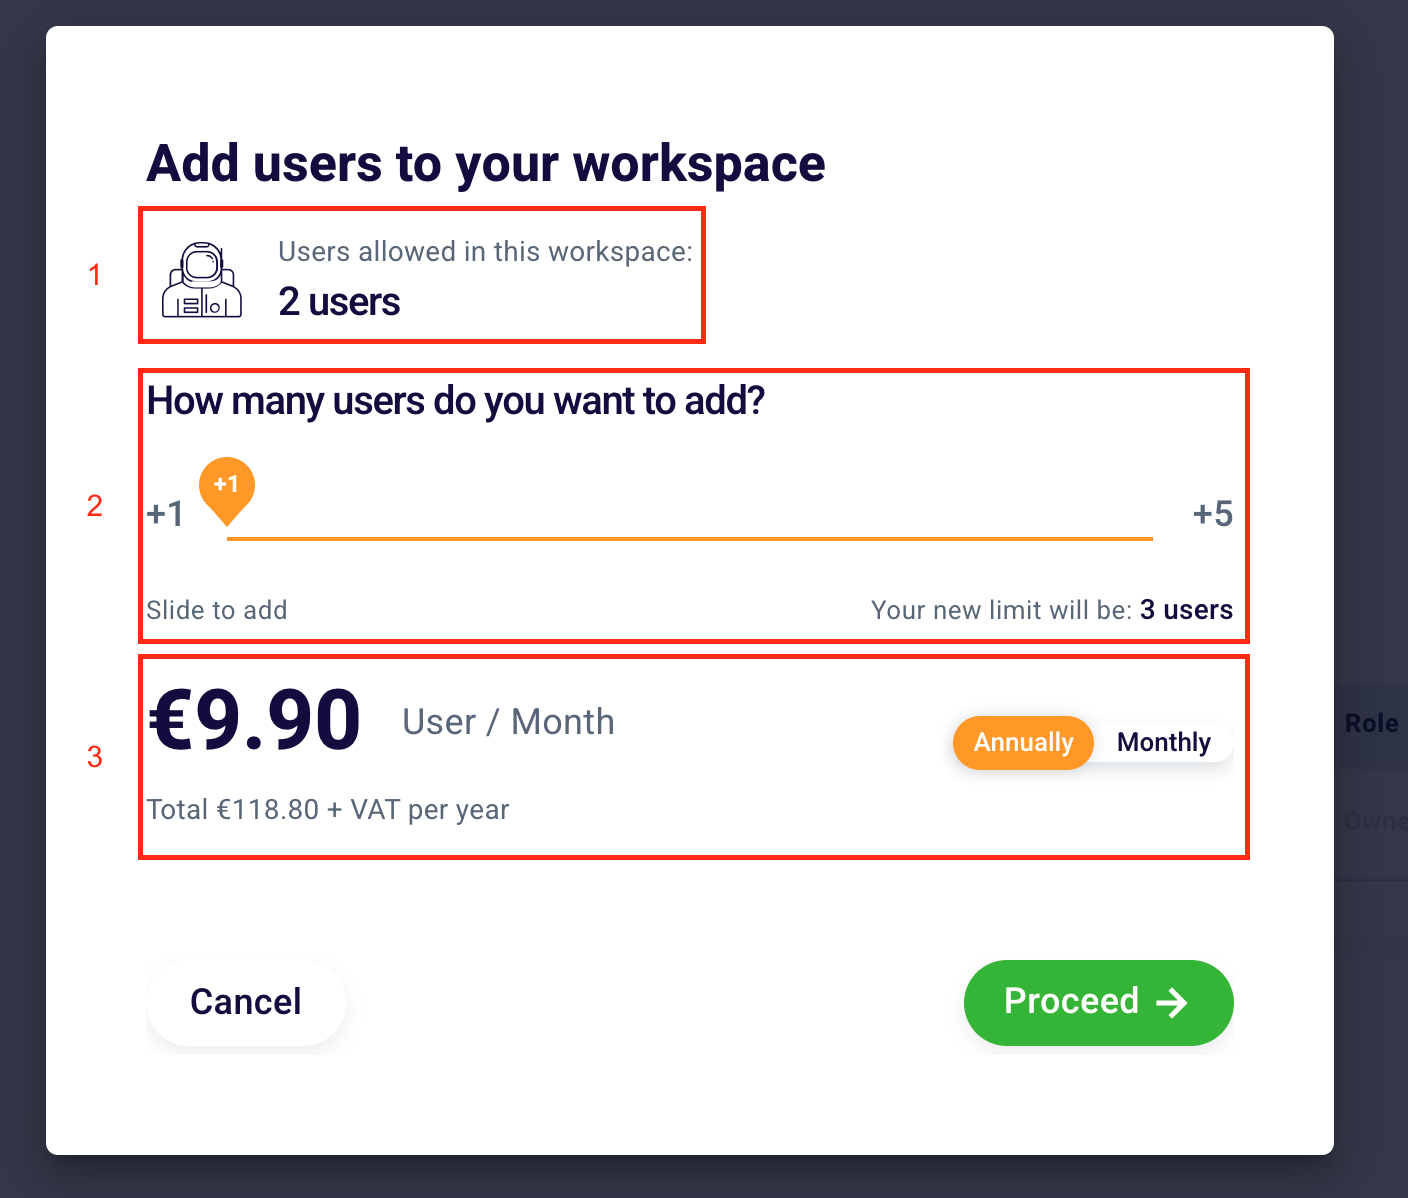
After clicking you will be shown this screen consisting of three sections.
At first, you will be able to see the number of users that your Workspace can host. In the second, instead, you will find a slider that will allow you to choose the number of people to add. Finally, in the third, you will be shown the monthly and total costs to be incurred to add a new user.
Let’s go into detail to better understand this window.
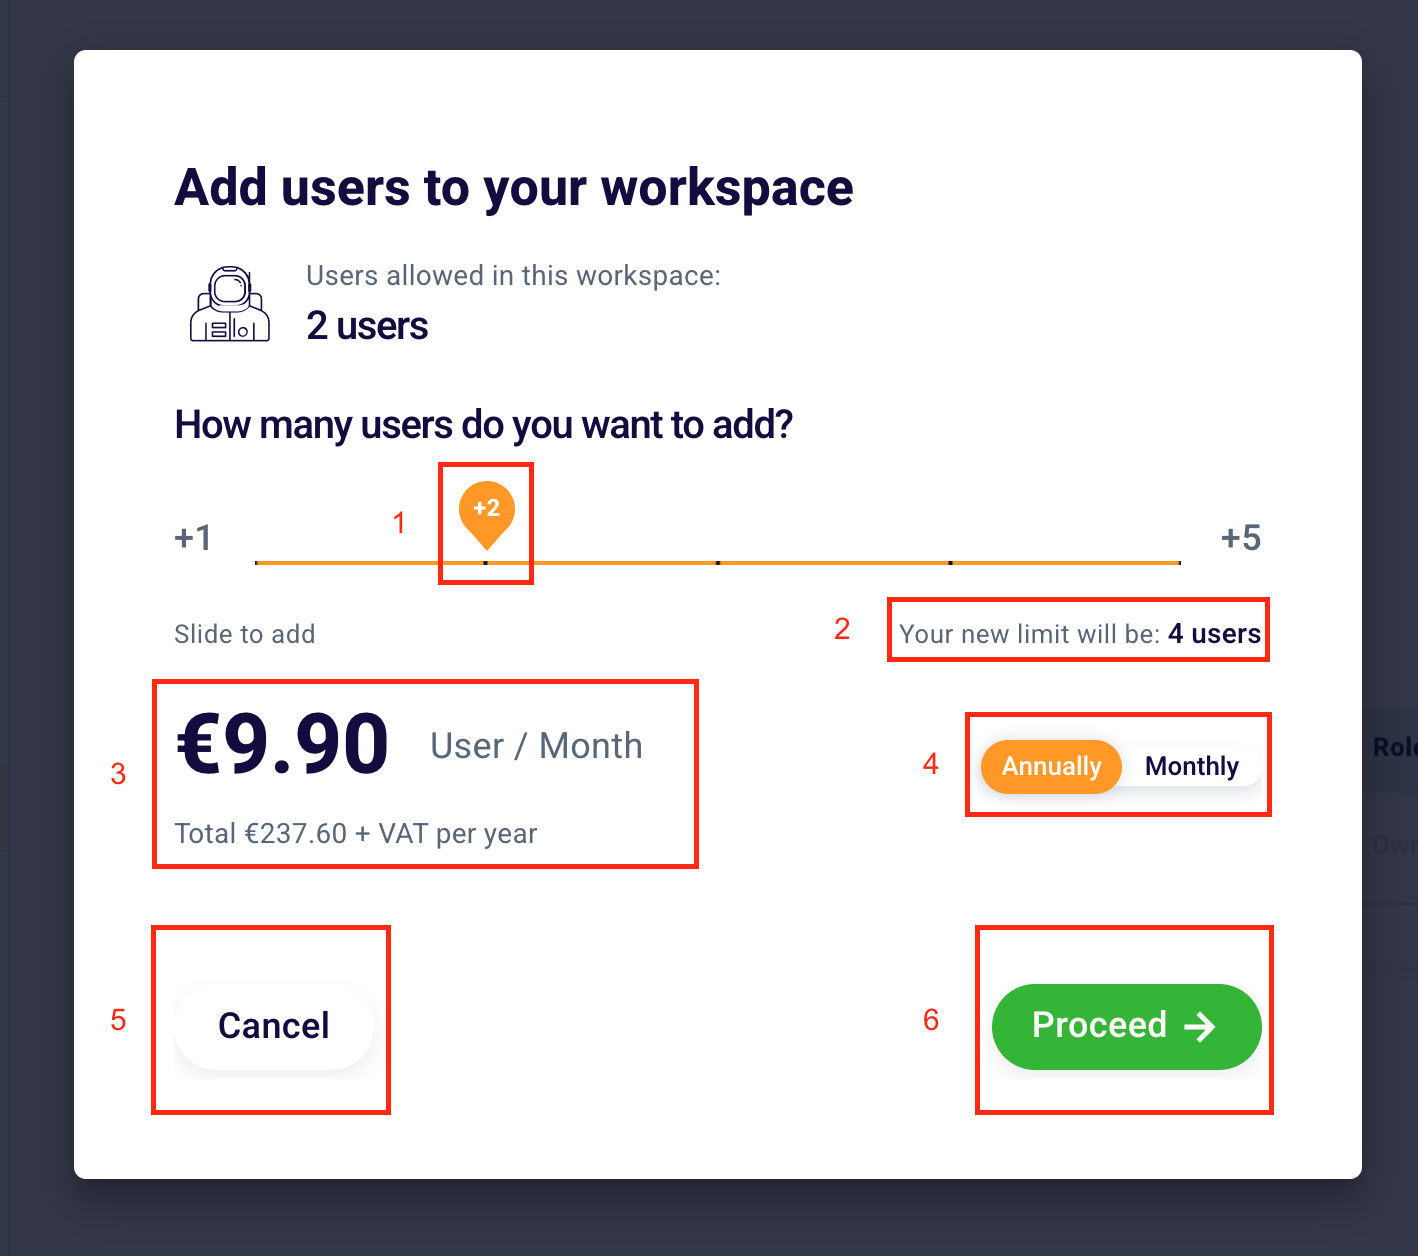
To select the number of users to add to the Workspace, simply scroll the icon (1), inside which the number of collaborators entered appears, along the orange line. As soon as you do this, the new limit (2) will be shown at the bottom left, the sum of users that you could already enter in the past, and those that you can add after this change.
Going down you can see the monthly and total price of each user (3). As you add new users, the total (i.e. the product between user price/month and the number of new users) will increase. Total to which VAT will be added during payment. You can choose to pay annually or monthly (4).
Click “Cancel” (5) to go back and “Proceed” (6) to confirm the change and reach the checkout section relating to payment.
We remind you that the initial limits are dictated by your subscription plan. The plan is closely related to the concept of Workspace.
So, for example, if you have opted for an Agency Premium plan which includes 10 users, you will have the possibility to invite up to a maximum of 10 people (remember that you are included among the 10 users).
If you want to extend your limits and expand the number of users allowed in your workspace, you can also subscribe to a new subscription plan.
How to monitor the activities of your collaborators?
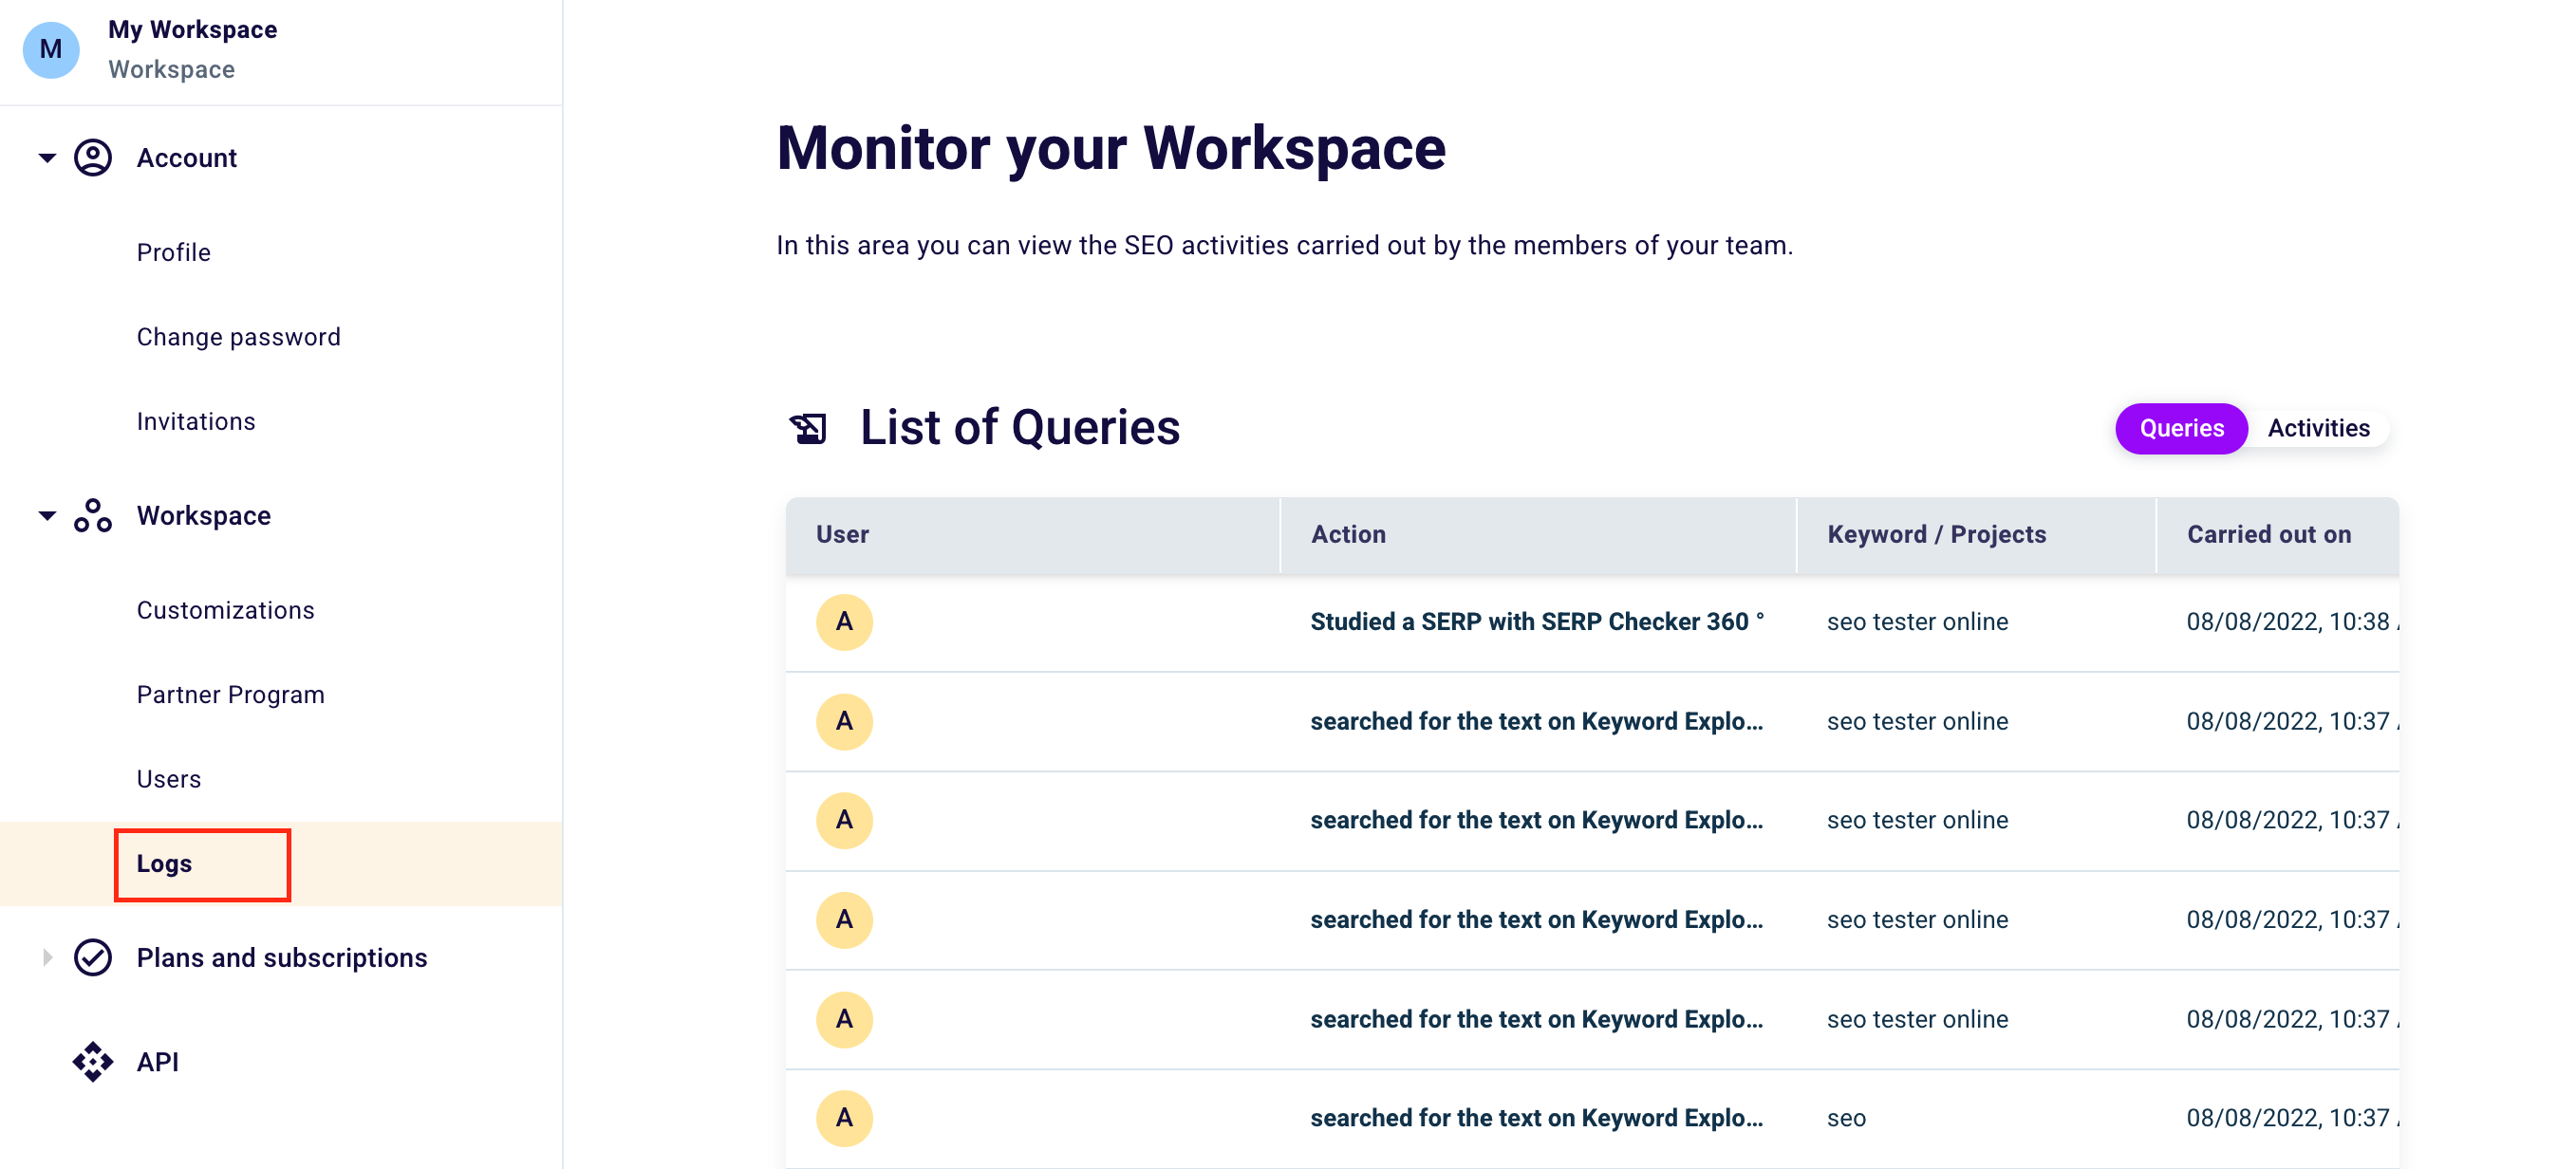
If you want to know what activities and searches the users of your Workspace are conducting, go to the “Logs” section from the menu on the left.
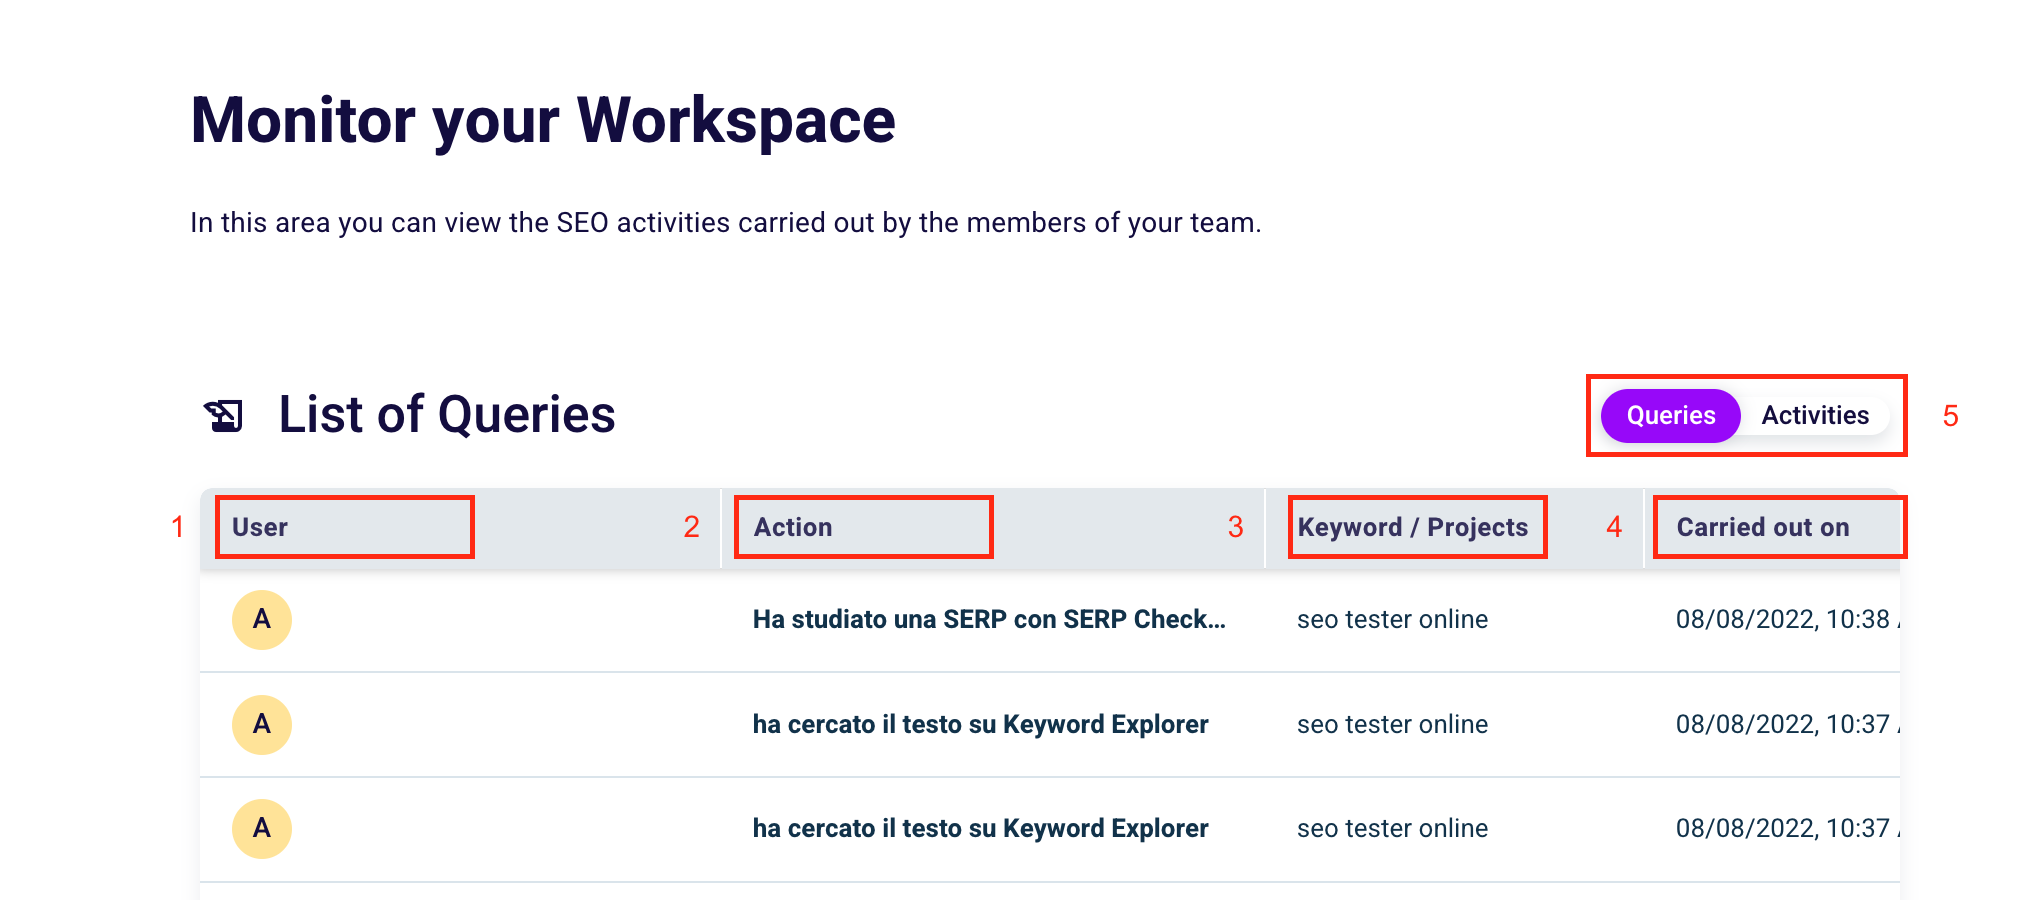
The table will show you the email of the user who performed a certain action (1), the subject of the same, or the activities carried out within SEO Tester Online (2).
Examples of actions that can be performed and related messages that can appear are: studied a SERP with SERP Checker 360 °, performed an analysis with the Backlink Checker, performed an analysis with the SEO Spider, searched for the text on Keyword Explorer, and much more.
You will also be able to see the searched and analyzed keyword, or the project your collaborator worked on (3), and the date and time when the action took place (4). At the top right of the table, you can switch to the Activities table using the switch button (5) where you can see the invitations created and sent by users of your workspace.
How to view and manage the invitations received?

If you have been invited to join a workspace, go to the “Invitations” page under the “Account” item in the left side menu. Here you will see the invitations waiting for your response and your active Workspaces.
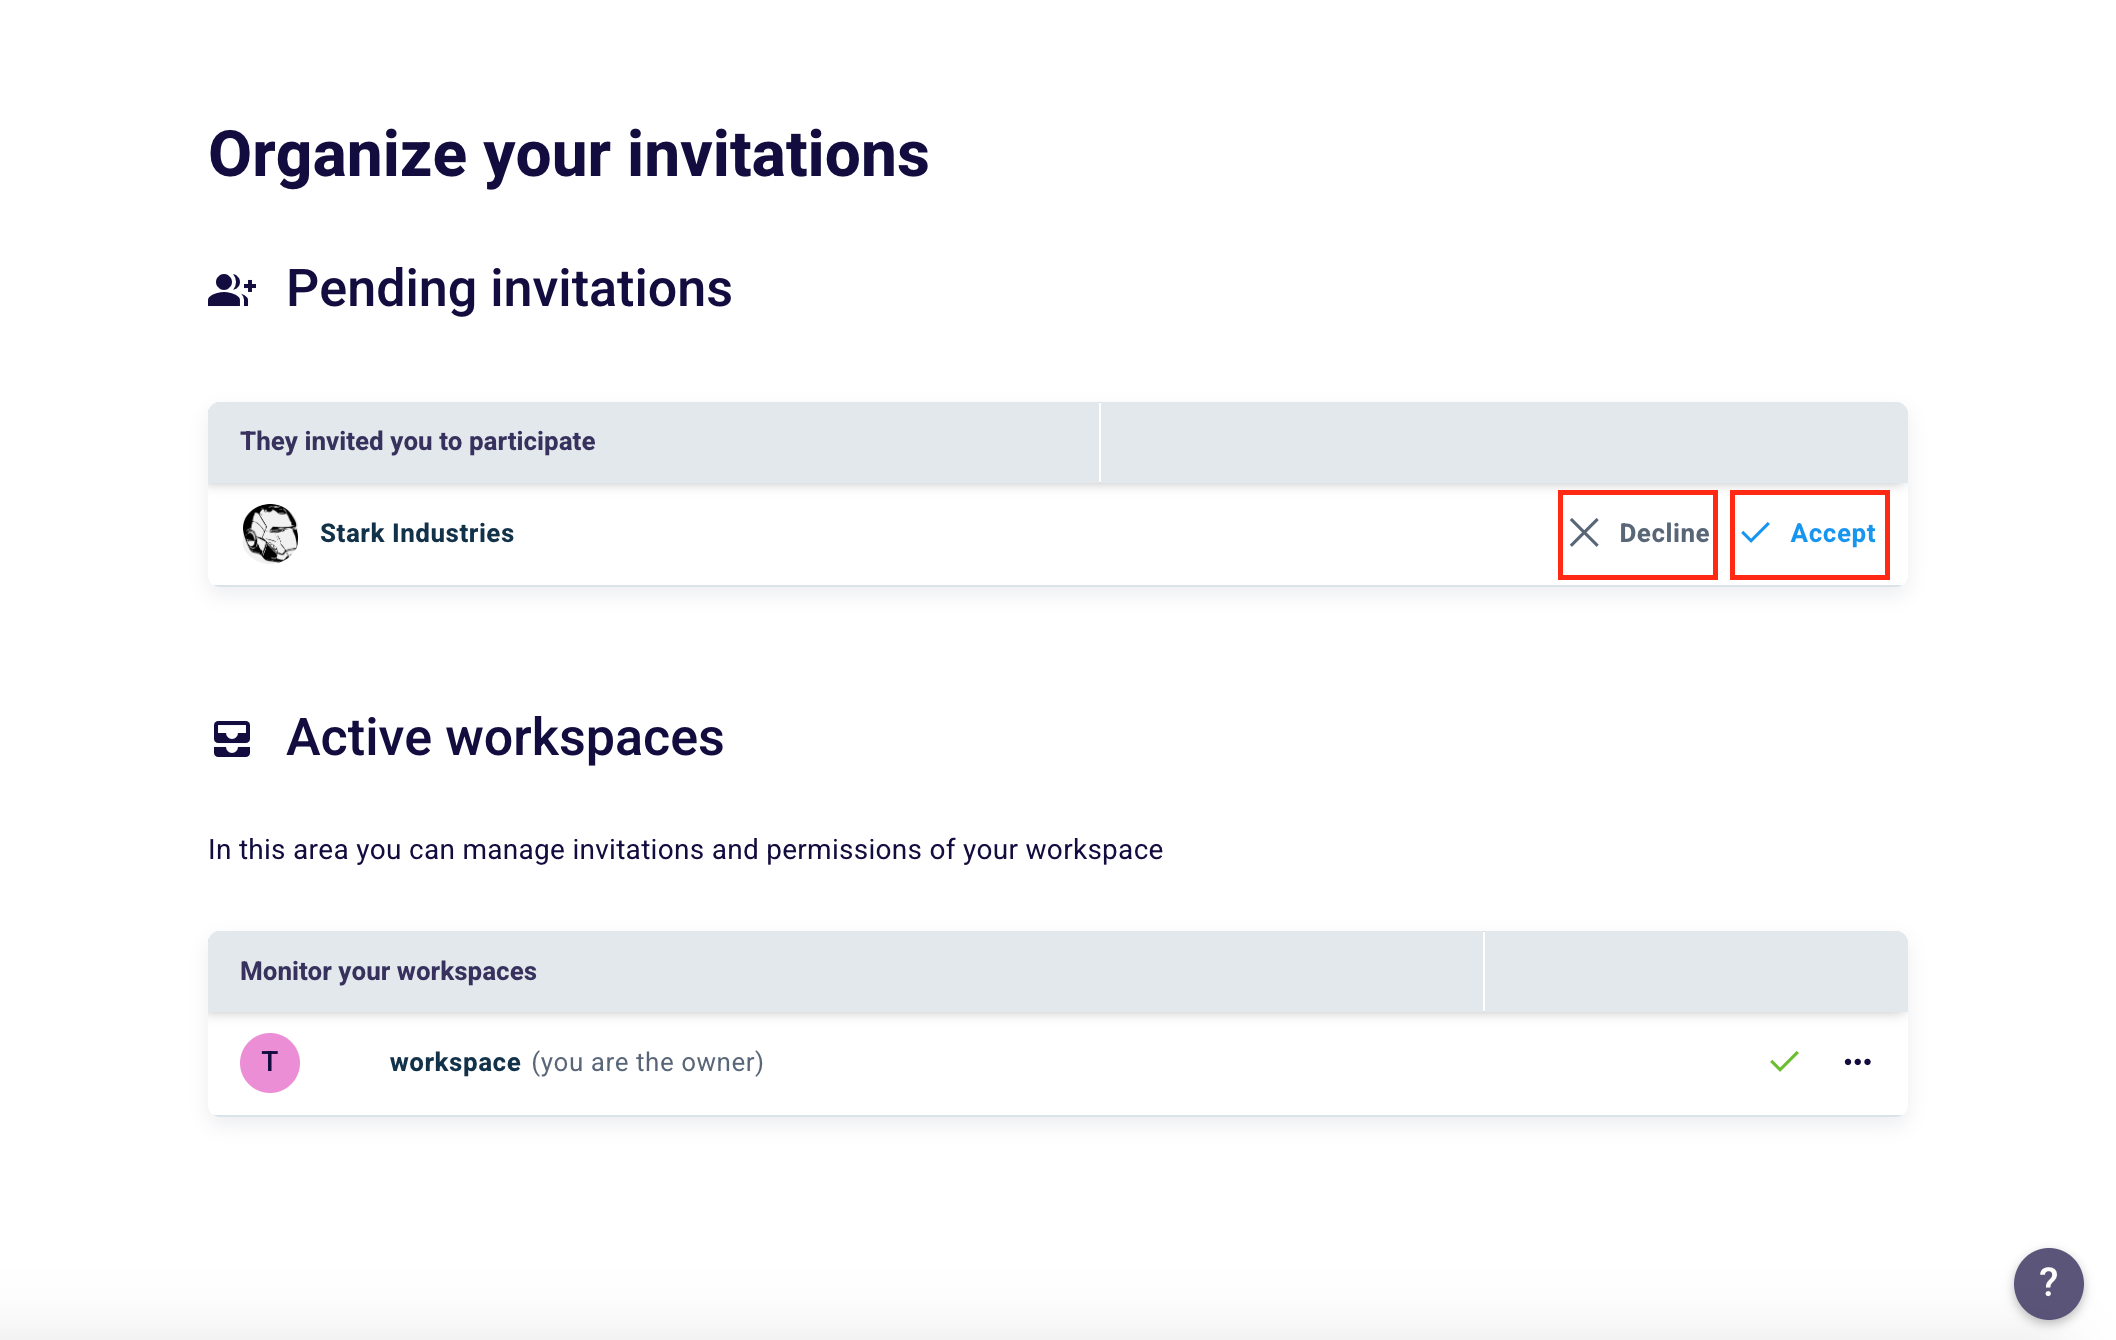
Click “Decline” (1) to decline the invitation or “Accept” (2) to join the Workspace from which you received the request.
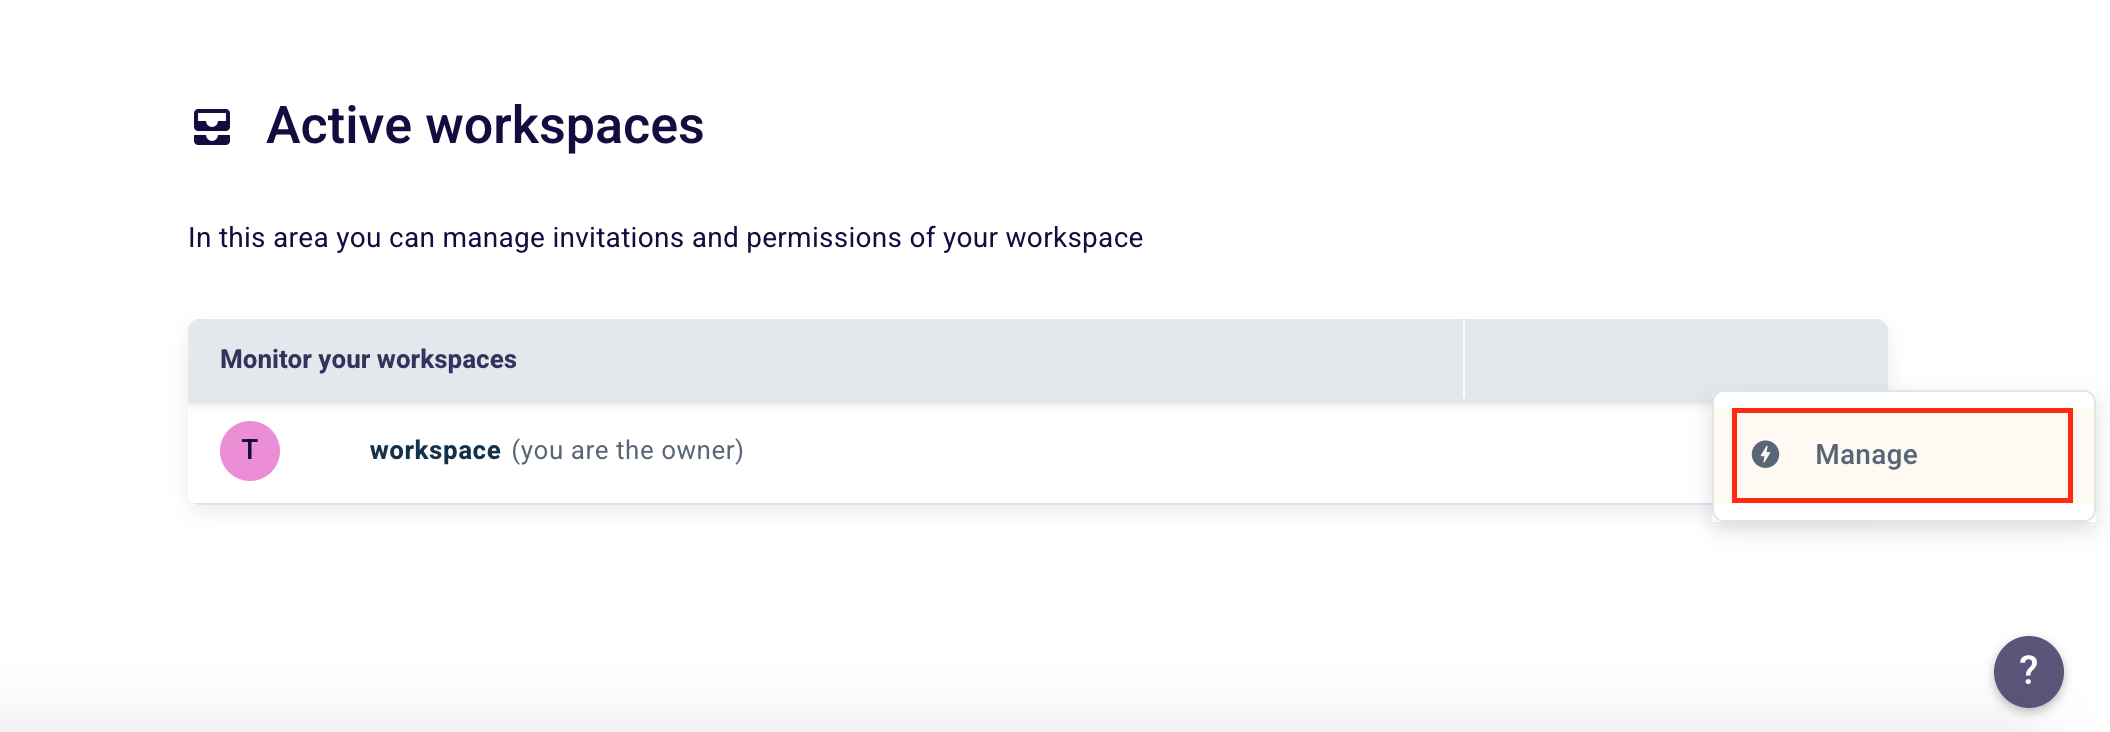
Instead, click “…” and then “Manage” to the right of the table in active Workspaces to reach the “Customize” section of your workspace.
We hope this guide has helped you better understand how the Workspace works.
For other doubts or questions please do not hesitate to contact us at support@seotesteronline.com.